Materials run from free to a single pack of supplies: toilet paper tubes, fallen leaves and a twig cost nothing, while cotton swabs, pipe cleaners and felt cost a few dollars, and effort ranges from a no-glue pipe cleaner spider to a miniature haunted house that takes an afternoon.
The age of the youngest child at the table decides which one to make, since paint, scissors and balloon popping need an adult’s hands for small kids, while older kids can cut paper bats or paint rocks beside you.
1. Monster Crafts
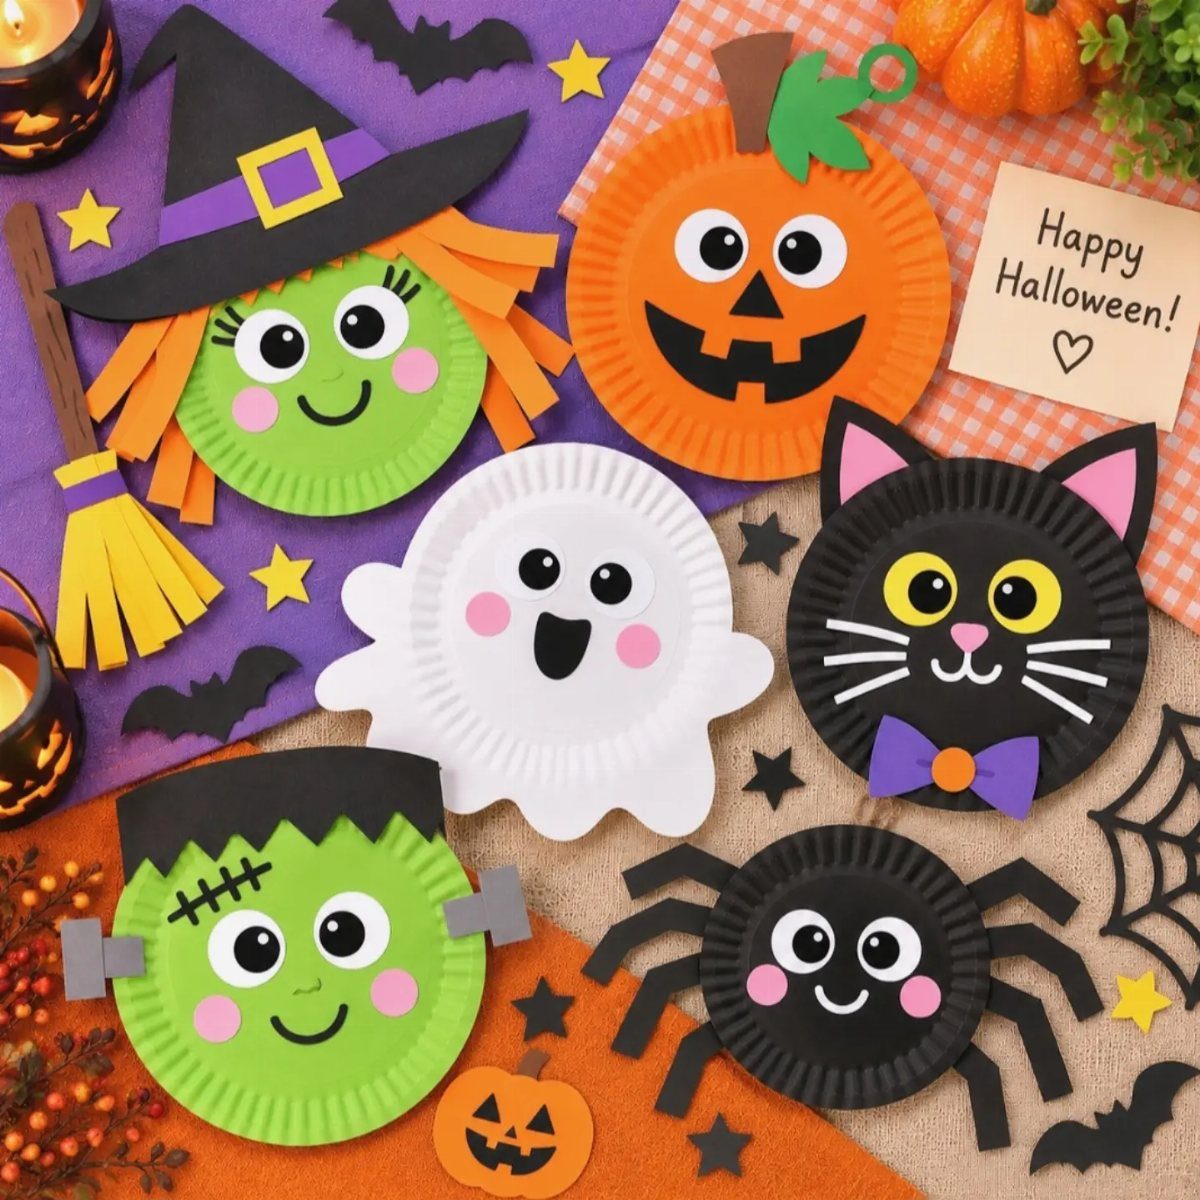
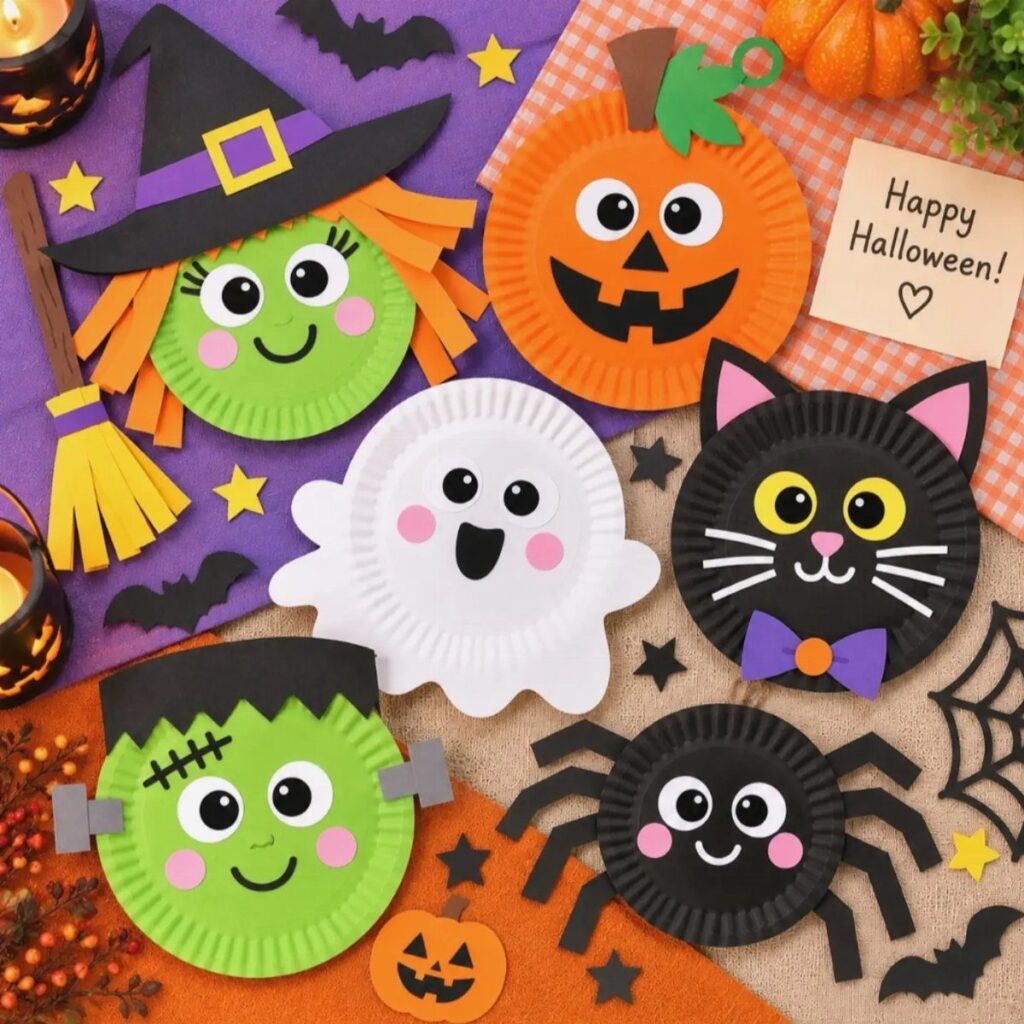
Paper plates make the cheapest monster face there is, and the round shape does half the work for you. Color the plate, then add eyes, teeth and hair from whatever is in the craft drawer.
Paper plates can become a whole crew of different creatures in one sitting, so a small group of kids can each claim their own.
Hand out the same plate and let the faces diverge. Googly eyes, scrap paper and markers are plenty.
2. Yarn Pumpkins
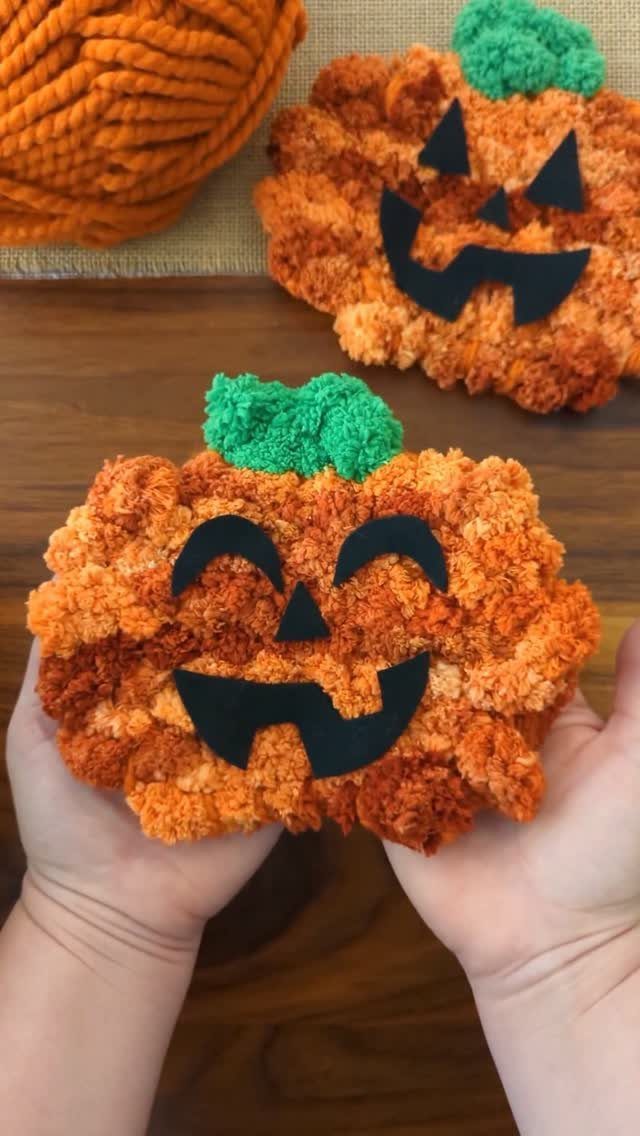
A balloon is the mold for a yarn pumpkin, and that is why the round shape comes out so even.
Wrap orange yarn around an inflated balloon, coat it with glue, let it dry hard, then pop the balloon and pull it out.
Plan on a full drying stretch before popping, since a damp shell collapses.
Faces cut from black felt or paper and a green yarn stem finish it off. Younger kids handle the wrapping well; an adult should do the popping.
3. Paper Plate Witch
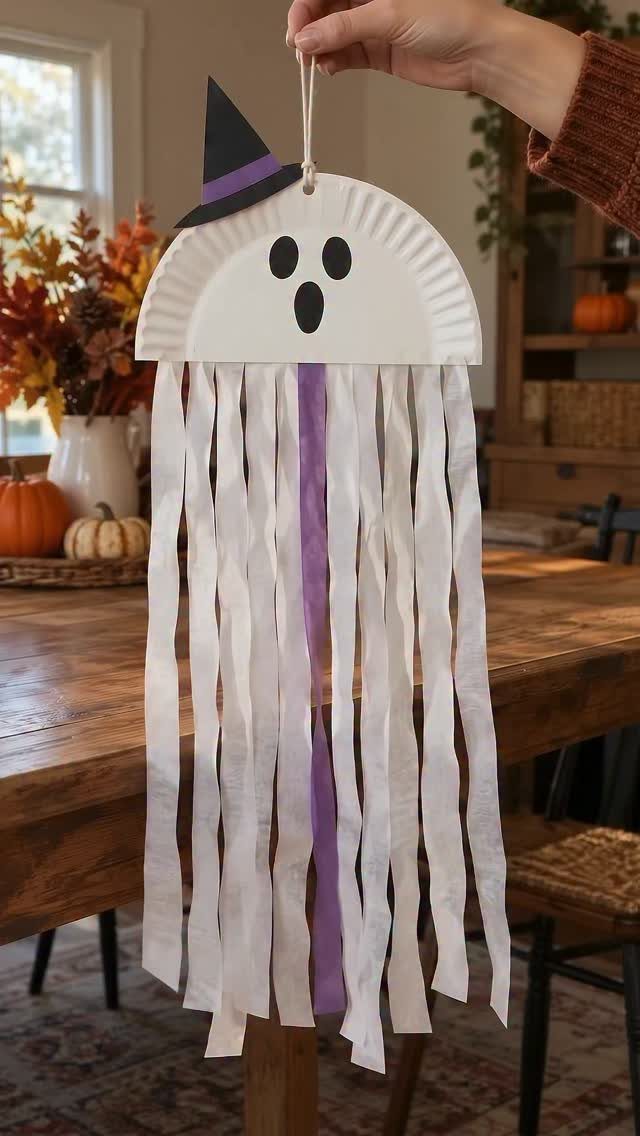
Long paper strips are what turn a plain plate into a witch that moves. Hang white and purple streamers from the bottom edge, then top the plate with a black paper hat.
Streamers swing in a draft, so this one looks best hung in a doorway or from a dining room light.
I would cut the strips at different lengths, which looks wilder than an even fringe. Tape or glue holds them fine.
4. Leaf Ghosts
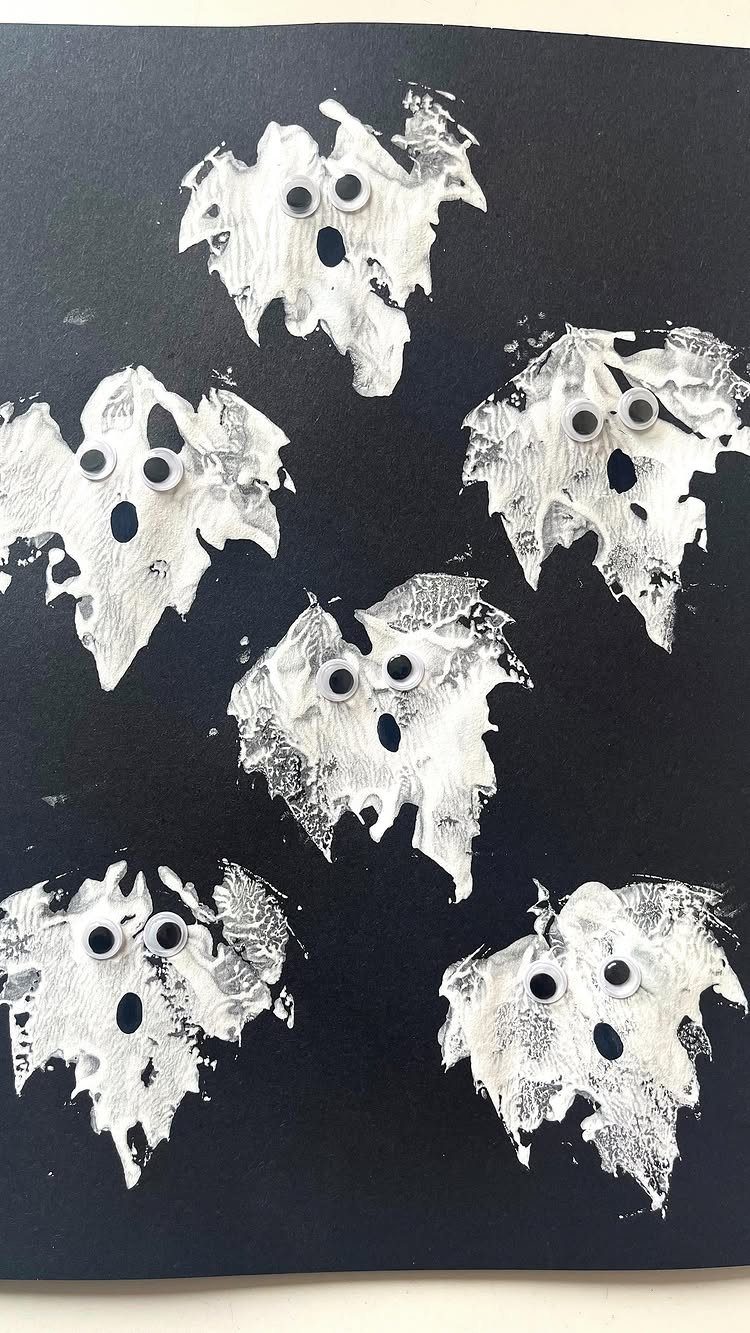
Fallen leaves are free, and a coat of white paint turns them into ghosts with a natural wavy edge. Pick leaves that are dry and fairly flat, paint one side white, then glue on googly eyes.
White paint shows up best against dark paper, so mount them on black.
Expect to give lighter leaves a second coat. Gathering the leaves outdoors doubles as the first half of the activity.
5. Frankenstein Handprints
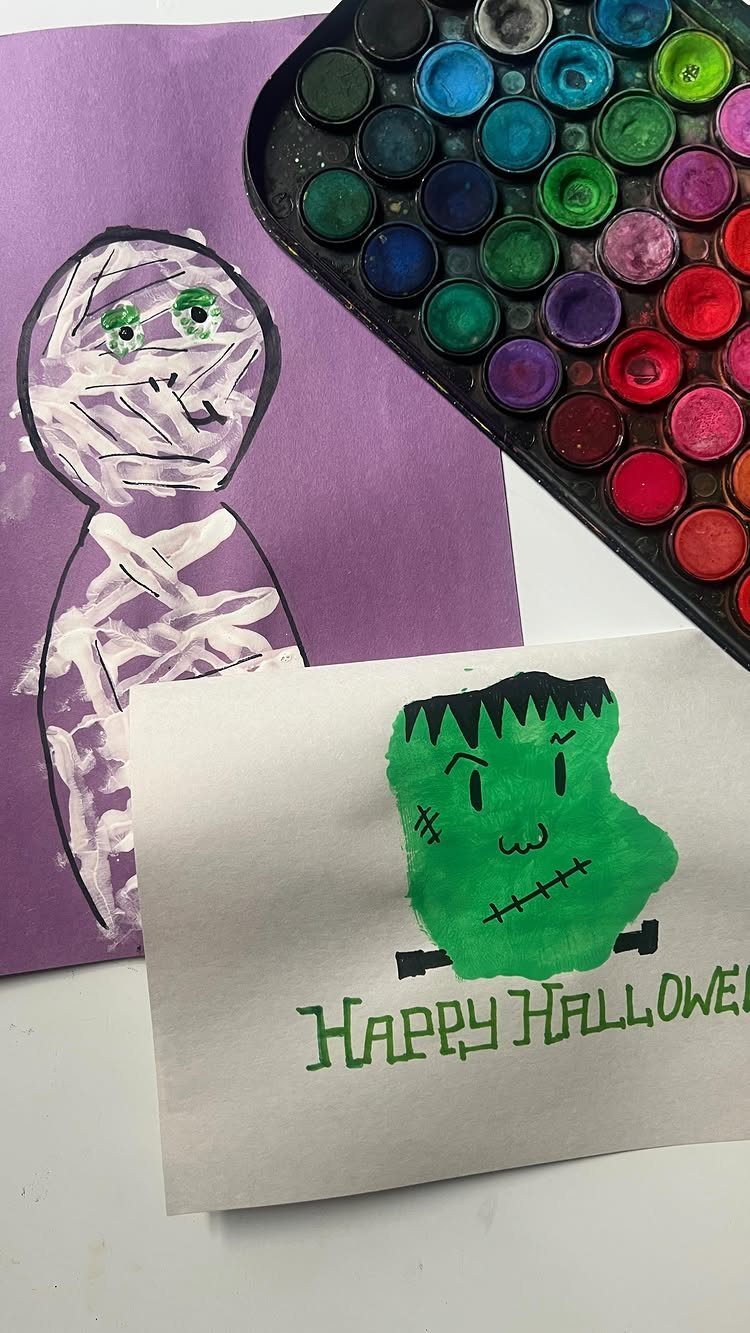
Paint a child’s palm green and press it down: the fingers become Frankenstein’s flat-topped head. Once it dries, add black hair, stitches and a face with markers.
I like putting the print on folded paper so it doubles as a Halloween card with the greeting written inside.
Washable paint is the sensible choice here, with a wet cloth within reach. Little hands vary in size, which gives each monster a different face.
6. Ghost Crafts
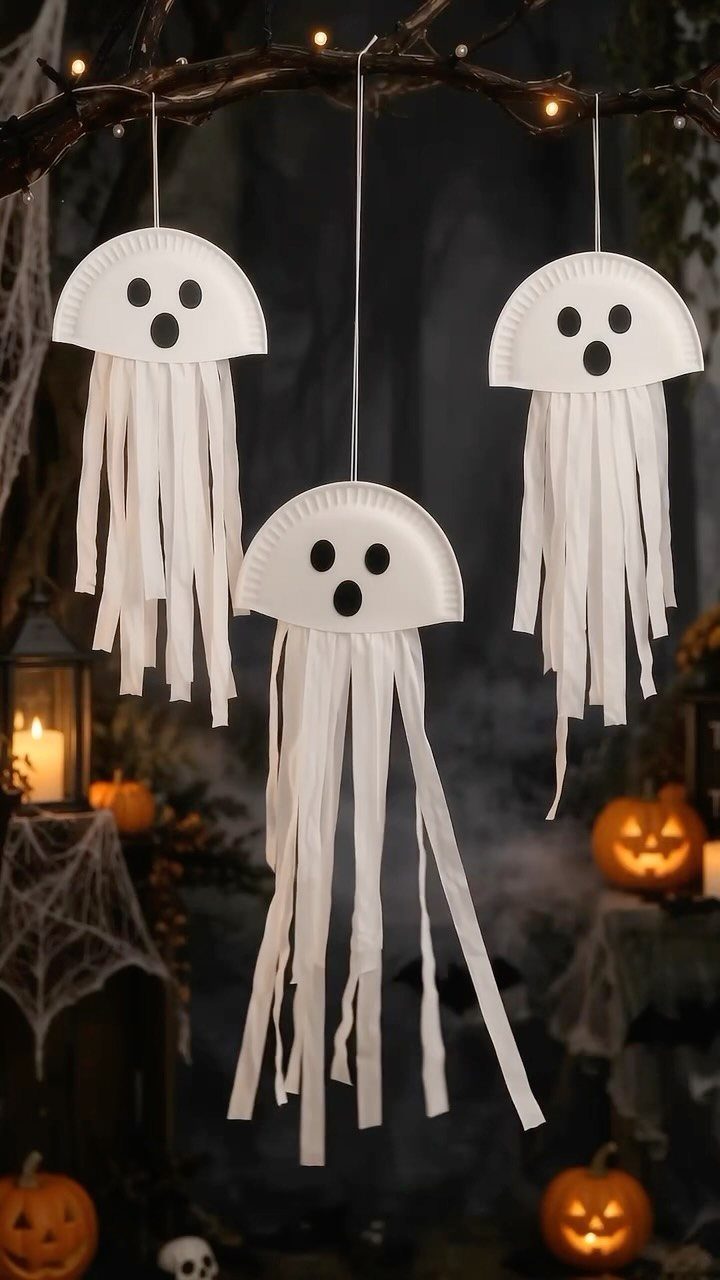
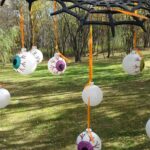
Hang a few paper plate ghosts from a branch and the whole thing reads as a decoration, not a craft left on the table. Use white plates, then attach strips of paper at the bottom for a ragged, floating tail.
Cut the strips long, because short ones look more like fringe than ghost.
Three ghosts of different sizes look better to me than three identical ones. Tie each with string or ribbon so it can hang.
7. DIY Cheesecloth Ghosts
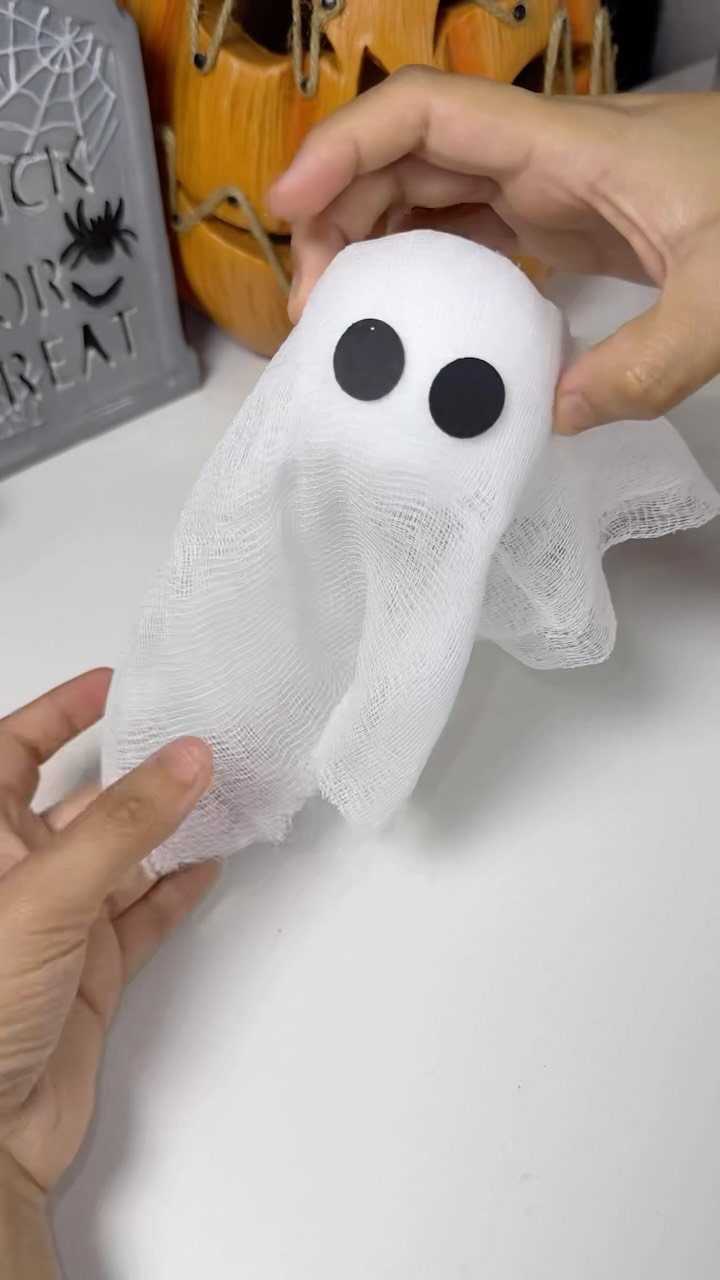
Cheesecloth drapes into soft folds, which makes a ghost look gauzy and a little tattered with almost no effort. Drape a square over a small form, add black eyes, and the loose weave does the spooky work.
I would make several and hang them at different heights near a door or window, where a draft moves them.
Cheesecloth costs very little, so a whole group of ghosts stays budget-friendly. Eyes cut from black paper or felt are the easiest shape for small hands to glue down.
8. Ghostly Handprints
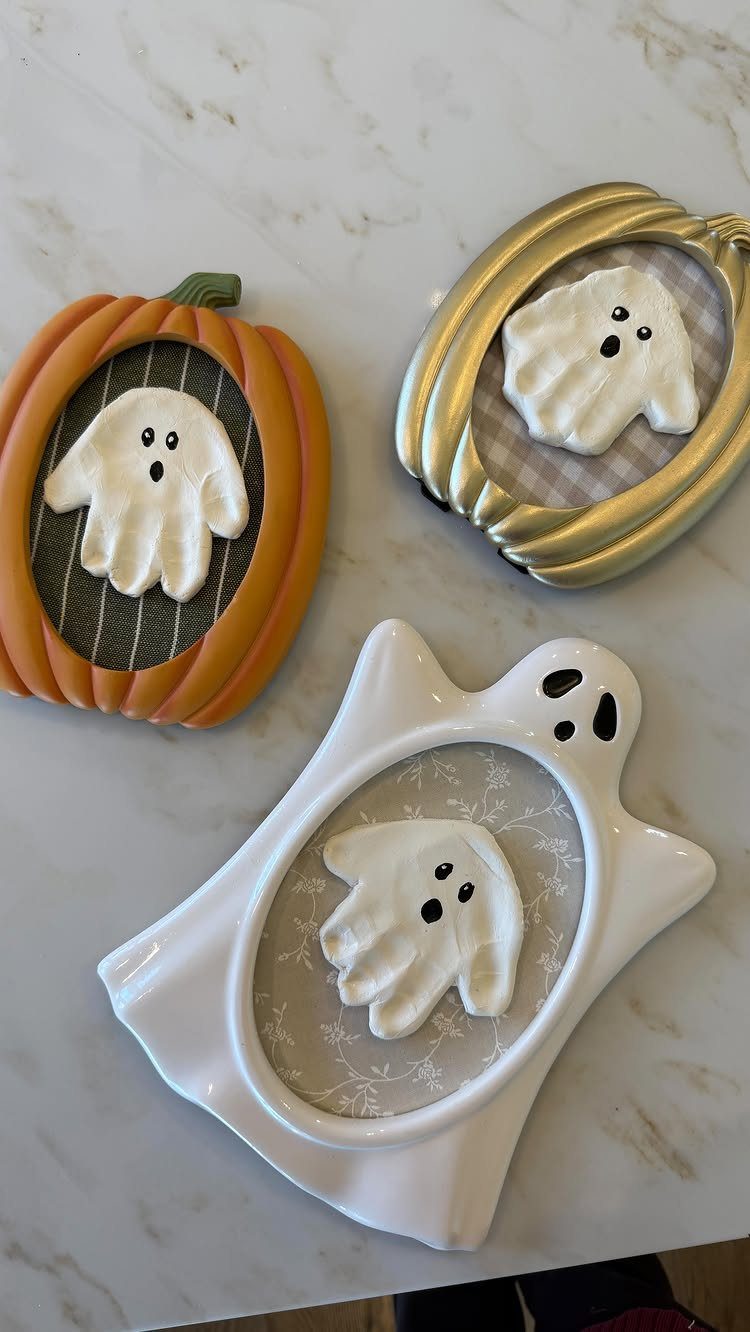
A child’s hand already has the right shape for a ghost: the palm becomes the body and the fingers become the ragged, trailing bottom edge.
Press a hand in white paint on dark patterned paper, then add eyes once it dries.
Frames make this one feel finished.
A pumpkin-shaped frame, a gold oval and a ghost-shaped frame all suit it, and several together look like a gallery wall. Washable paint and a damp cloth nearby save the cleanup.
9. Straw Skeletons
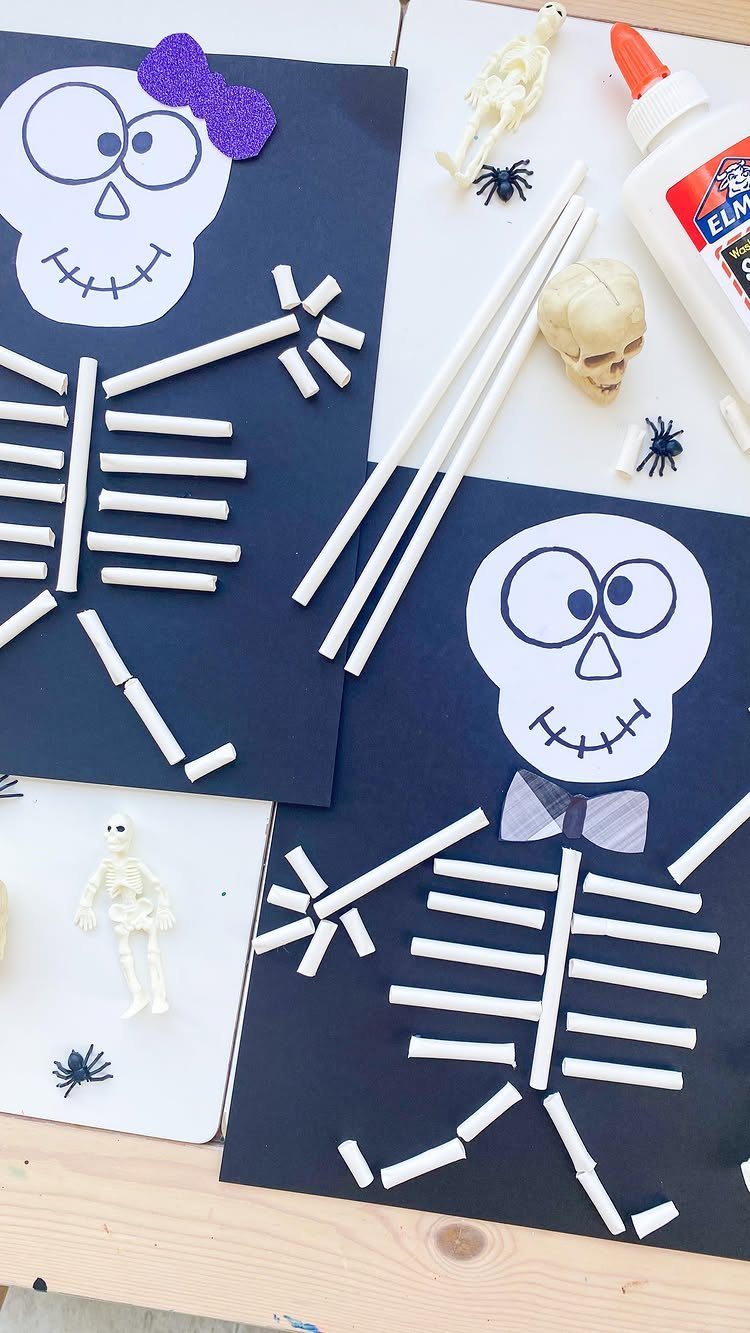
White straws stand in for bones, and cutting them into short pieces gives you ribs, arms and legs that glue flat onto black paper. A dark background makes the white pop.
Scissors do the cutting, so younger kids may need an adult to prep the pieces.
Small details change each skeleton’s personality: I like a purple bow on one and a grey bow tie on another. Use glue and let it set flat before anyone lifts the paper.
10. Trick-or-Treat Bags
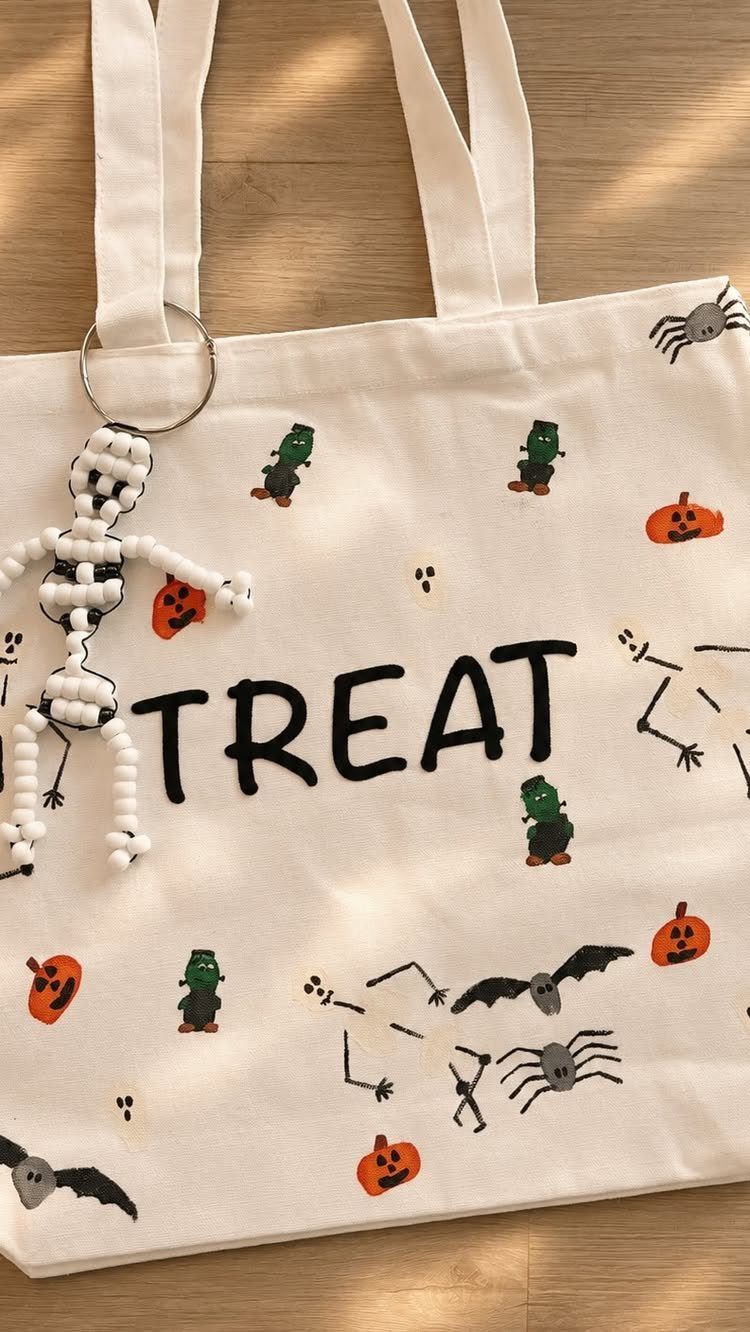
White canvas totes work as a blank page for the night’s candy haul. Draw the word TREAT across the front, then add small Halloween figures around it with fabric markers.
Fabric markers hold up better on canvas than regular ones, and I would set the design before the bag ever goes outside. Each child ends up with a bag no one else has.
11. Halloween Suncatchers
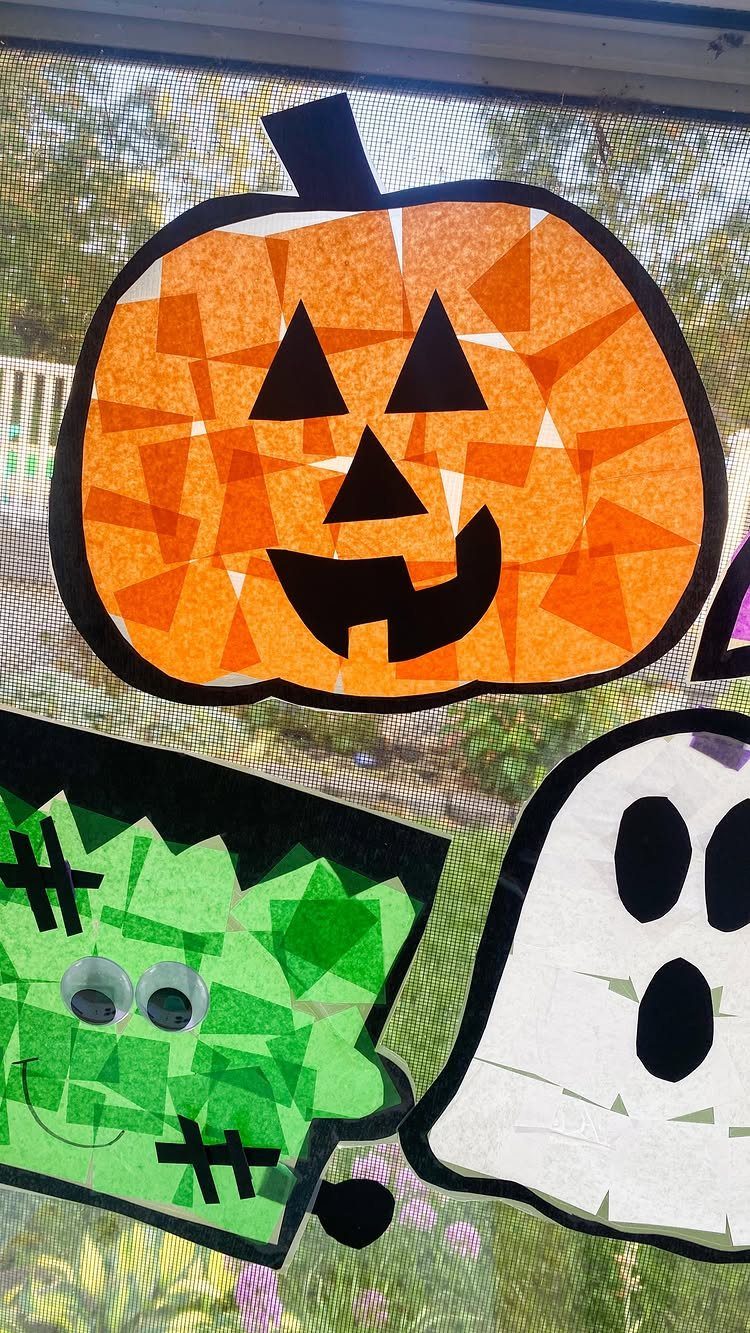
Tissue paper glows when light comes through it, so a pumpkin, a Frankenstein and a ghost look best on a window.
Cut the shapes from black paper frames, fill the openings with colored tissue, and tape the whole thing to the glass.
Tissue is cheap and tears easily, so let kids rip pieces instead of cutting them.
Daylight is what makes these work, so choose a window that gets sun. 3 different characters side by side fill a pane nicely.
12. Mini Witch’s Broom
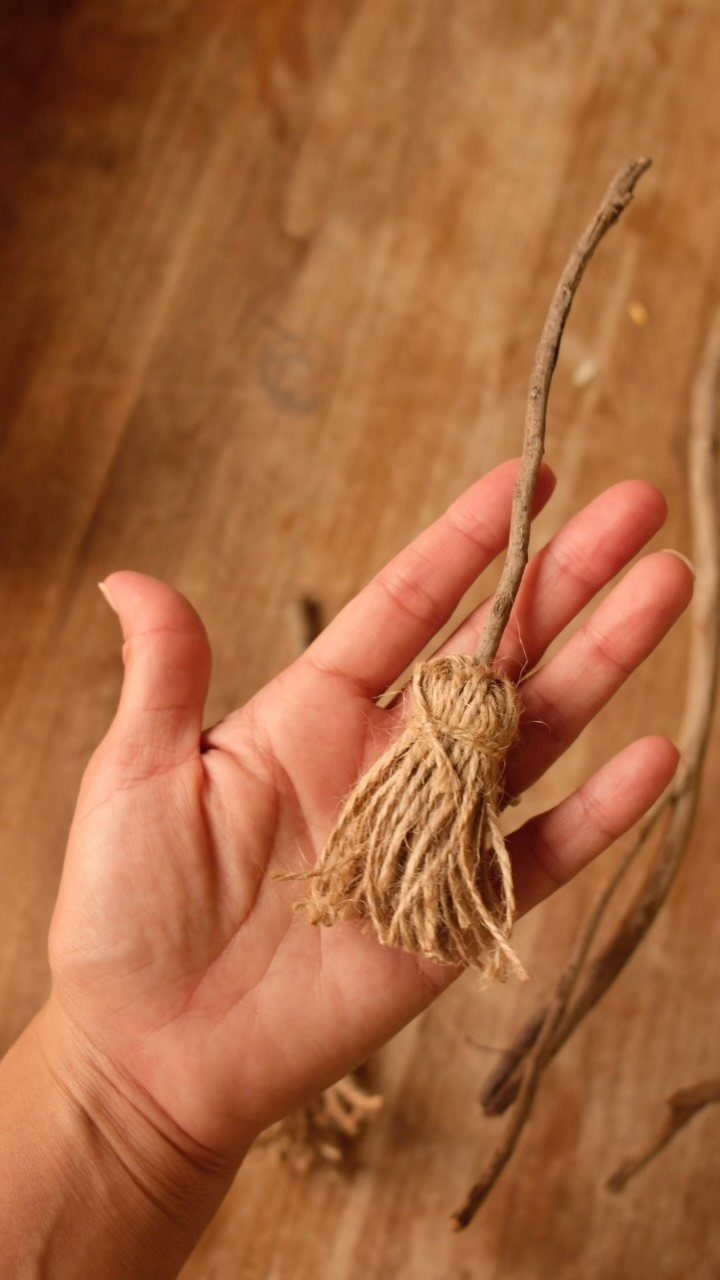
A twig makes the handle and raffia or natural fiber makes the bristles, so a witch’s broom comes together quickly. Gather bunches of twine, tie them to the end of the twig, and trim the bottom ragged.
Keeping it small is what makes it work: a mini broom sits on a shelf, tucks into a wreath or tops a gift.
I would pick a twig with a bit of crook to it, since a perfectly straight one looks store-bought.
13. Paper Roll Halloween Haunted House
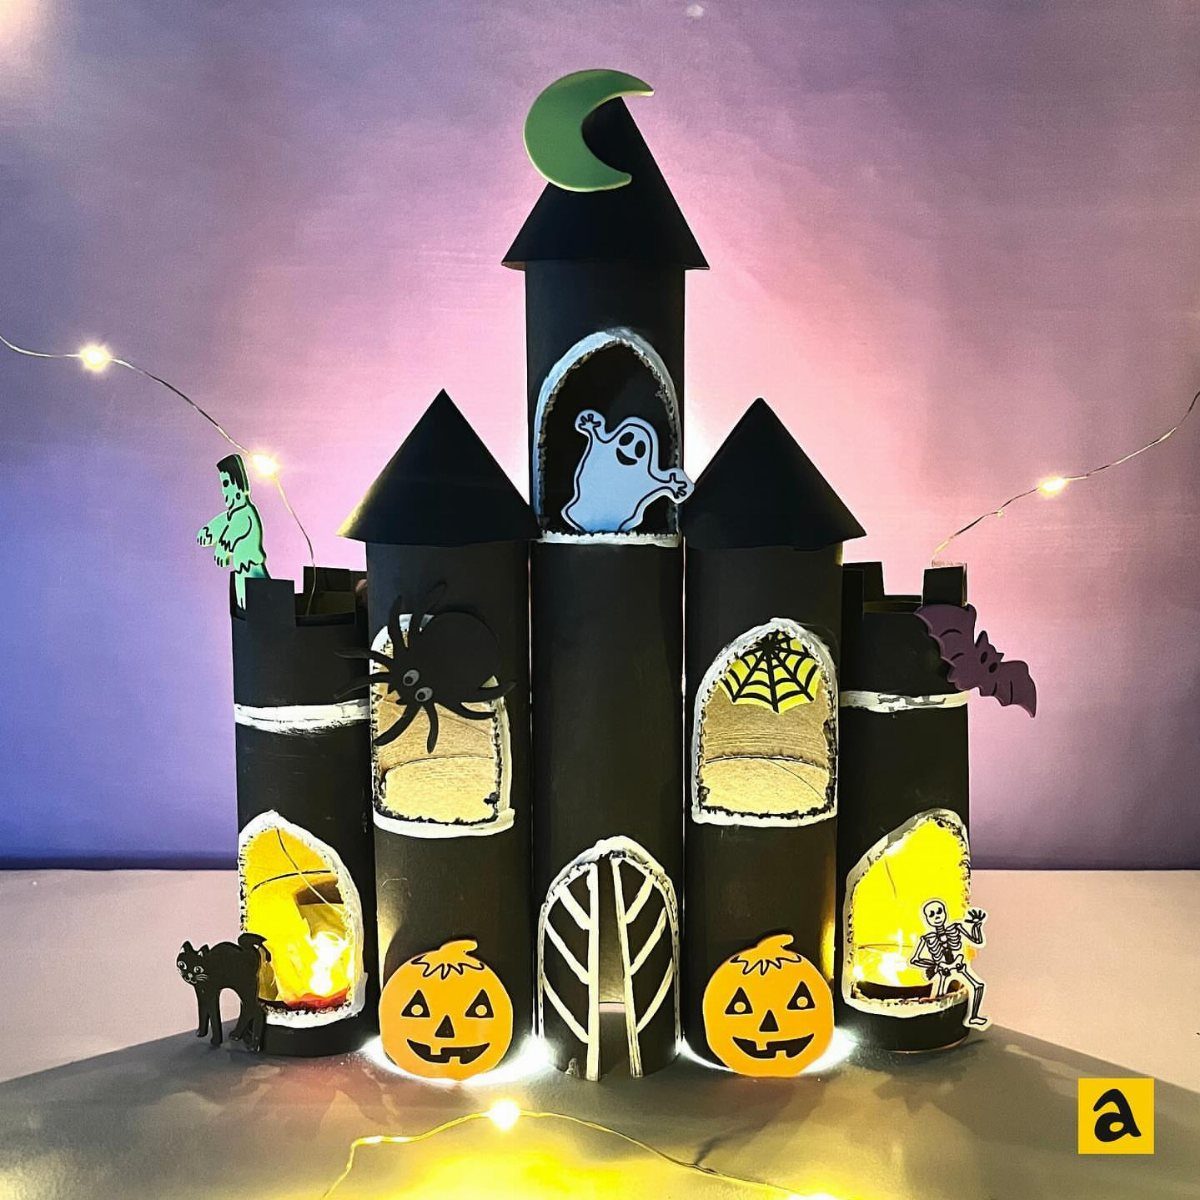
A cardboard tube makes a good house because its tall, narrow shape already looks like a spooky tower. Paint or cover the rolls in black paper, then cut small windows and back them with something bright so they glow.
I would group several rolls of different heights into one street, which reads better than a single house. A string of fairy lights tucked behind adds the glow.
14. Toilet Paper Roll Monsters
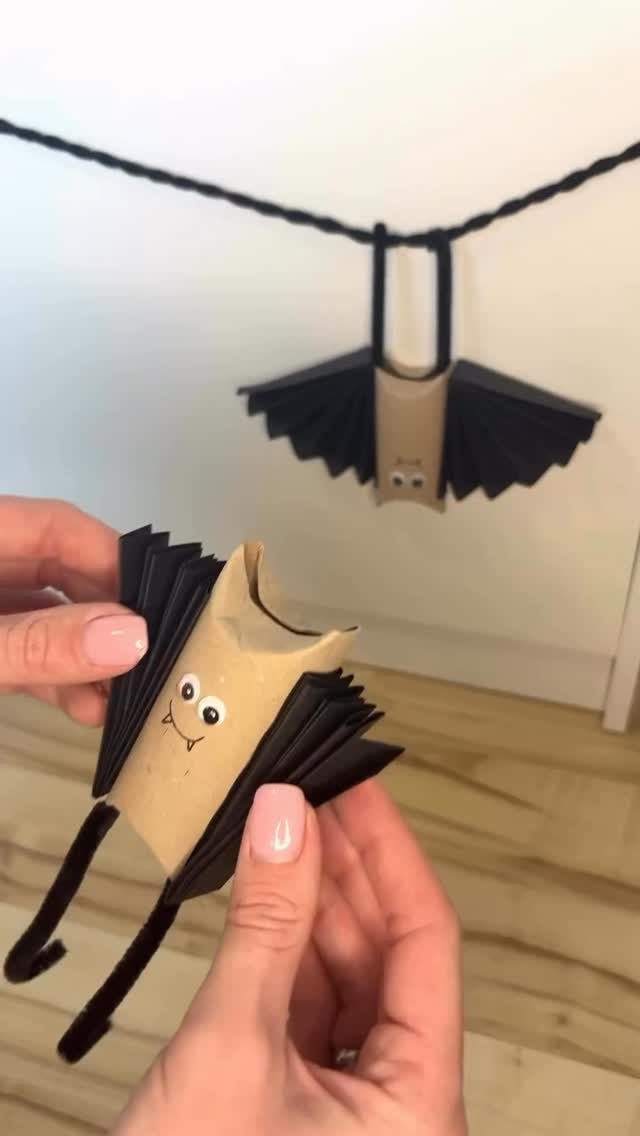
Pinch the top of a toilet paper roll into 2 ears and a roll becomes a bat body, ready for wings.
Trace two wing shapes on black construction paper, cut them out, and glue one to each side of the tube, then press on a pair of googly eyes last so they sit flat.
Hanging is what makes this one work, so loop a black string through the top.
A cluster of bats at different heights looks better to me than a neat row. The rolls are free, which keeps the whole batch cheap.
15. Paper Cauldrons
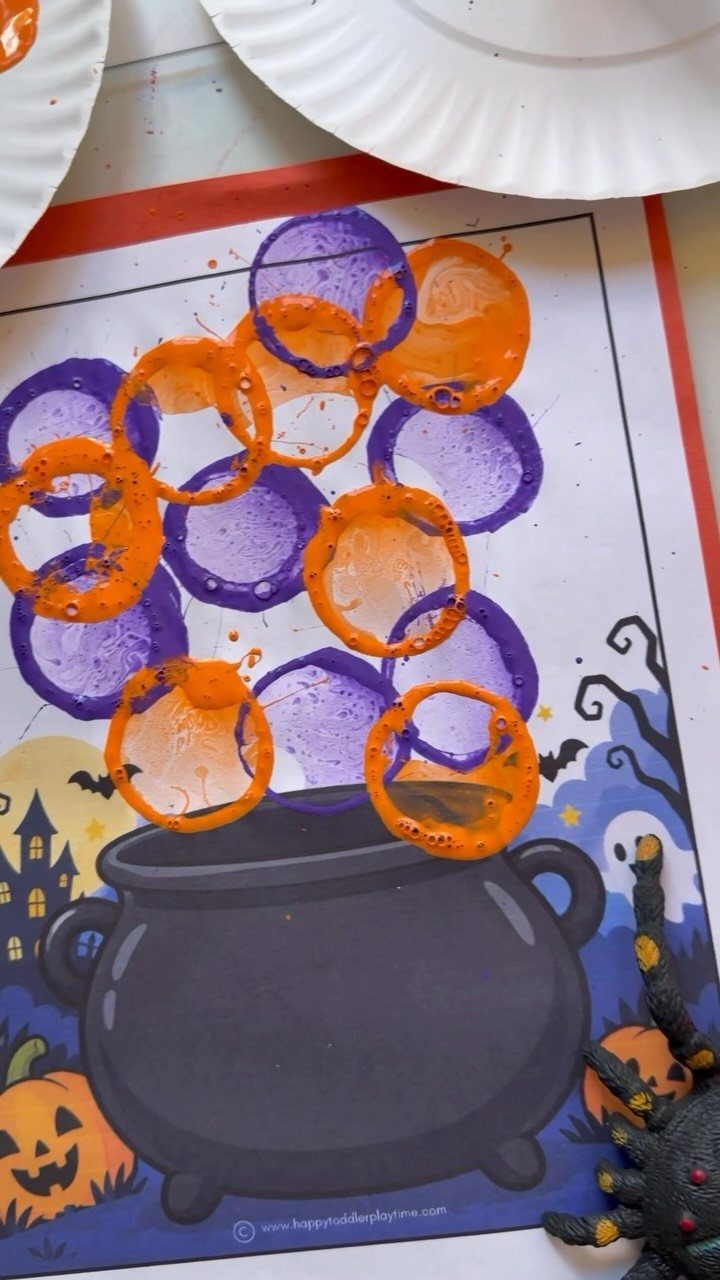
Bubbles are the best part of a cauldron, and kids can paint them without any skill. Start with a printed black cauldron, then dab orange and purple circles above it so they seem to float up.
Cotton swabs or fingertips make round bubbles fast.
Vary the sizes, with a few big ones and many small. Dry the page flat, then add a toy spider or a pumpkin sticker if you want extra detail.
16. Printable Halloween Treat Boxes
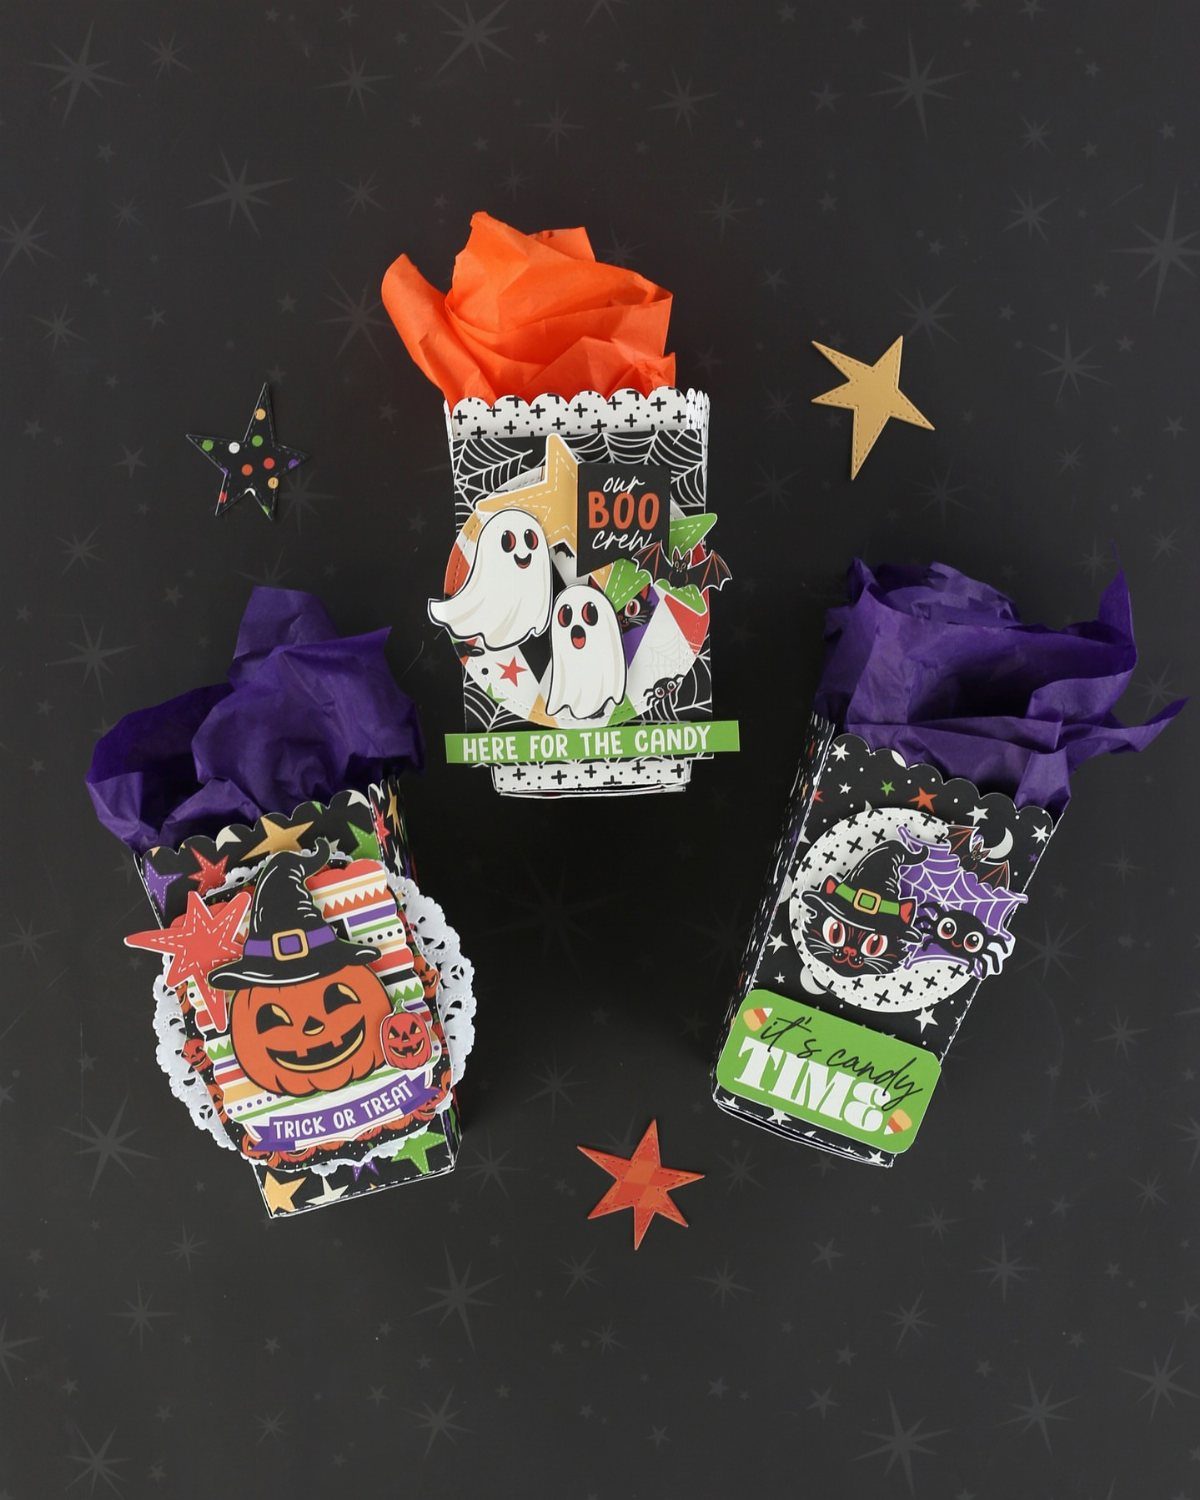
Printables do the artwork, so the only work left is cutting, folding and filling. Print the boxes with ghosts, pumpkins and phrases like TRICK OR TREAT, then fold them along the lines and fill with colorful tissue paper.
Heavier paper holds a box’s shape better than plain printer paper, and I would use it. Making a box per guest is a cheap party favor, and each one doubles as a place card.
17. Paper Roll Vampire Craft
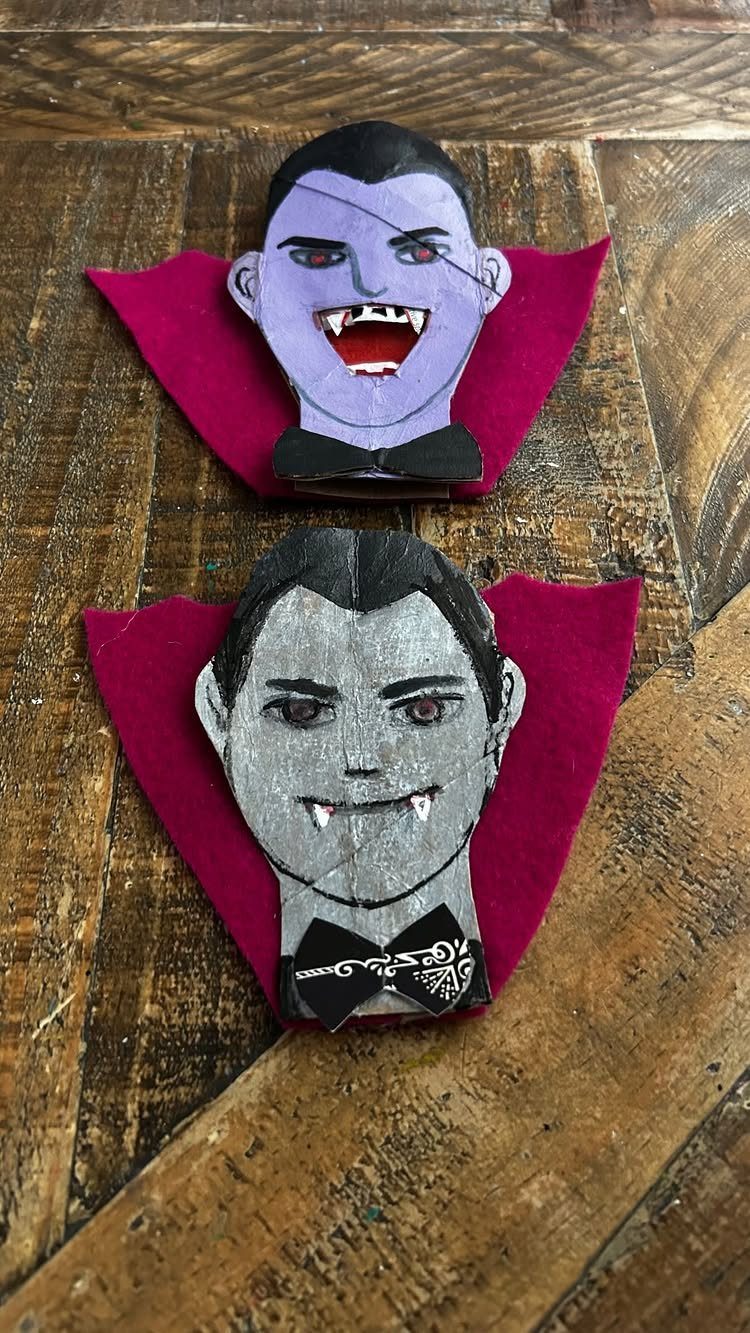
For the cape, wrap a strip of red felt around the back of the tube and glue it at the neck; felt hangs better than paper and won’t curl as it dries.
Paint a face on the upper part, then glue the felt around the back so it flares like a collar.
Felt doesn’t fray, so kids can cut it with little fuss.
I would make a pair or more, since vampires look better as a group. Add small white fangs, cut from paper, to finish the face.
18. Fork Painted Monsters
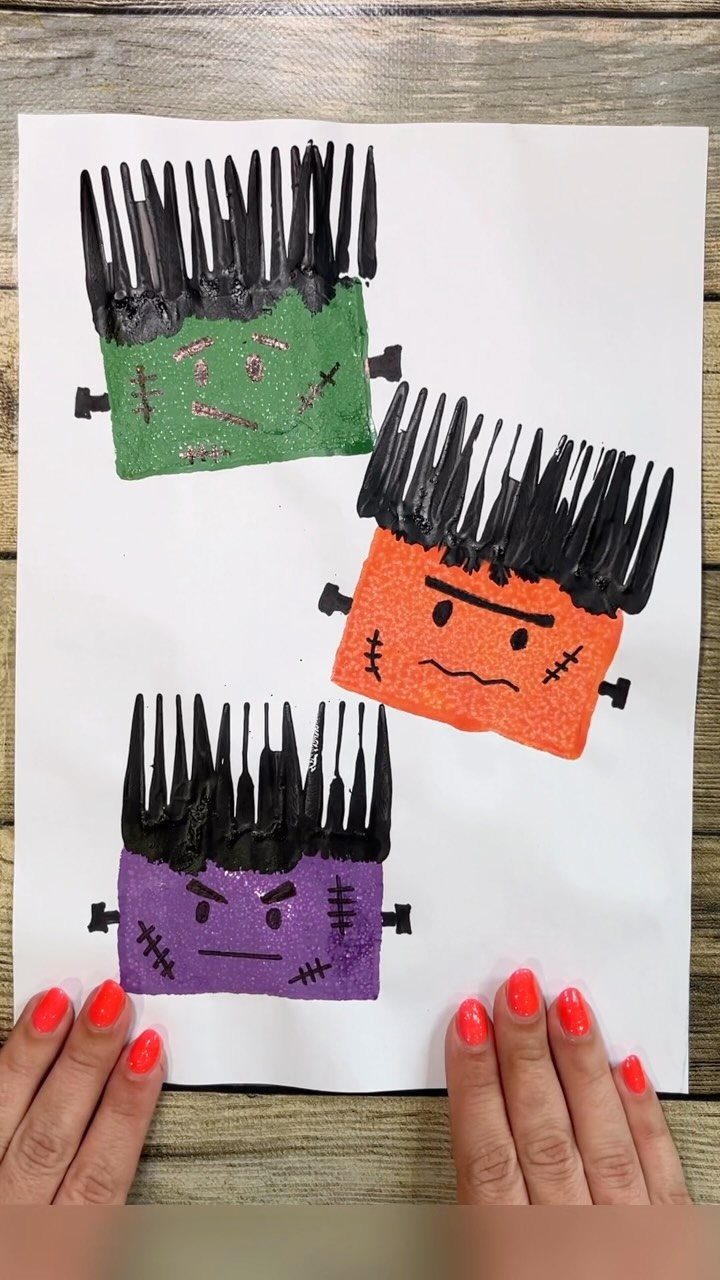
A fork leaves a row of fine lines in one press, which is exactly what monster hair needs. Paint the monster’s face first, then dip a fork in black paint and drag it from the head outward.
Let the faces dry before adding the hair, so the colors don’t blend.
I like giving each monster a different head shape, since the hair ties them together. Washable paint and a paper plate as a palette keep cleanup easy.
19. Halloween Painted Rocks
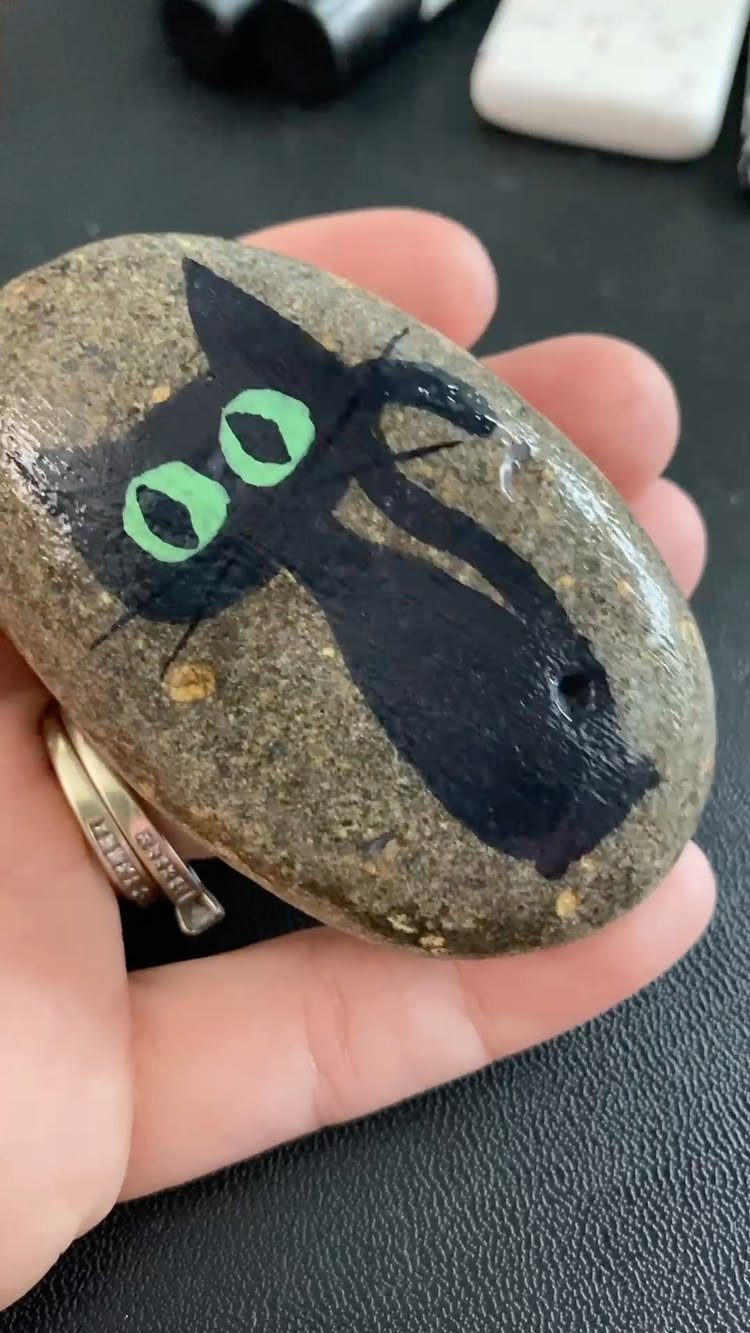
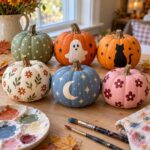
Smooth river stones take acrylic paint well, and an oval one already has the shape of a cat face, so you only add ears, eyes and whiskers.
Paint the stone black, then add large green eyes, which carry the whole character.
Acrylic craft paint is my pick for stone.
Let the black base dry fully before the eyes go on, or the colors will smear. A few stones on a shelf or windowsill make a cheap decoration kids can keep.
20. Pipe Cleaner Spiders
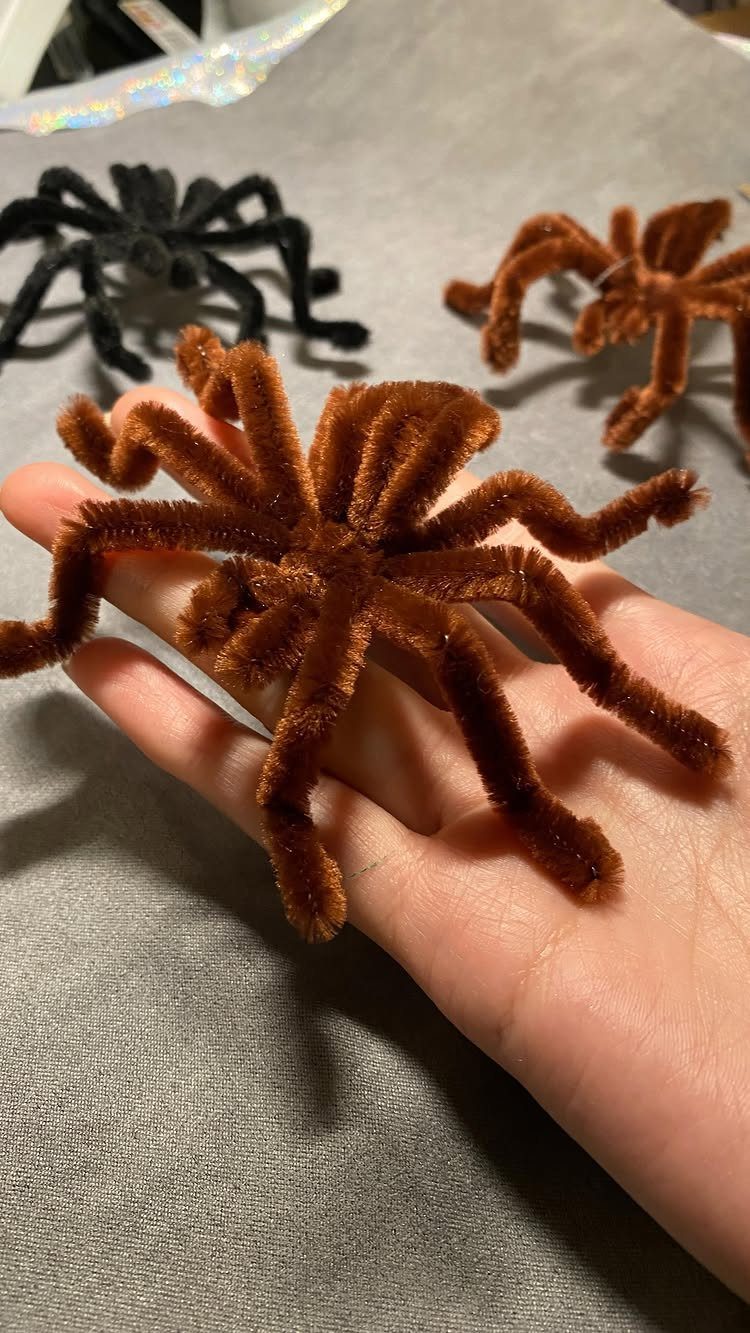
Brown pipe cleaners twist into a spider small enough to sit in a child’s palm. Bend a few lengths into legs, then wrap a short piece into a body.
Mixing brown and black gives you a whole nest from one pack of pipe cleaners, which keeps it cheap.
Bend each leg at a joint so the spider looks ready to crawl. No glue and no drying time, so this suits kids with short attention spans.
21. Paper Bat Craft
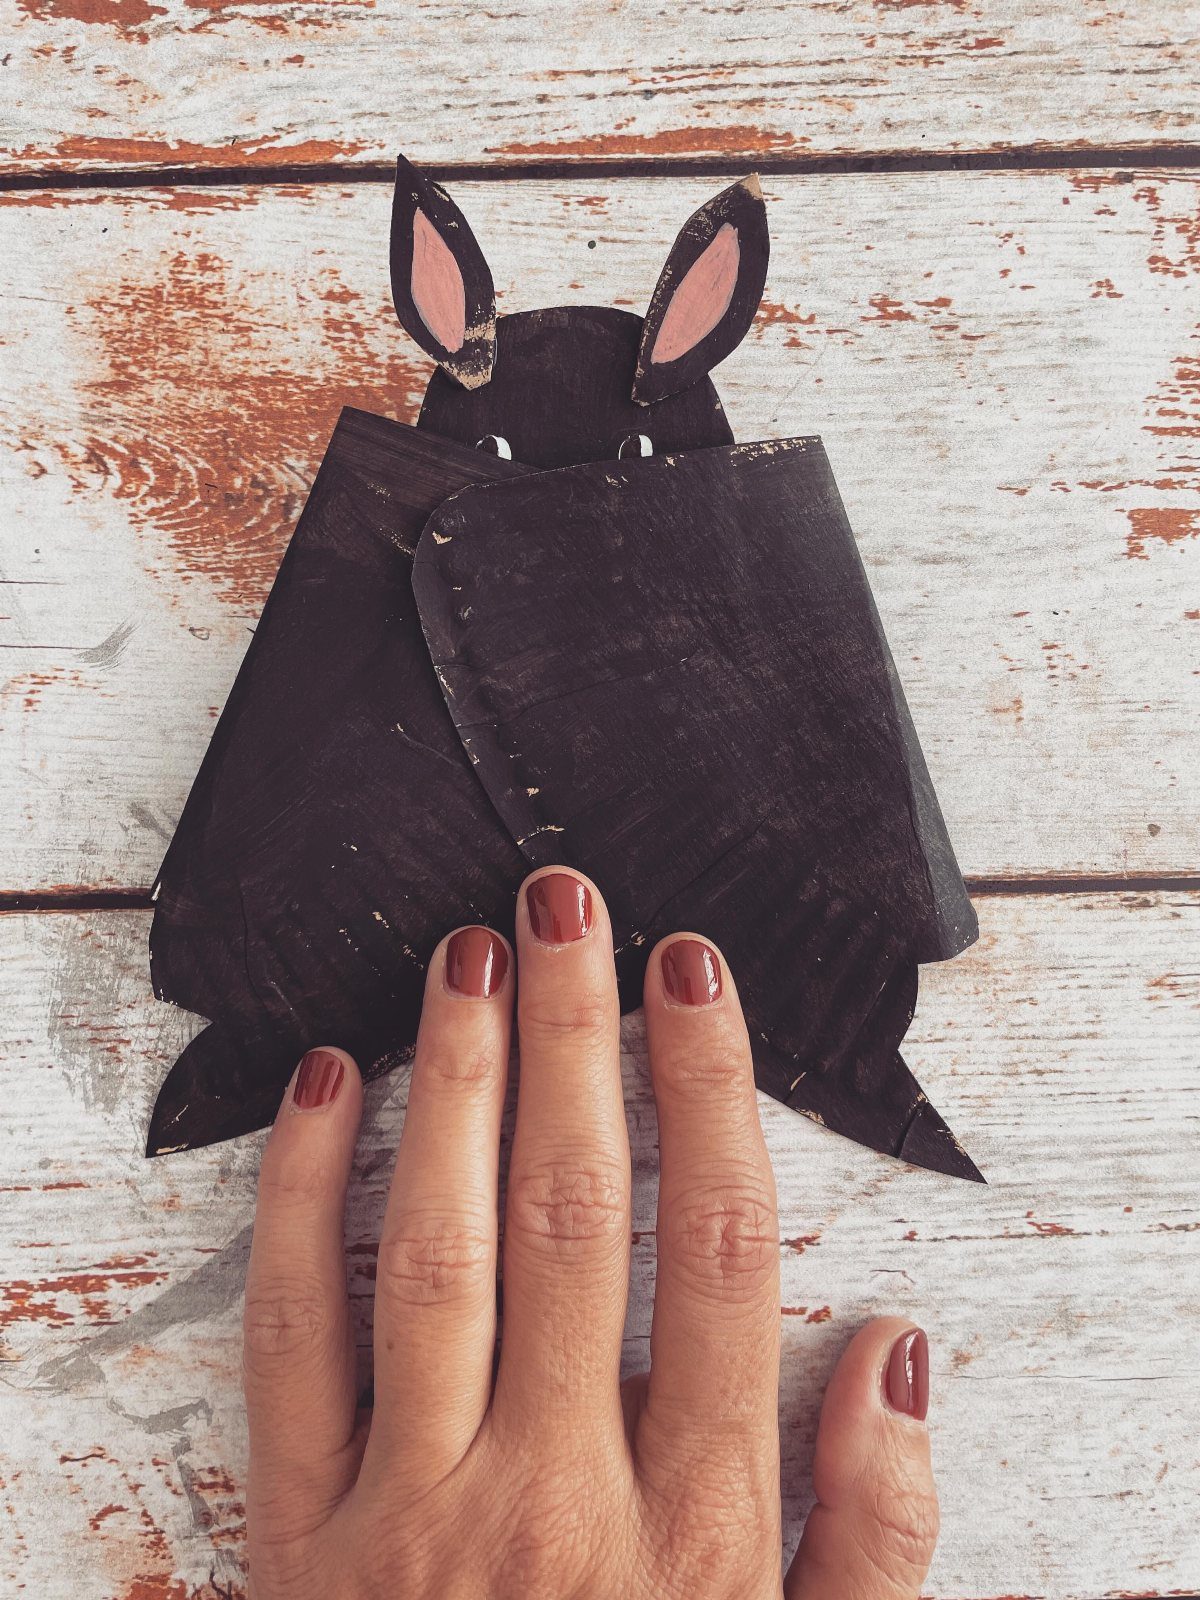
Pink ears and white eyes are the small touches that turn a black paper silhouette into a bat with a face. Cut the body and wings from black paper, then glue on the colored details.
Cut the ears from a different color than the body, since contrast is what makes it read at a glance.
Black construction paper is cheap, and a pencil outline helps younger kids cut a steady wing curve. I would make a few in different sizes.
22. Pumpkin Handprint Art
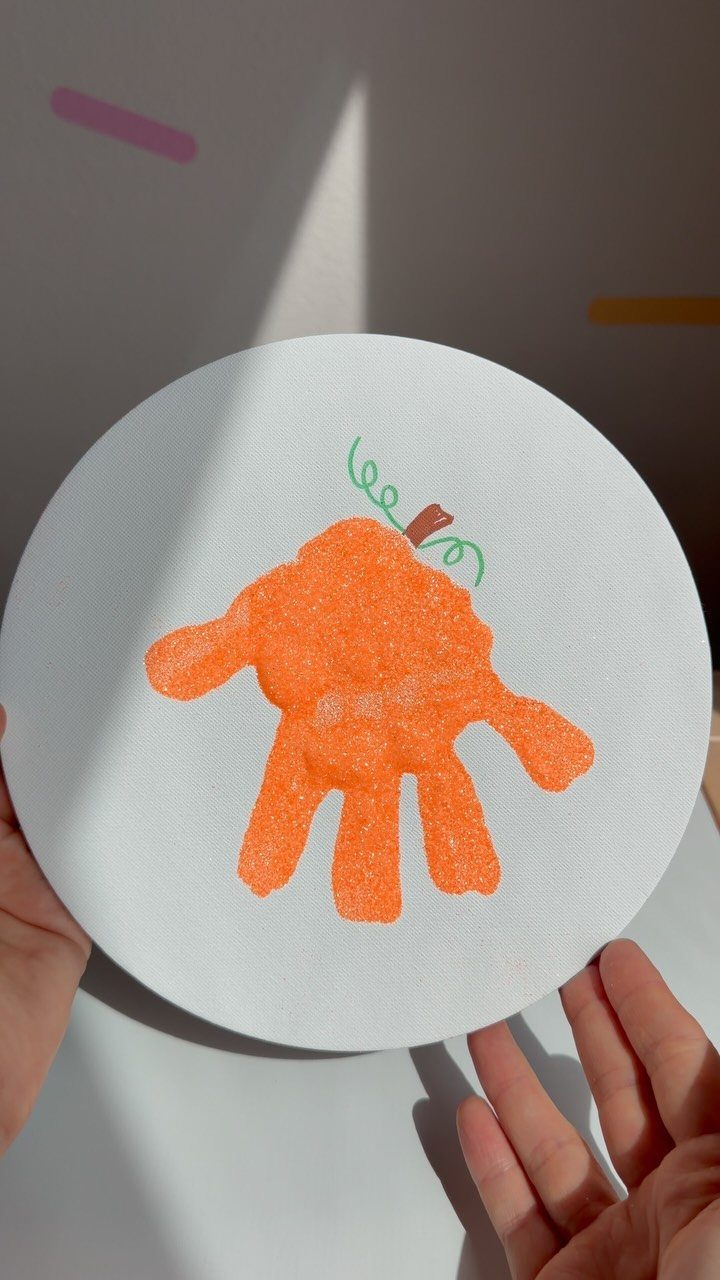
Press a painted hand flat and the fingers fan out into the ribs of a pumpkin. Paint the palm orange, press it on a round sheet of paper, then add a green stem once the print dries.
A white background keeps the orange bright. Try a round canvas or a circle cut from heavy paper, so the print has a frame.
23. Halloween Paper Garlands
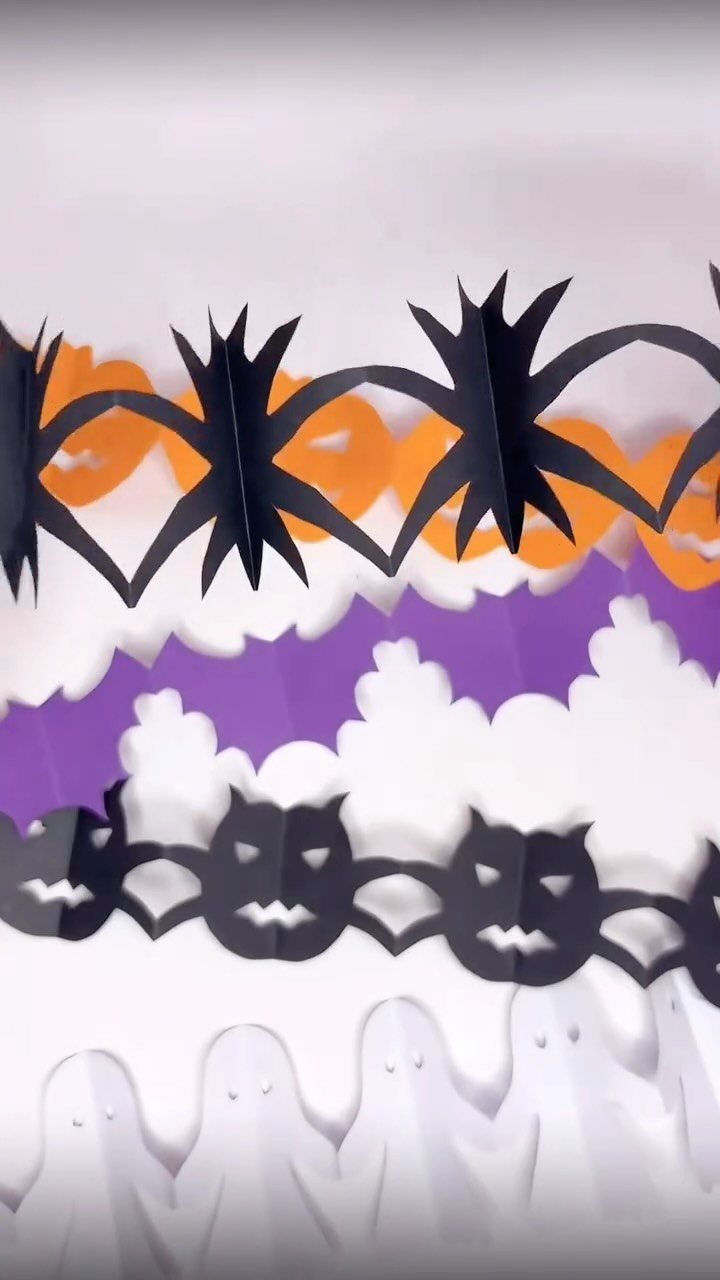
Folded paper is the shortcut here: cut through a stack once and you get a whole row of matching shapes. Ghosts, bats and spiders each work as a repeating chain, and the maker says five designs took about 20 seconds apiece.
For garlands, I’d pick high-contrast pairs: black paper on orange, or black over white, so the shapes read from across the room.
Hanging several strands at different heights looks fuller than a single line, and I’d go with 3 for a standard mantel or doorway. Paper and scissors are all it costs.
24. Clay Witch Cat Figurine
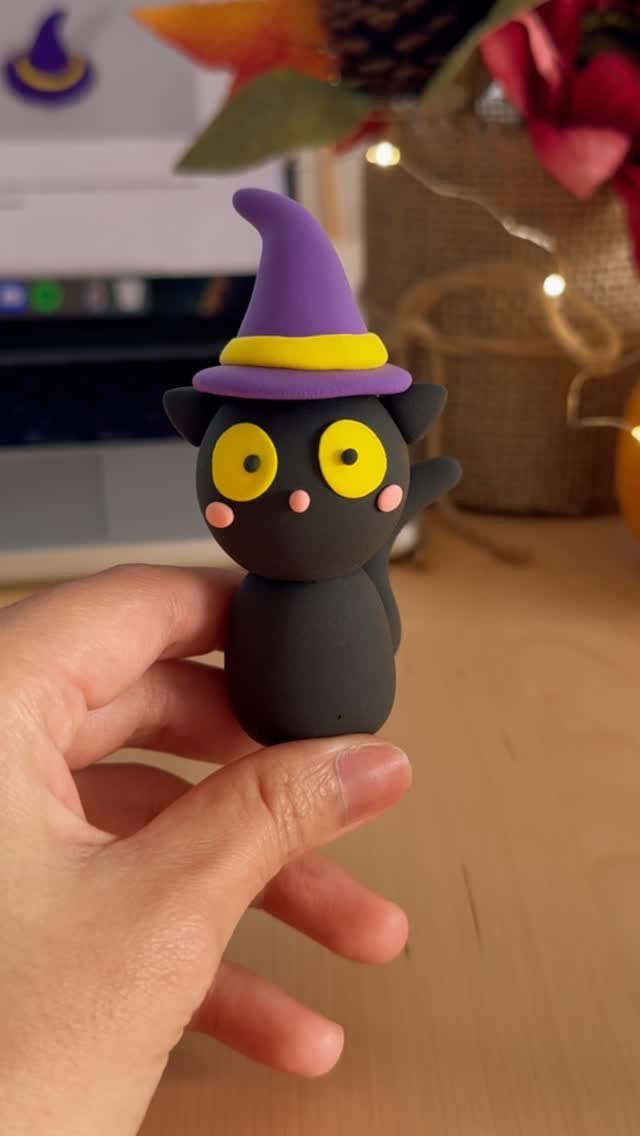
A black clay cat is mostly a few simple shapes: a rounded body, a head and 2 pointed ears. The witch hat is what sells it, so make that purple and add a yellow band.
Its maker says the cat takes under 30 minutes, which fits a single afternoon with kids.
Sculpt the hat separately and press it on the head. Small enough to sit beside a laptop, it works as a desk buddy for a grown-up, too.
25. Felt Pumpkin Ornament
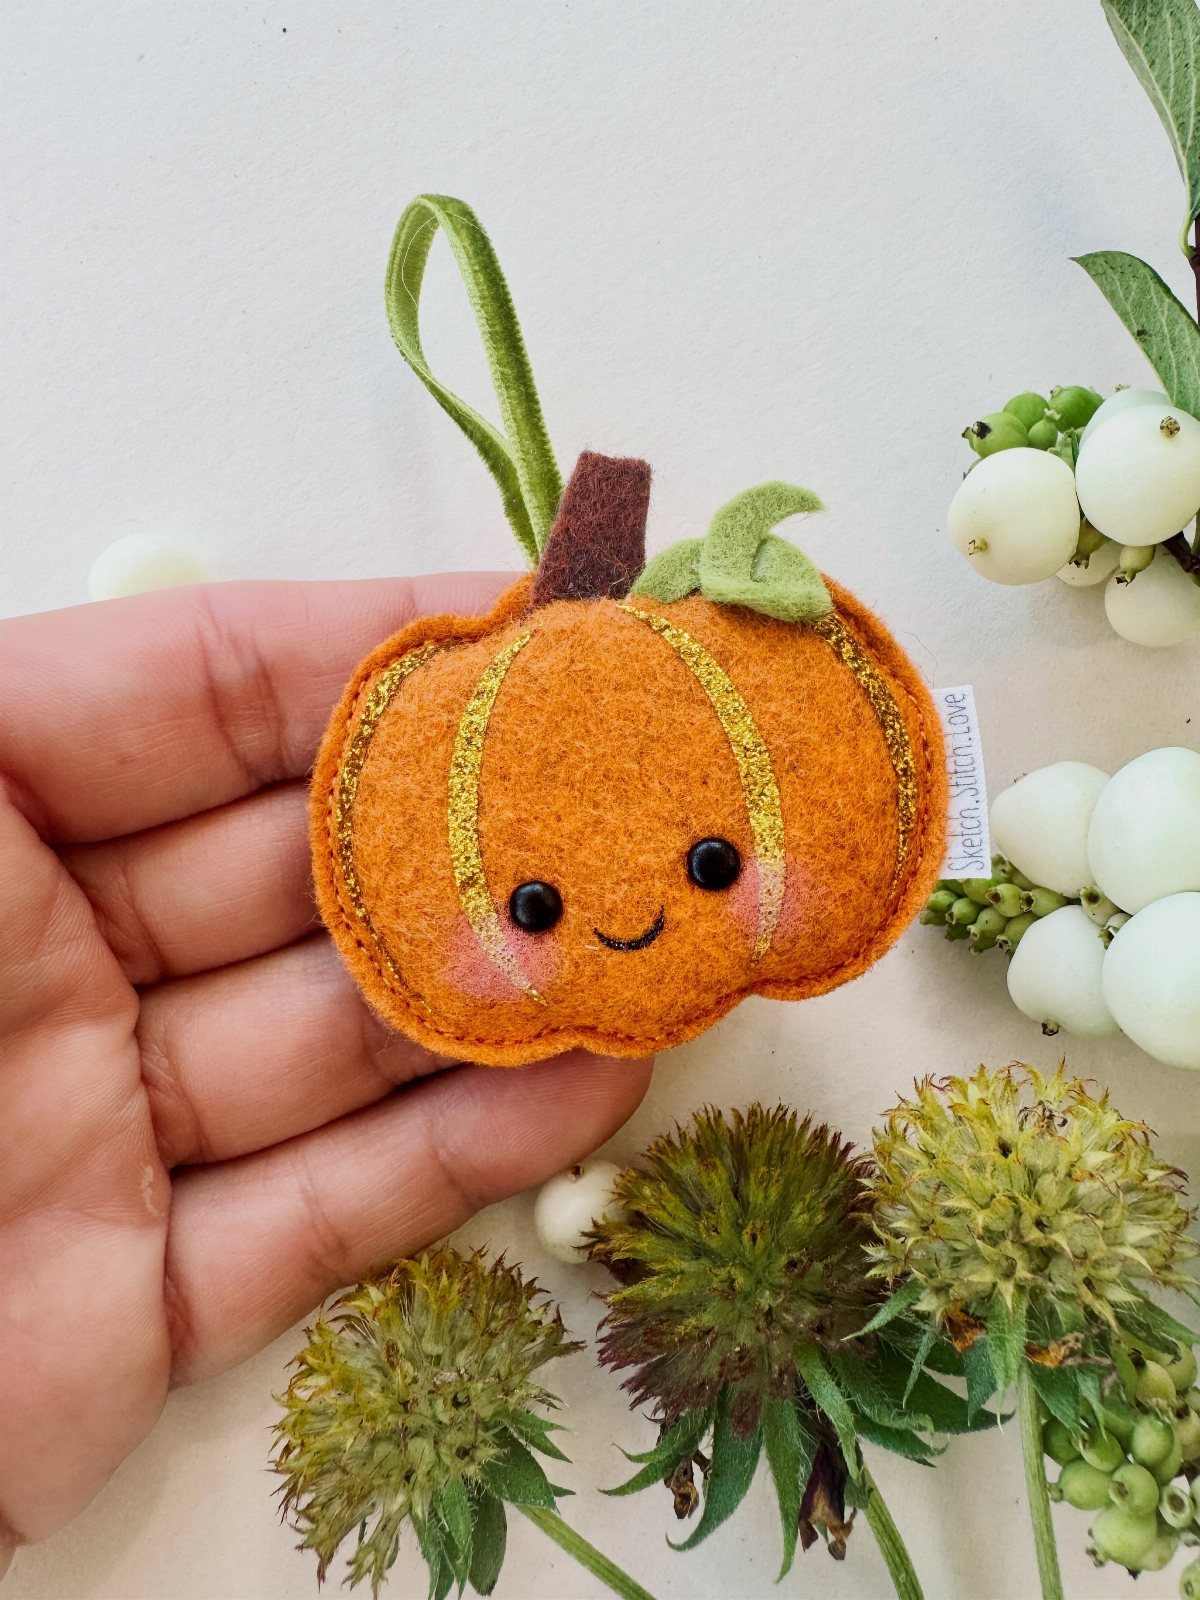
Felt holds its shape without sewing skills getting in the way, so a small stuffed pumpkin is a good first project for an older child working beside an adult.
Cut 2 orange circles, stitch them together, and stuff the middle with fiberfill before closing the seam.
A green felt stem on top gives it something to hang by.
I like a simple smiling face over a scowl, since it looks friendly on a tree or a shelf. Glitter accents are optional, and felt is cheap.
26. Handmade Halloween Character Buckets
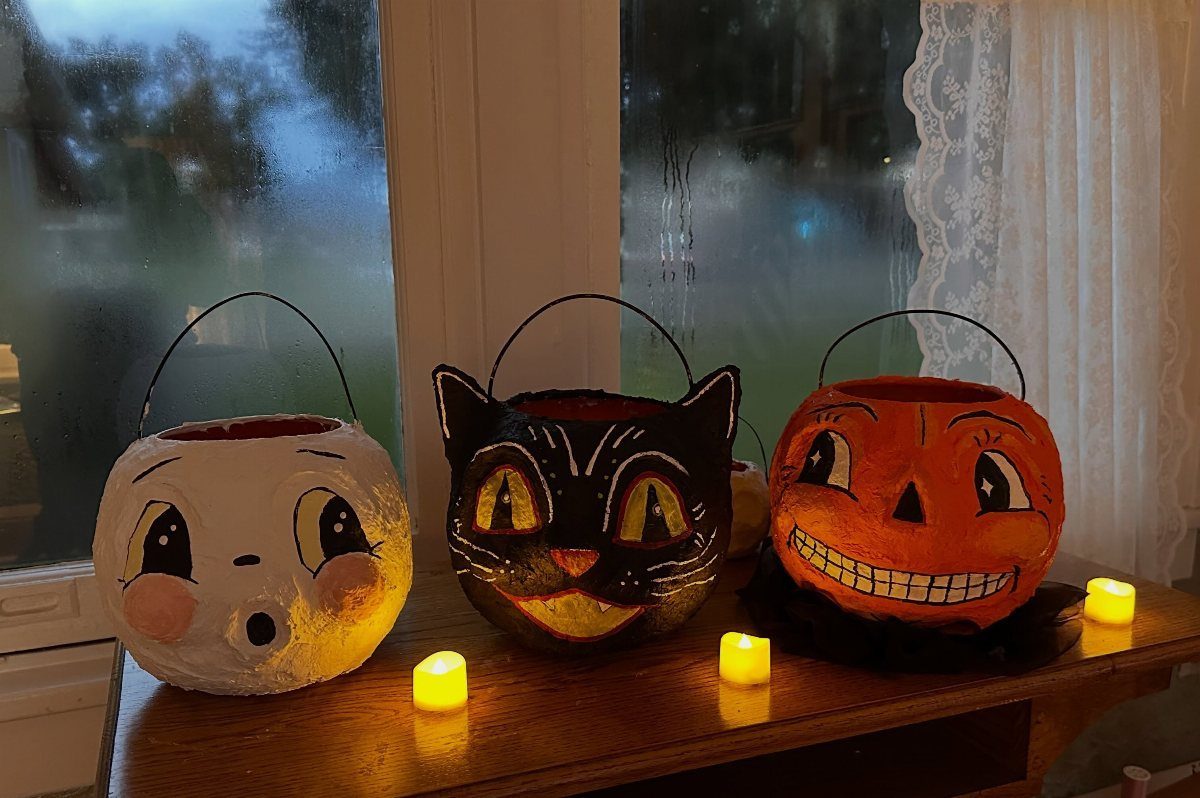
Small buckets shaped like characters double as candy holders and shelf decor, which makes them worth the extra effort over a plain pail.
Pick three: a pumpkin, a ghost and a black cat cover the usual crowd, and each child can claim one.
Once the candy is gone, the buckets work as holders for battery tea lights, so line them up on a mantel or ledge for a display that lasts through October.
Use flameless candles, since paper and plastic and open flame don’t mix. I would keep the faces simple, with big eyes and few lines, so kids can finish them on their own.
27. Paper Spiderweb Cutouts
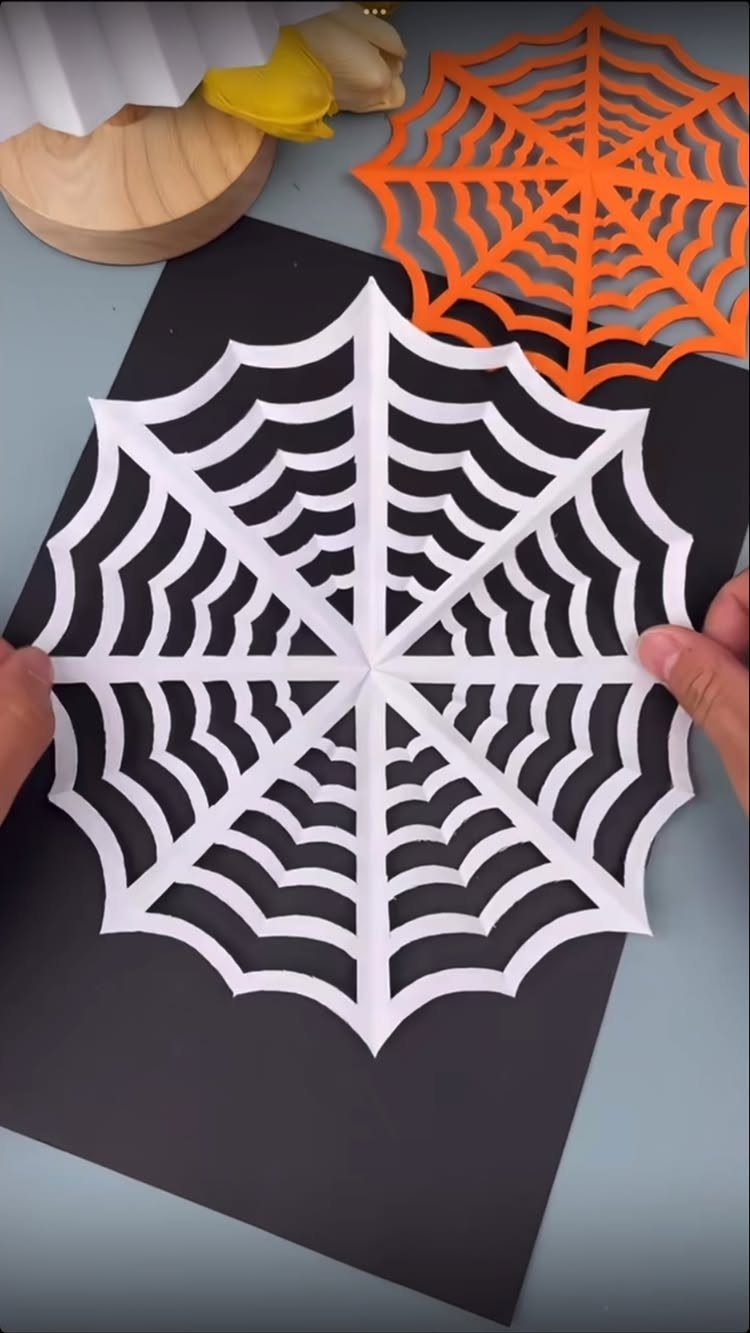
Spiderwebs are all straight lines and repeating curves, which is why paper handles them so well. Fold a circle of paper, snip small wedges along the folds, and open it up into a lacy web.
Use white paper on a black background, or orange for a bolder look.
Younger kids will need help with the small cuts, so I would pre-fold the circles for them. Mount a few on a window or a dark wall, and the cost is a sheet of paper each.
28. Cotton Swab Skeletons
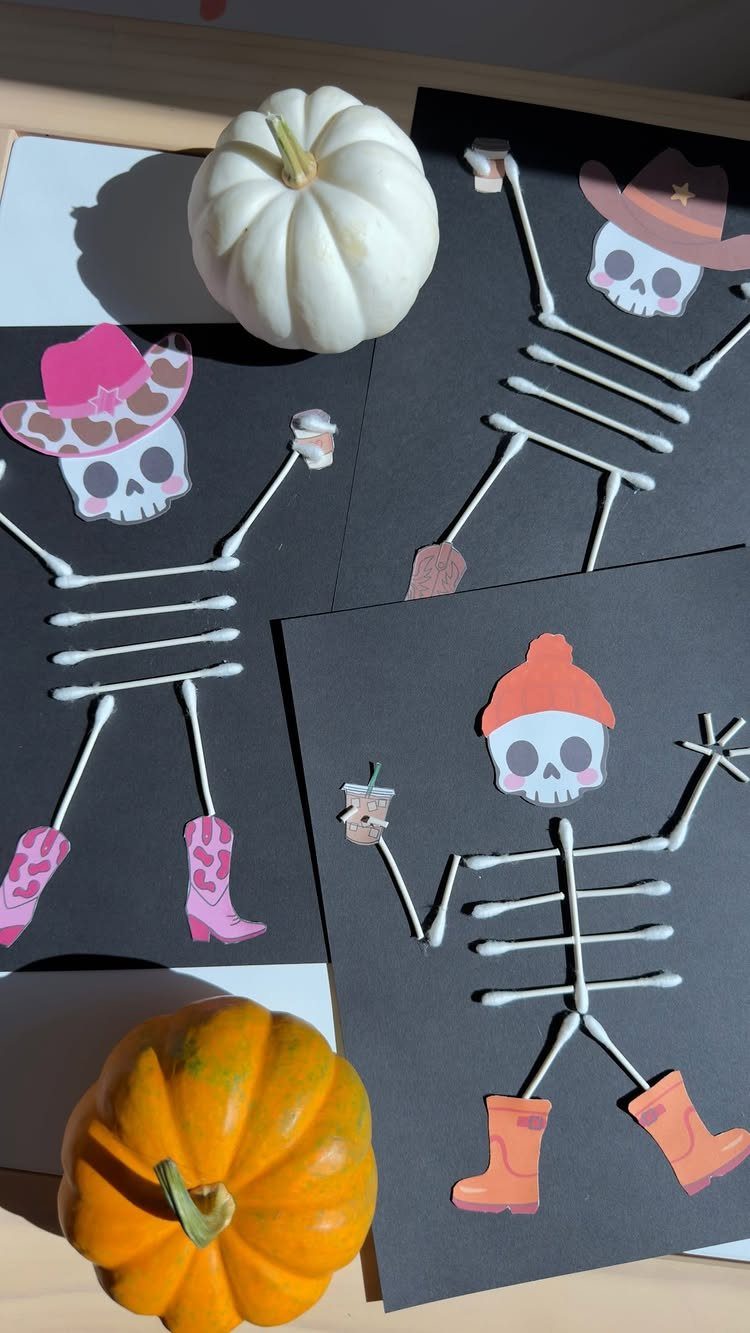
Cotton swabs make convincing bones because they are already the right shape. Snap or trim them into ribs, arms and legs, then glue them flat on black paper so the white stands out.
Paper cutouts finish the figure: a skull, a hat and a pair of boots give each skeleton a personality.
I would glue the swabs first and add the skull last, so the proportions stay right. A box of swabs makes several skeletons for pennies.
29. Paper Plate Witch Hats
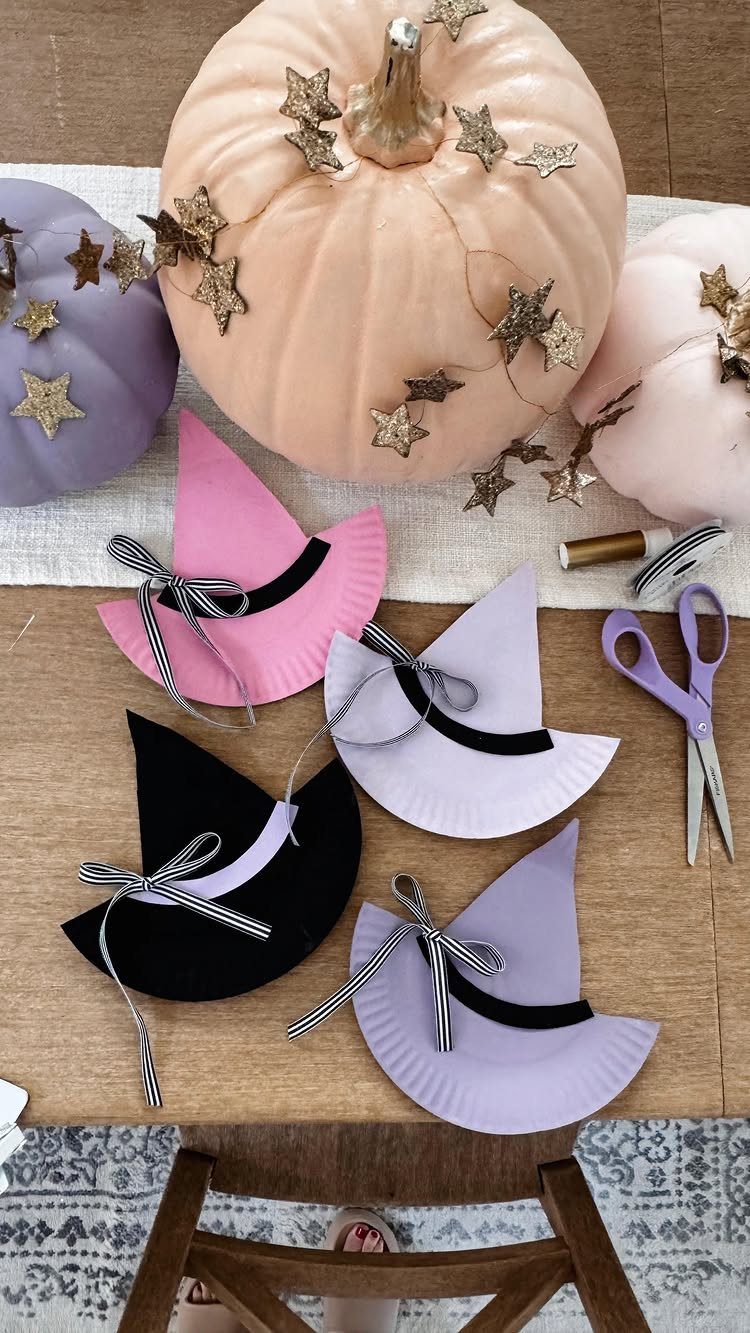
Paper plates turn into witch hats quickly: a plate becomes the brim, and cardstock rolled into a cone becomes the crown.
Glue the cone to the center of the plate, then wrap a ribbon around the base to hide the join.
Pastel plates look lighter and friendlier than all black, and I like mixing both colors on one table.
Use glue rather than tape on the cone, since tape tends to give way. These stay small, so they suit a shelf or a party table.
30. Miniature Haunted House
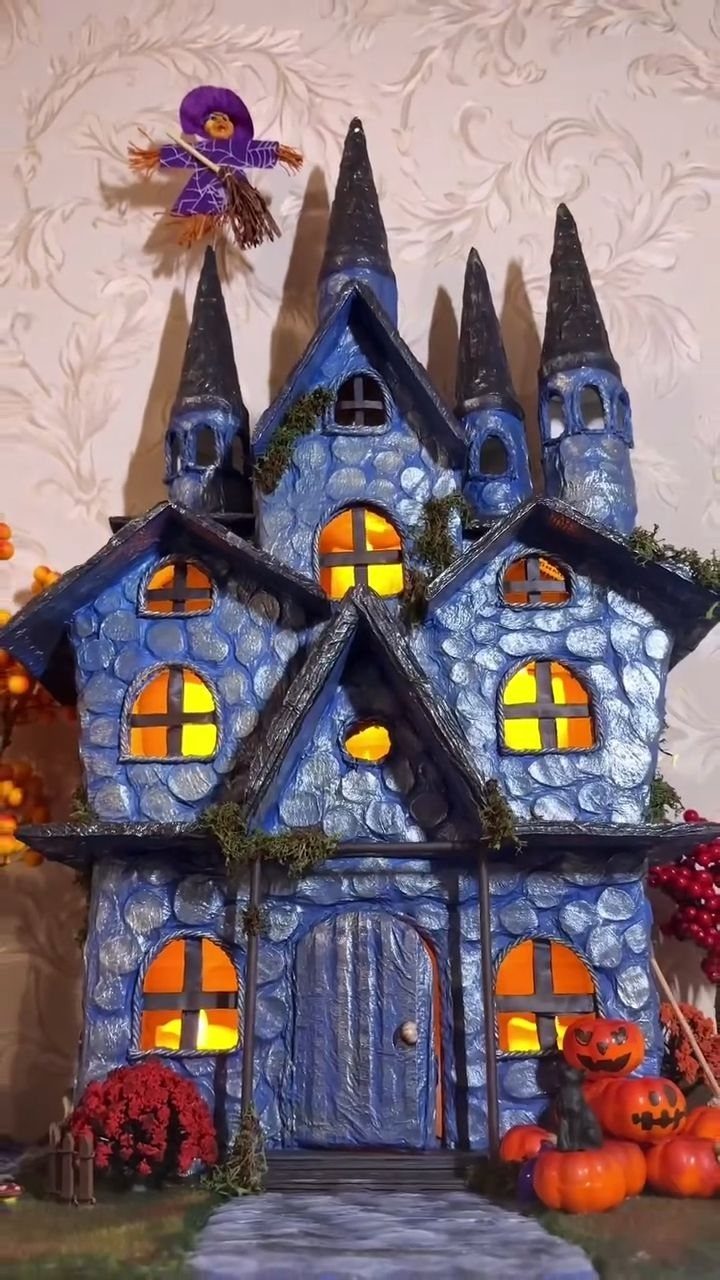
A paper house gets its personality from the windows: cut openings, back them with yellow paper, and the whole thing seems lit from inside.
Build the walls from folded blue paper, then add black spires on top for the haunted silhouette.
The miniature haunted house is the most involved craft on the list, so I would spread it over an afternoon and let an adult handle the cutting.
31. Pumpkin Pop-Up Puppet
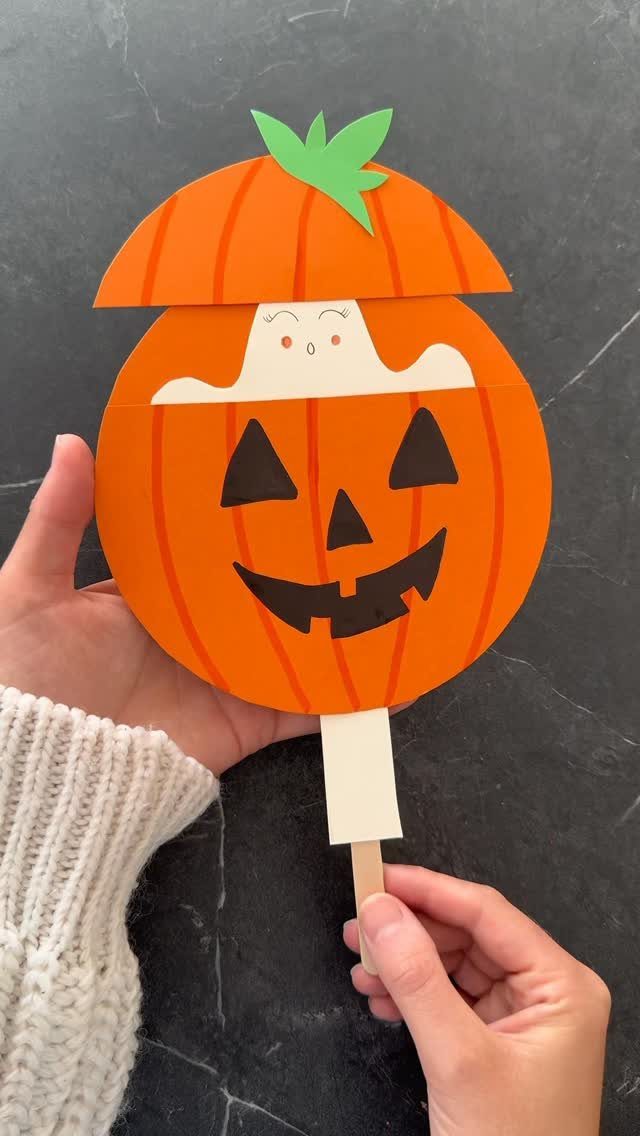
A slit cut across a paper pumpkin lets a small white ghost slide up and peek out, and the craft stick underneath turns the whole thing into a puppet.
Cut the slit wide enough for the ghost to move without catching, then tape or glue the stick to the back of the pumpkin.
Cut the ghost from white paper and attach it to its own stick, so it can pop up and hide again.
A dark background behind the white ghost makes it easy to see, so I would draw the pumpkin’s face in black marker.
Kids will want to make the ghost vanish and reappear, which keeps them busy long after the gluing is done.
Crafting with Kids Safely
Plan the mess before anyone picks up a brush. Cover the table or floor, and check with a child’s parents first if paint, permanent markers or scissors are on the menu and you are hosting other people’s kids.
Match supplies to age. Younger kids get blunt tools and close supervision, and paint and scissors deserve the most watching.
Let go of the Pinterest-perfect result.
Kids tend to love the wonky results most, like a ghost leaning to one side, a pumpkin with 6 eyes, or a spider with bent legs, so I leave the crooked parts alone and let them paint the pumpkin blue if they want to.
The best craft is the one that gets kids giggling, chatting and imagining, not the one that looks best on the refrigerator.
Using Recyclable Materials
Start saving empty toilet paper rolls well before the party, since a pile of them is free and costs nothing to store in a bag.
A handful of empty toilet paper tubes, some paint, markers and scraps of paper is enough for kids to turn the tubes into monsters, jack-o’-lanterns and mummies.
Setting the supplies out in one tray per child keeps the afternoon moving, and the rolls themselves never go in the trash.
Encouraging Creativity
Hand over the decisions. Put out a wide set of colors and let each child pick the palette, the face and the details, even when the choice looks odd to you.
A blue pumpkin or a seventh googly eye is a fine result. Resist the urge to fix it, because the child’s own call is what makes the piece theirs.
Show one finished sample if kids ask for direction, then put it out of sight so they are not copying it.