Costs run from nearly nothing (DIY Ghosts, the Trash Bags Body Bag, a Pallet Skeleton Graveyard built from pallets that are often free) up to projects that need paint, like the DIY Tombstones and Halloween Porch Signs.
Space decides the pick: a bare tree suits the DIY Halloween Bats, a narrow strip along a wall suits the Stacked Wooden Pumpkin Cutouts, and a wide lawn has room for the Giant Spider.
Light does more of the work than craft skill, so a glowing Nighttime Jack-O’-Lantern Patch or a lit DIY Halloween Cauldron can cover for plain construction.
1. Giant Spider Web
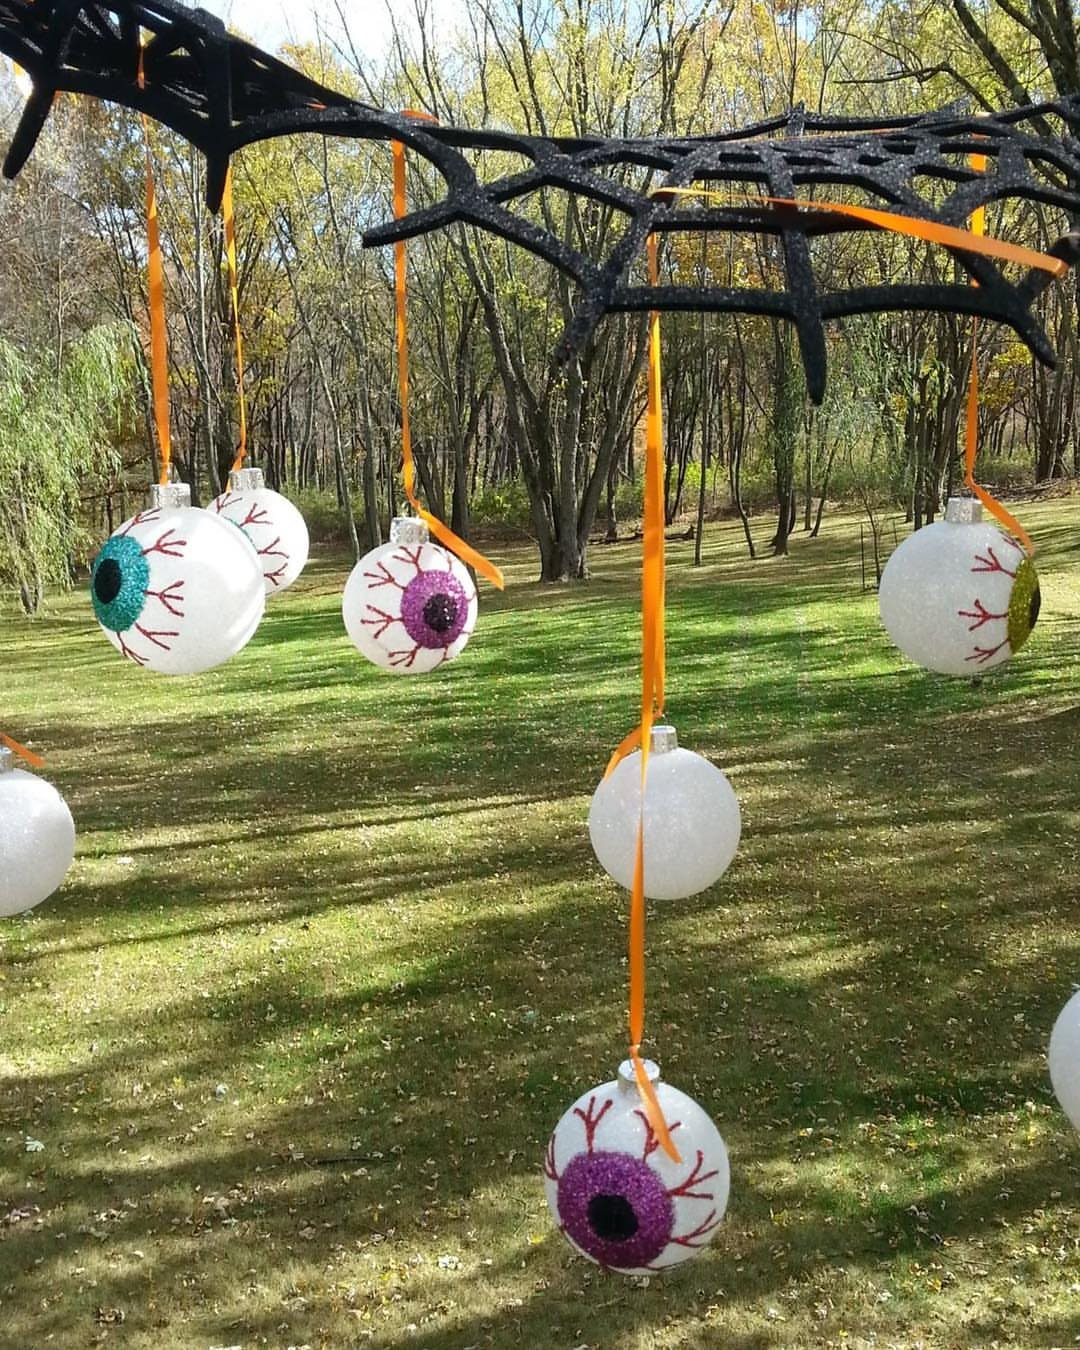
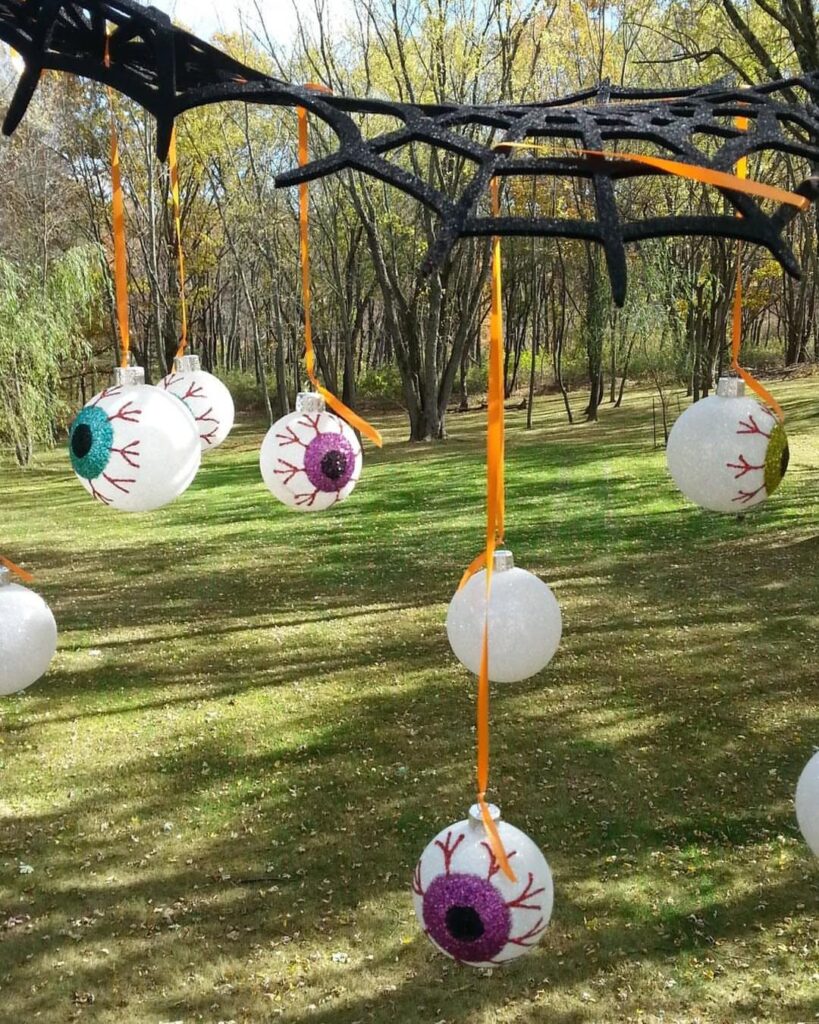
A black glittery web reads from the street because the sparkle catches porch light, which plain black netting never does. Hang it between 2 trees or from a roofline so it stays taut and stands upright.
A web alone reads as a tangle from the street, so hang a few eyeballs from orange ribbon at different lengths; they give the eye a focal point and add a pop of color.
Cut the ribbons at different lengths so the eyes don’t line up in a row.
2. DIY Tombstones
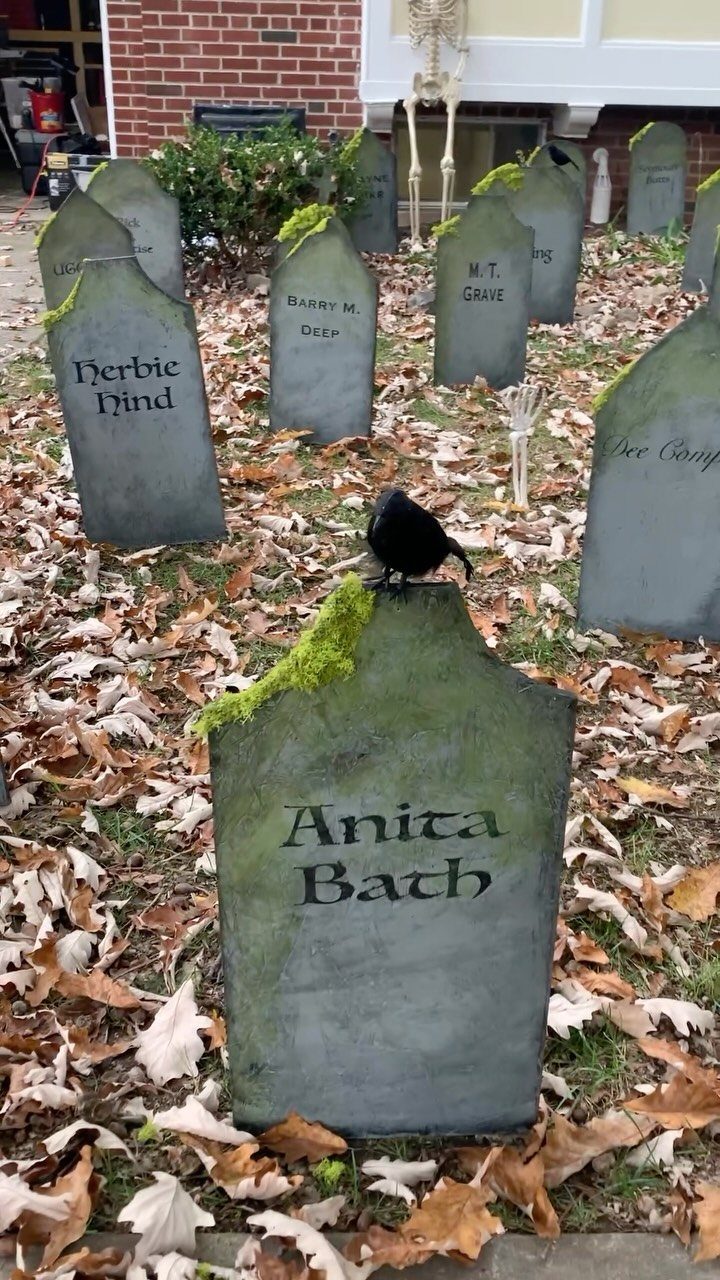
Funny names do more work than carving detail. A pun like "Anita Bath" gets a laugh from every trick-or-treater who reads it, so spend your effort on the lettering rather than on fancy edges.
Grey paint keeps the cost low, and a handful of stones in different heights looks more like a real graveyard than a tidy row. Add a skeleton or a prop bird, and let the fallen leaves do the rest.
3. DIY Outdoor Witches
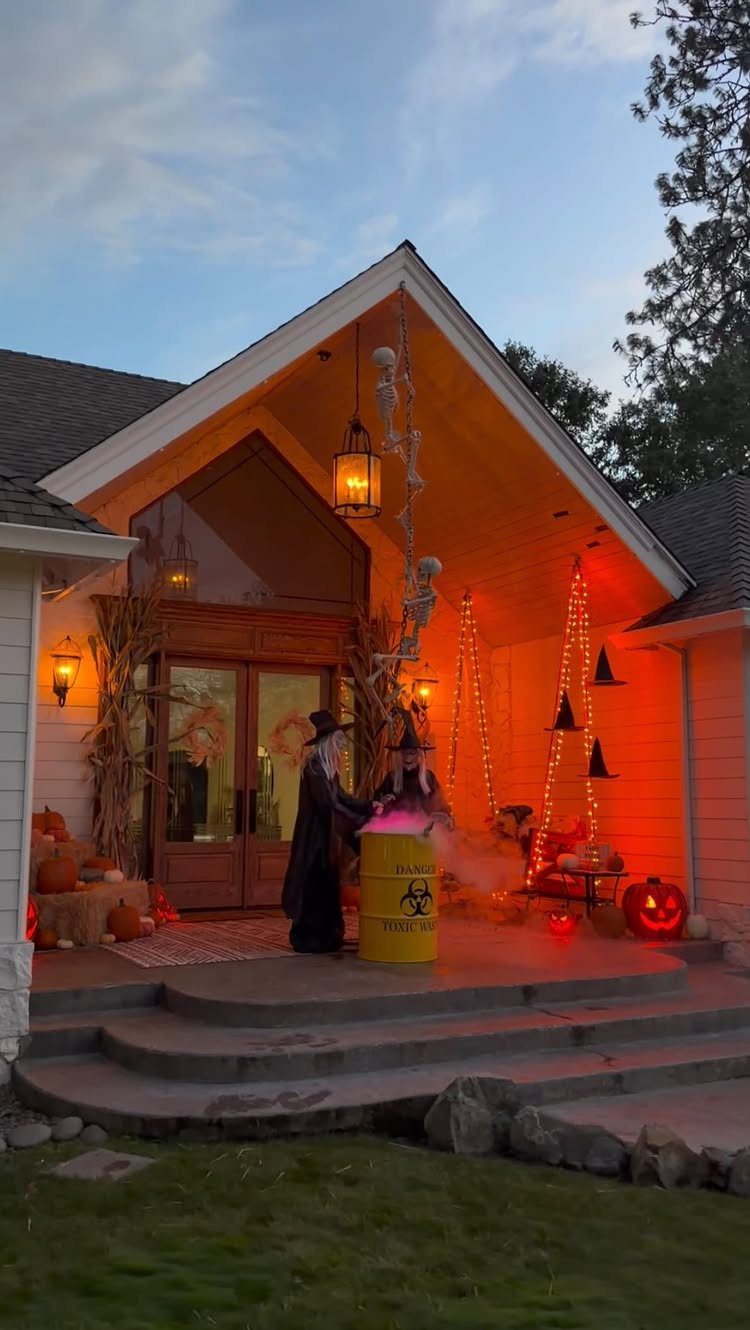
Storage and display can be the same object. The maker of this porch scene used a 55 gallon drum as the "toxic waste" prop, and it also holds most of the decor once the season ends.
I like that approach for anyone short on garage space. Pair 2 witch figures with the barrel, then add fog and orange lights around the base for the glow.
4. DIY Halloween Cauldron
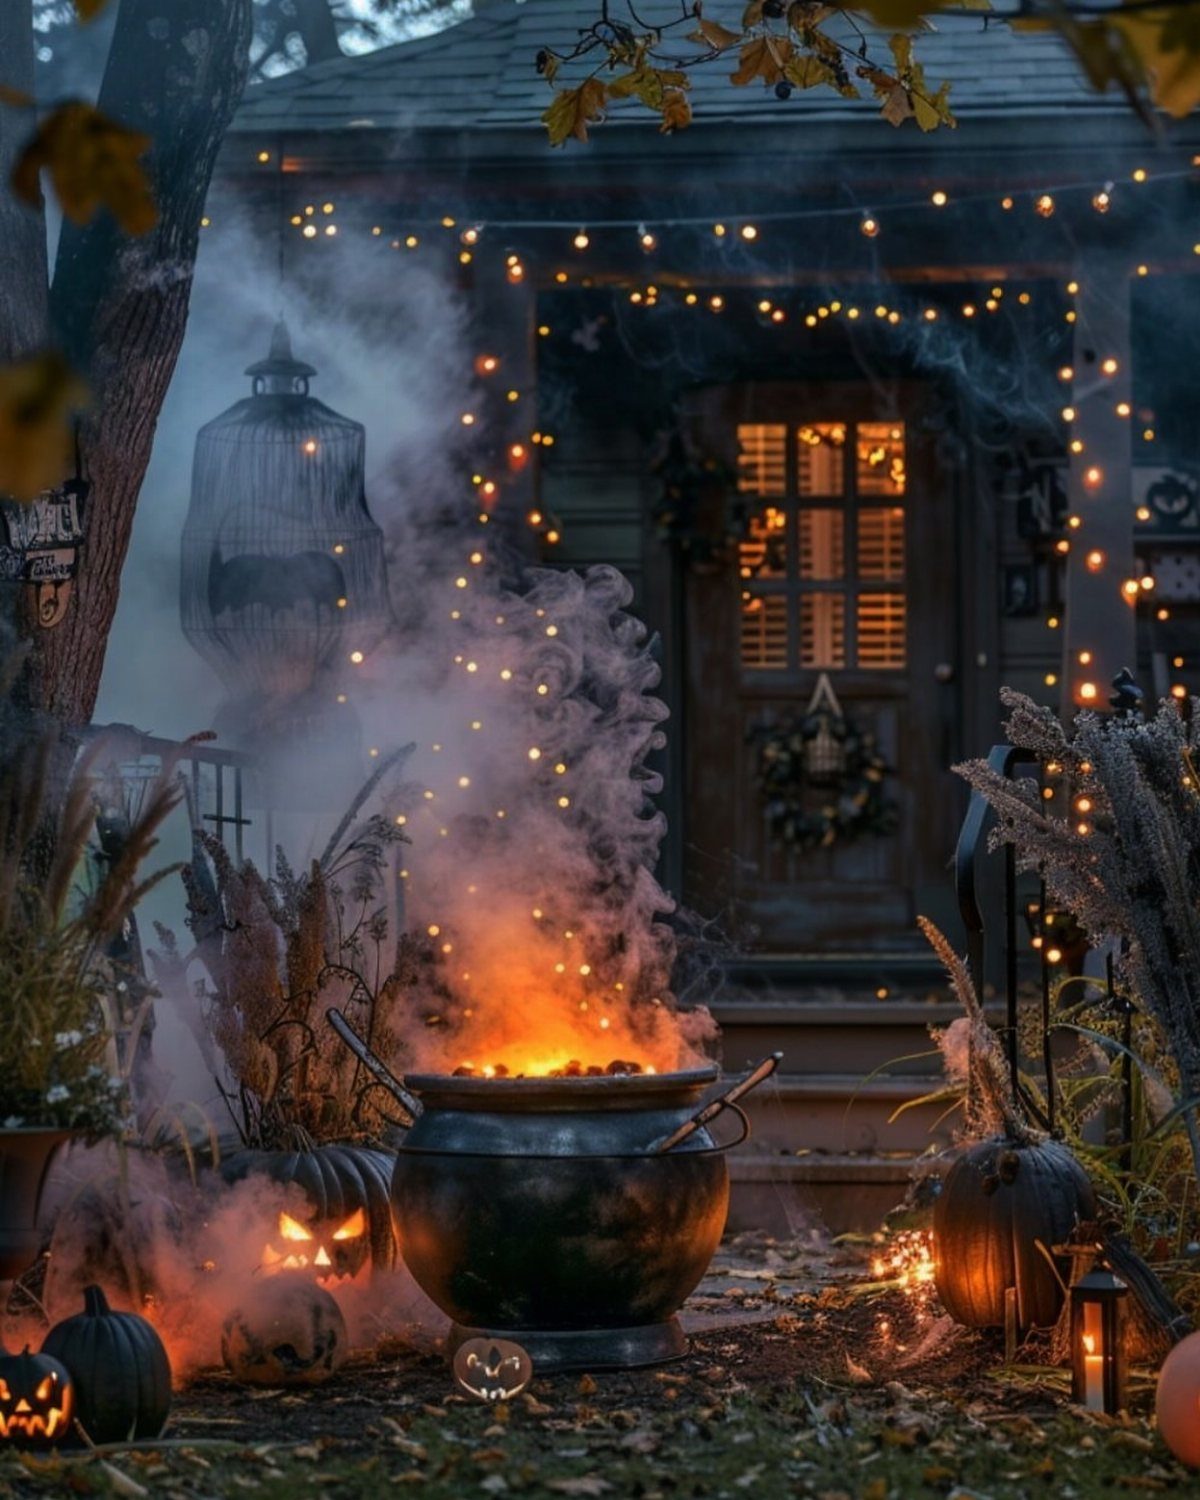
A cauldron is the easiest focal point to build because the effect comes from light and smoke, not from craft skill.
Set a black pot near the porch steps, put an orange light inside, and add smoke or fog for the bubbling look.
Surround it with pumpkins and string lights so it feels like part of the scene instead of a lone prop.
5. DIY Ghosts
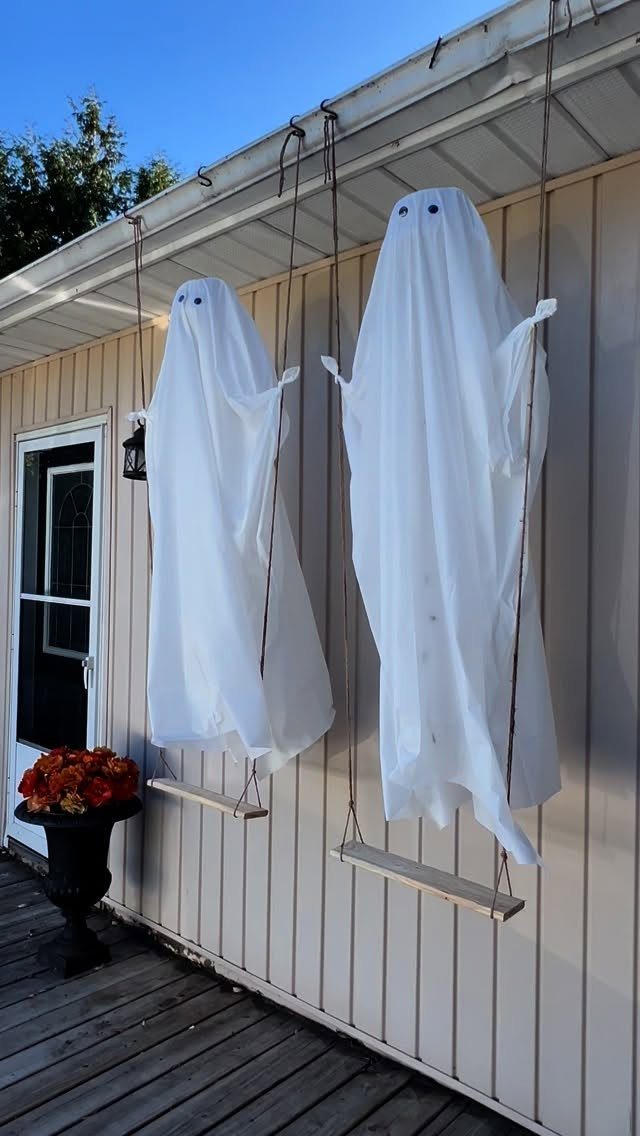
Sheet ghosts cost almost nothing, and setting them on porch swings or chairs gives you a scene without buying a single prop. White fabric, black eyes and something to hang them from is the whole shopping list.
Swings work well because any breeze sets the ghosts swaying, which adds motion for free. I would keep the eyes plain and simple; bigger black ovals read better from the sidewalk than detailed faces.
6. Halloween Porch Signs
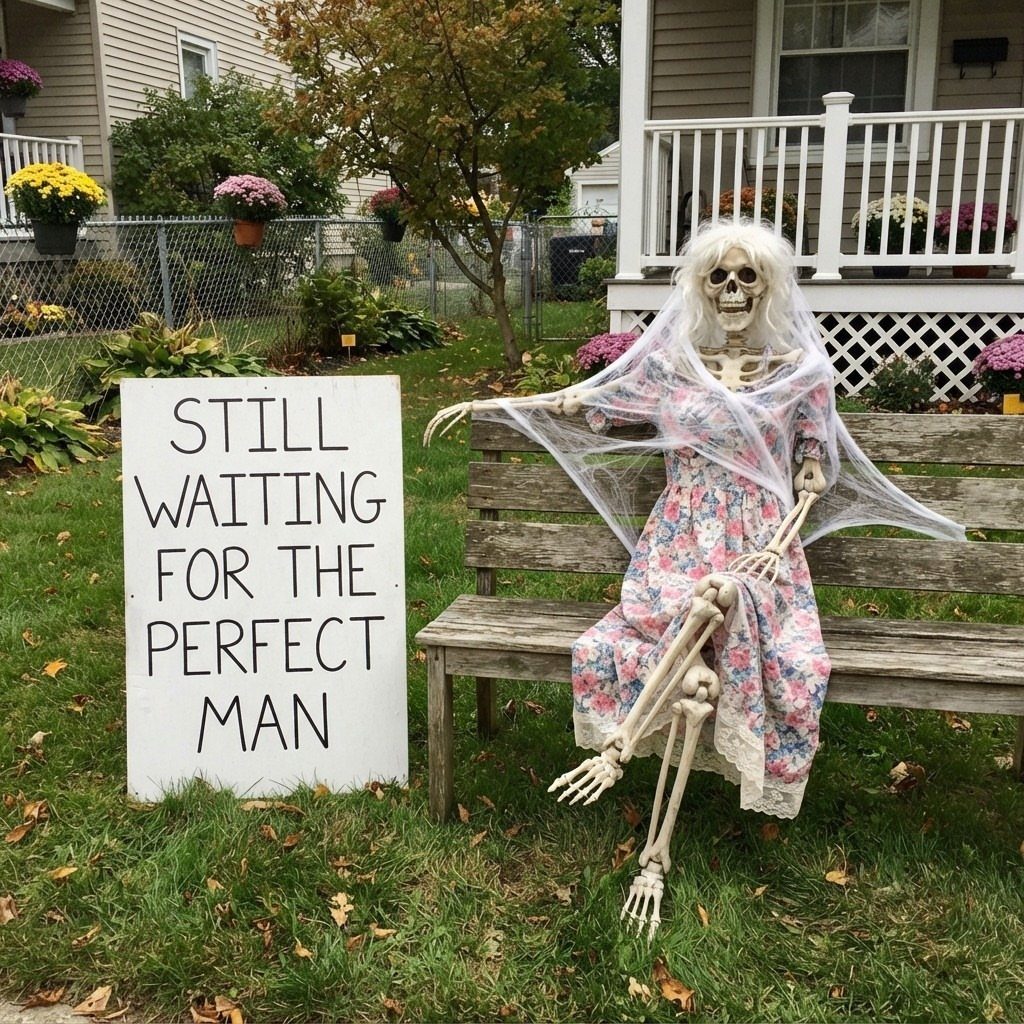
A joke sign beats a generic "Happy Halloween" board every time. "Still waiting for the perfect man" paired with a skeleton bride on a bench gives passersby a story in one glance.
Paint white lettering on a plain board so it stays readable at dusk.
Pick a punchline short enough to read in about 3 seconds, since trick-or-treaters won’t linger. A bench you already own makes the whole setup nearly free.
7. Giant Spider
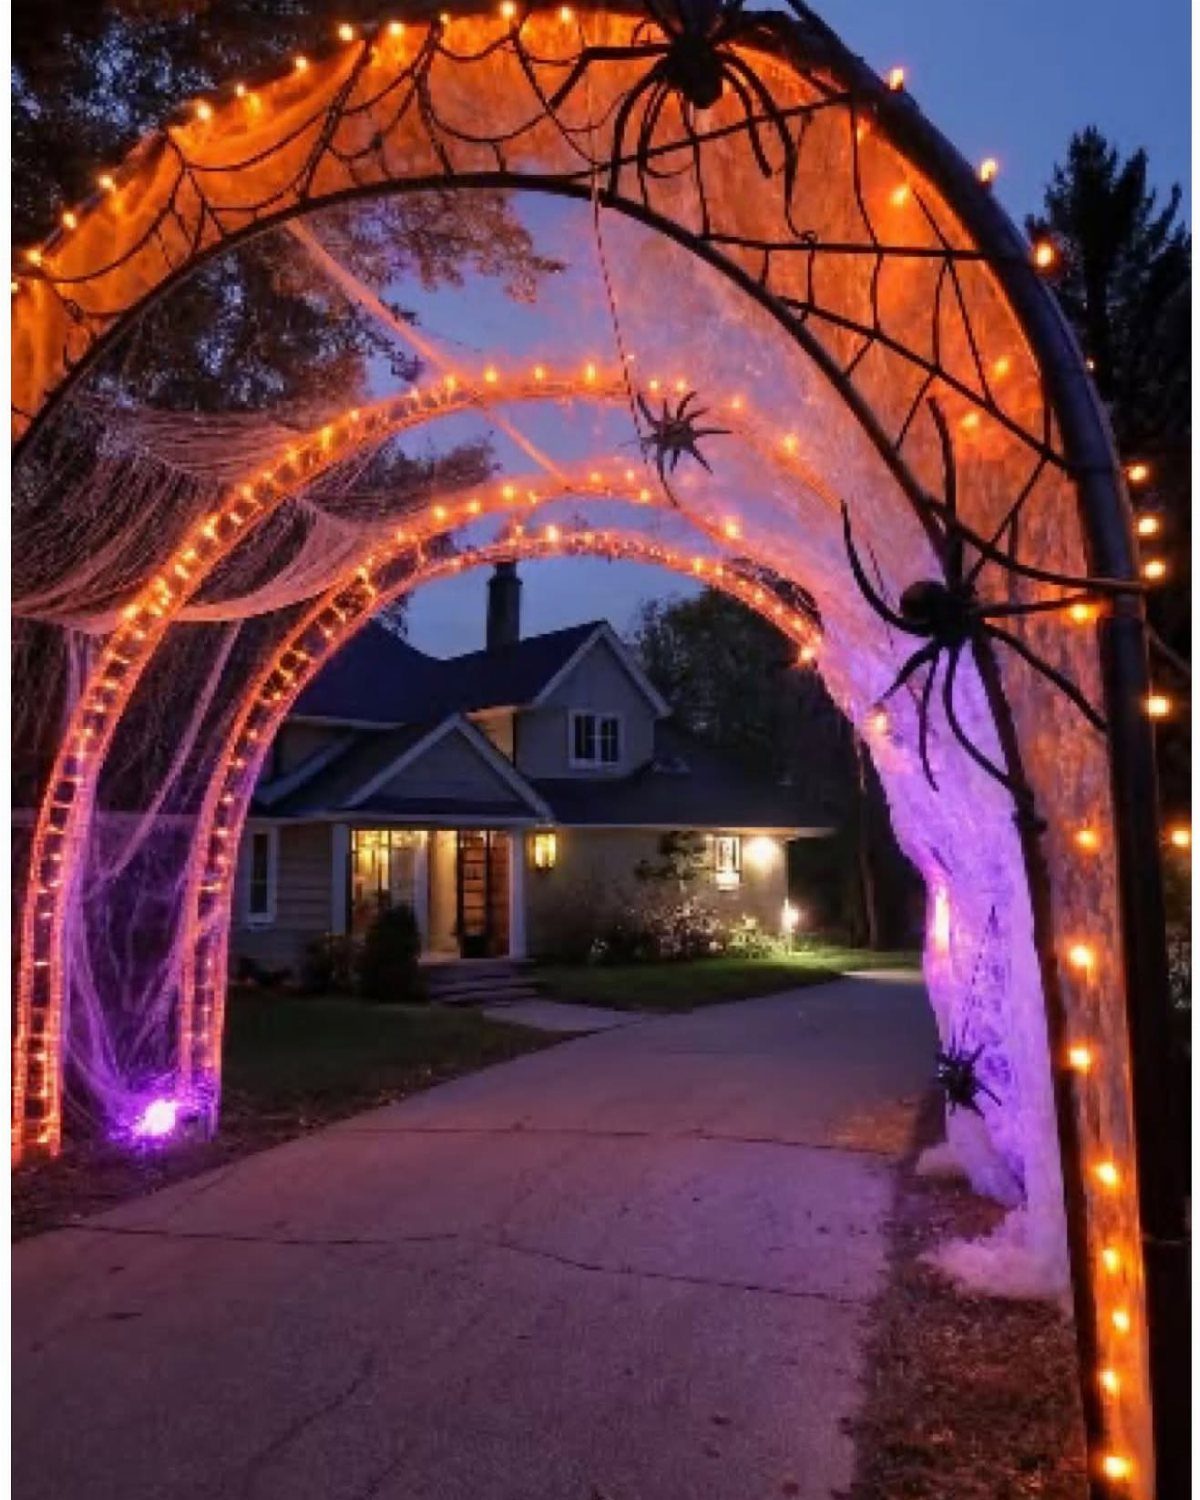
One oversized spider does more than a dozen small ones, because the eye needs a single thing to land on. Put it where the display is widest, with the smaller spiders and webbing leading toward it.
Orange lights wrapped around the frame make the black body stand out after dark. Keep the legs long and splayed; that is what makes a spider read as a spider from the street.
8. Frankenstein DIY Front Door
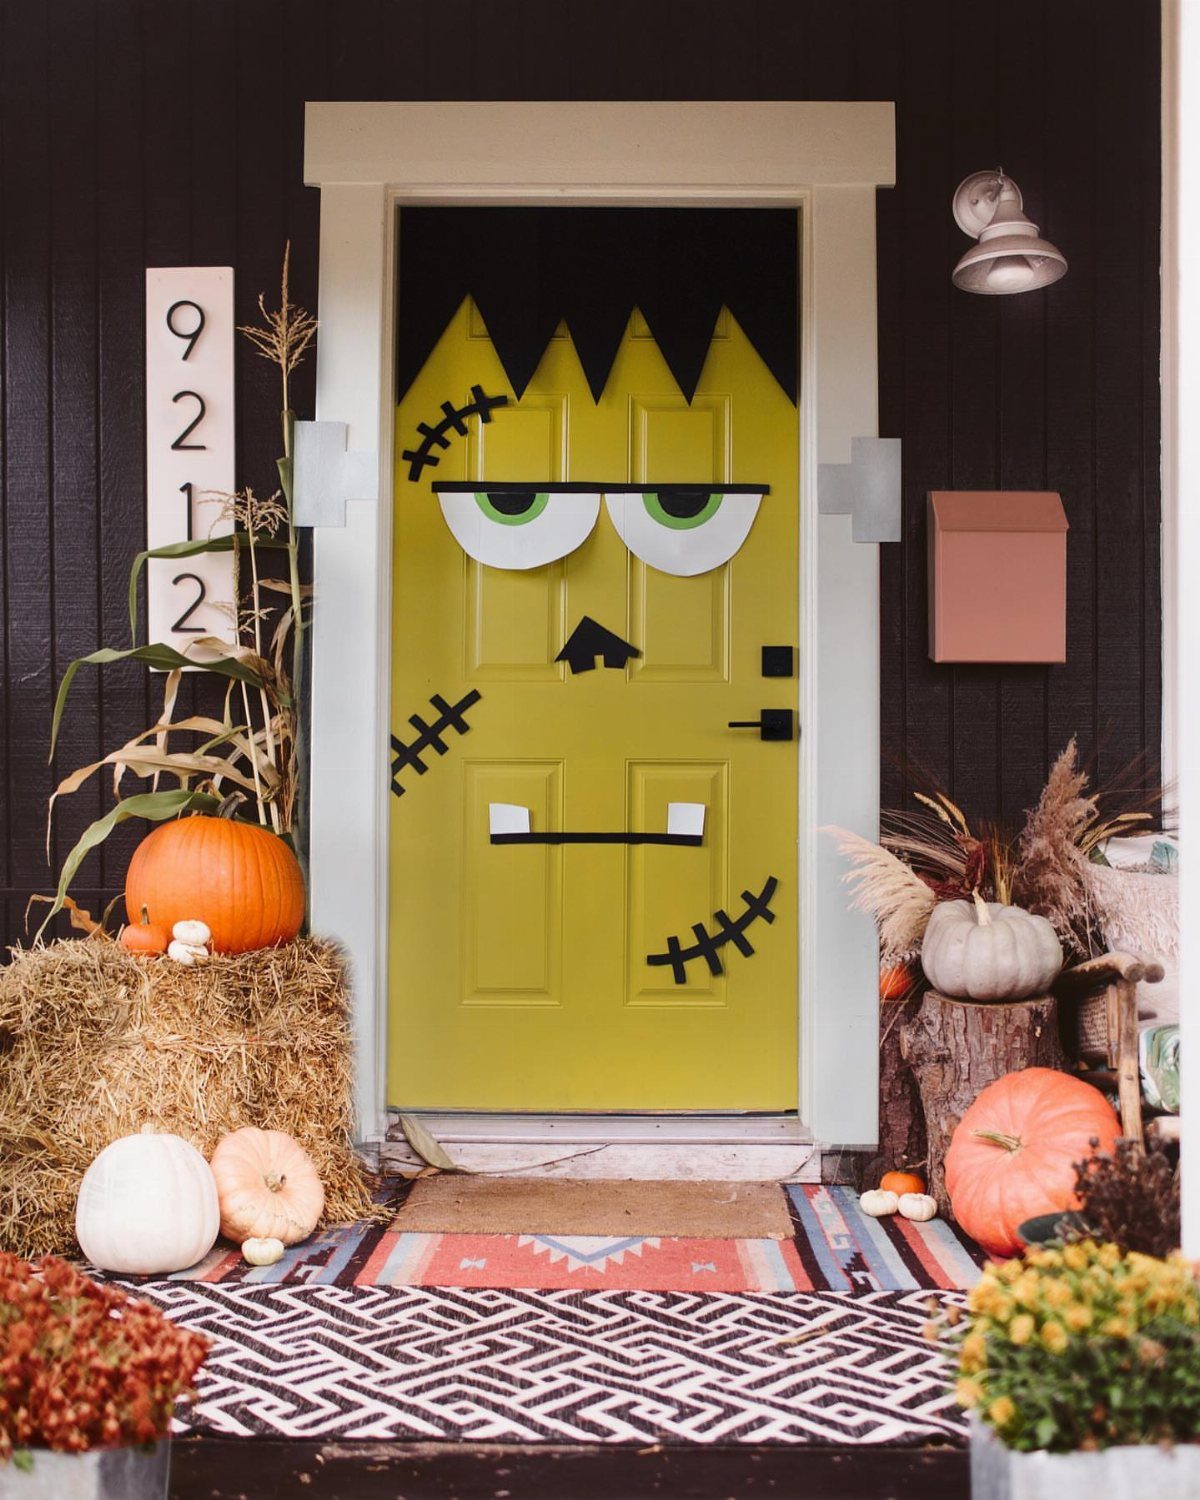
Paint decides everything here: a lime green door with black hair and stitched details turns a plain entry into Frankenstein’s monster without a single new prop.
It’s a good project for a limited budget, since one door and a few paint colors are the whole job.
Pumpkins, hay and autumn plants around the base soften the look and keep it seasonal. Use paint you can remove or repaint if you want the door back to normal in November.
9. Trash Bags Body Bag
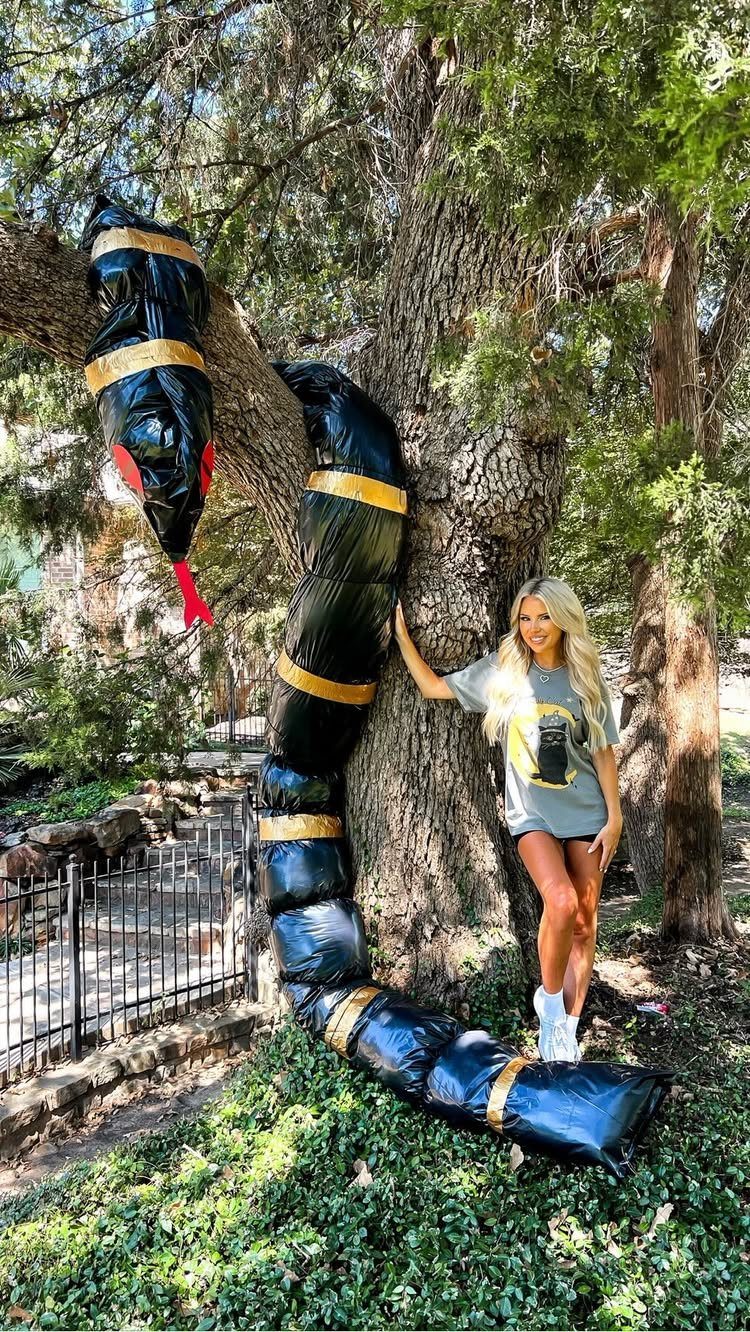
Black trash bags stuffed and wrapped around a tree make a creepy figure for almost nothing. Fill them with crumpled newspaper or leaves, then bind them with yellow caution tape so they read as body bags.
I prefer wrapping them around a trunk, since the tree holds the weight and gives you a spooky shape without a frame. Leave a few bags on the ground below for a scene that looks deliberate.
10. DIY Halloween Bats
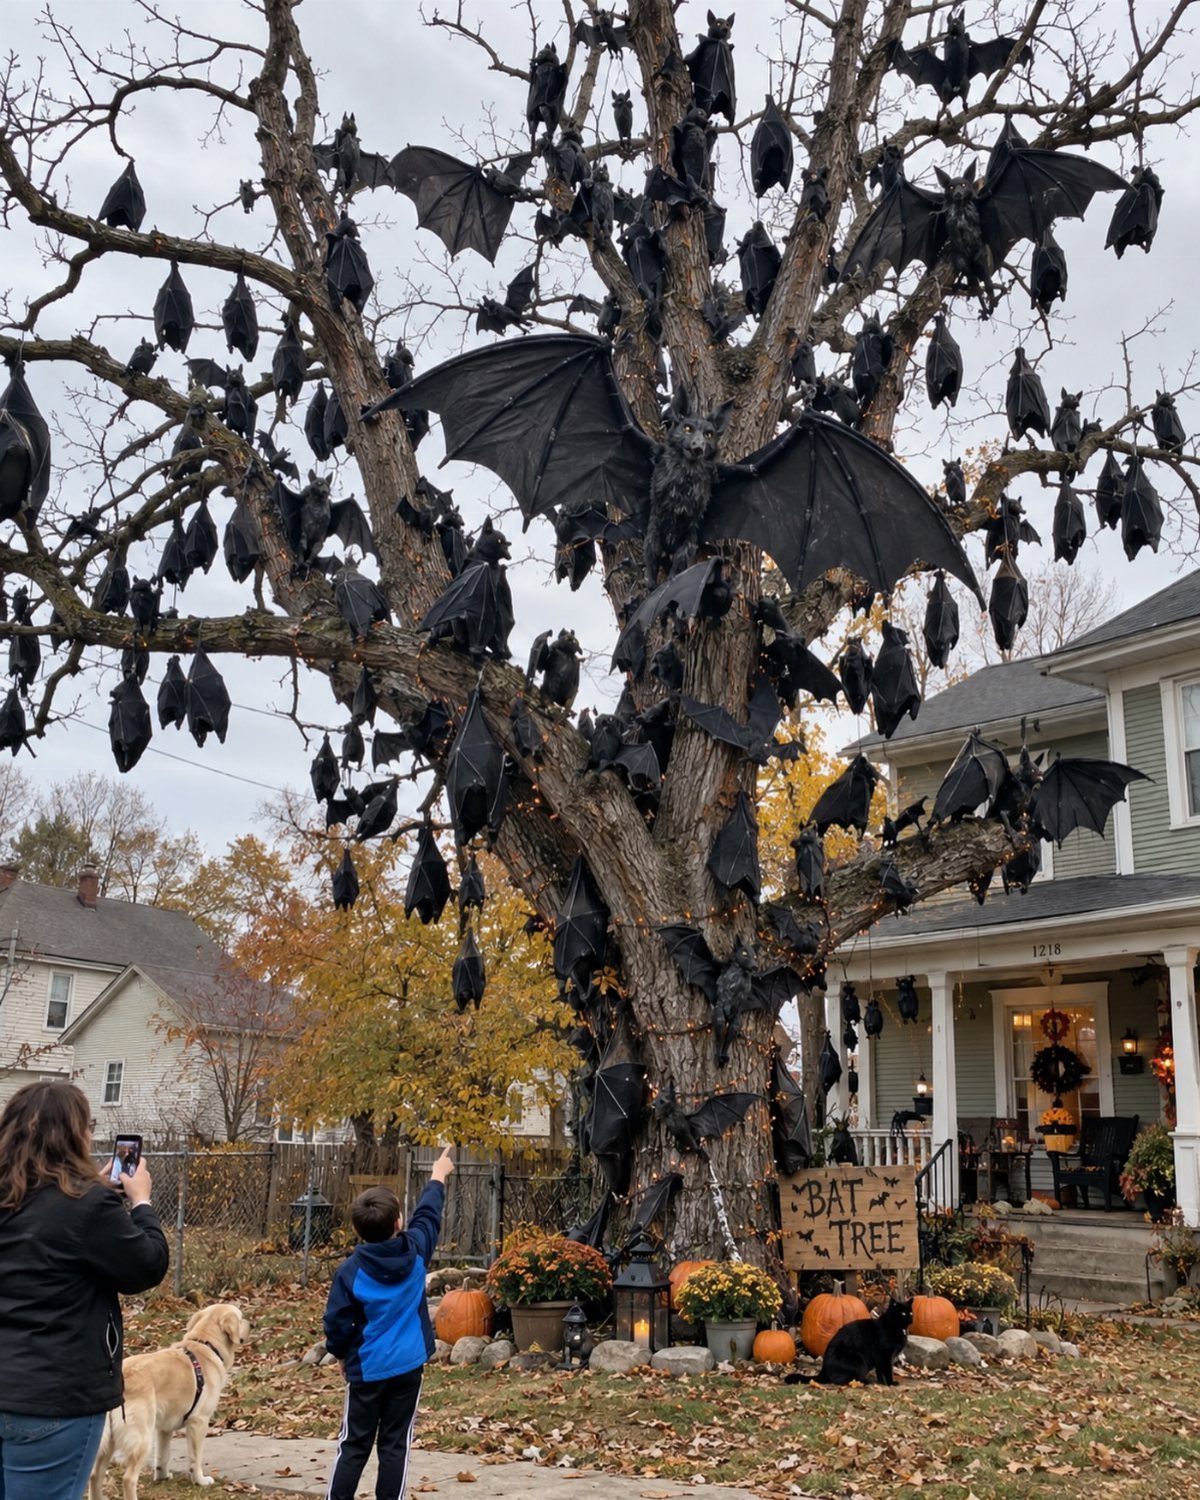
A bare tree full of black bats looks like a colony, and a "BAT TREE" sign gives it a joke that kids will read aloud.
Cut the bats from black paper, cardboard or craft foam in a few sizes, then hang them with string or fishing line.
Quantity matters more than detail, so aim for dozens rather than a handful. Vary the heights so the cluster looks natural, and keep the silhouettes simple.
11. Halloween DIY Doormat
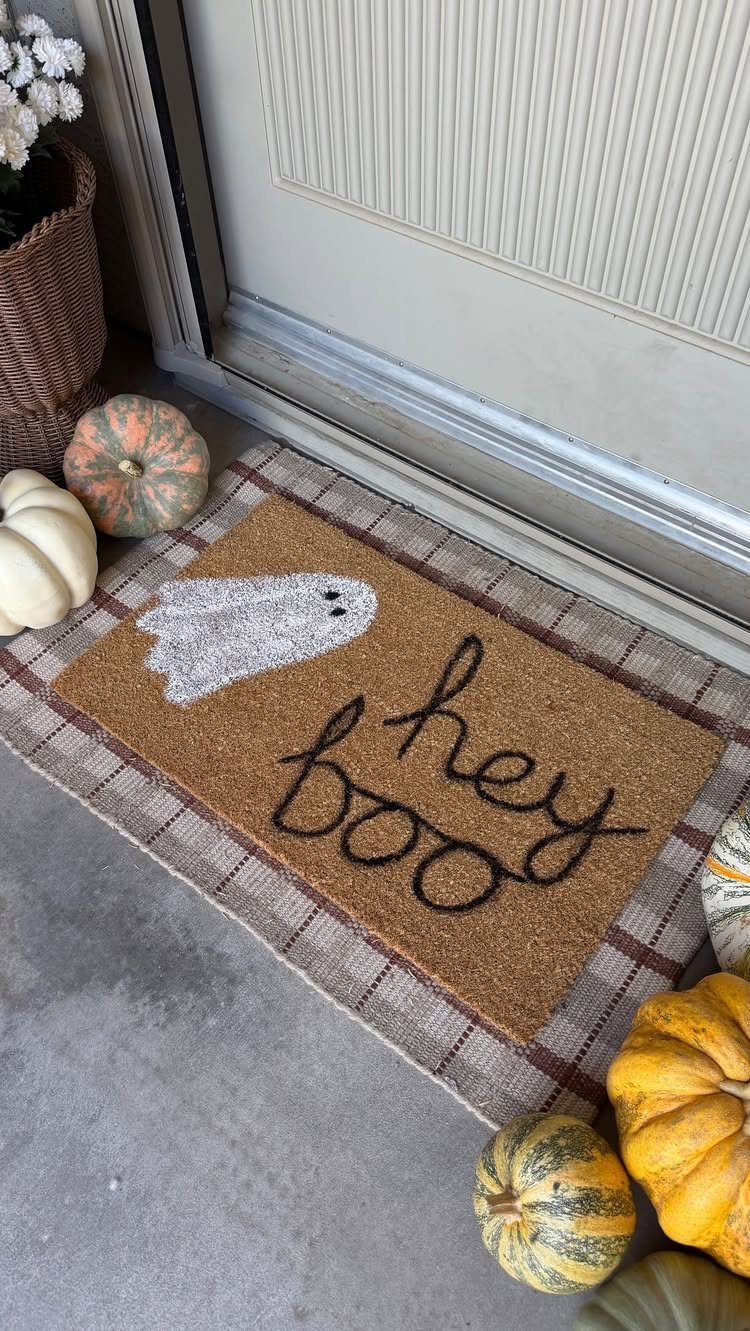
Tape off a simple ghost shape, dab on white paint, and add the lettering with a stencil or a steady hand.
Coir takes paint well but leaves a rough edge, so keep the lines bold and the letters chunky. Set it on a plaid rug with pumpkins around it, and the whole entry feels finished.
12. Eyeball Wreath
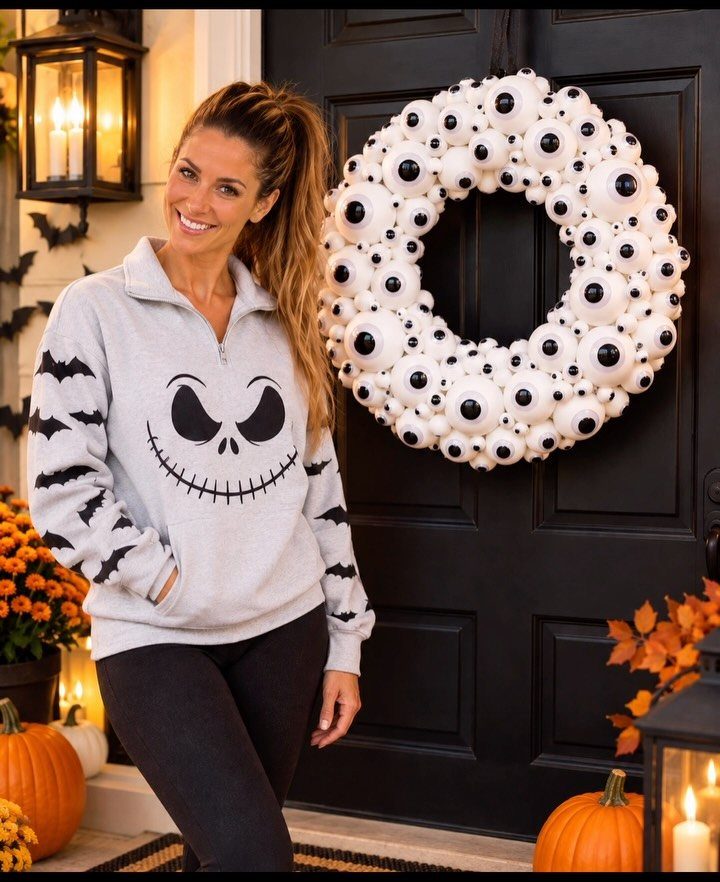
Oversized eyeballs are cheap because the body is just a white balloon or beach ball. Draw the iris and pupil with permanent markers, or cut them from black vinyl for a cleaner edge.
I would mix sizes in one cluster so the wreath looks organic rather than patterned. Beach balls hold their shape longer than balloons, which lose air within days, so choose those if your wreath will hang for weeks.
13. DIY Halloween Silhouettes
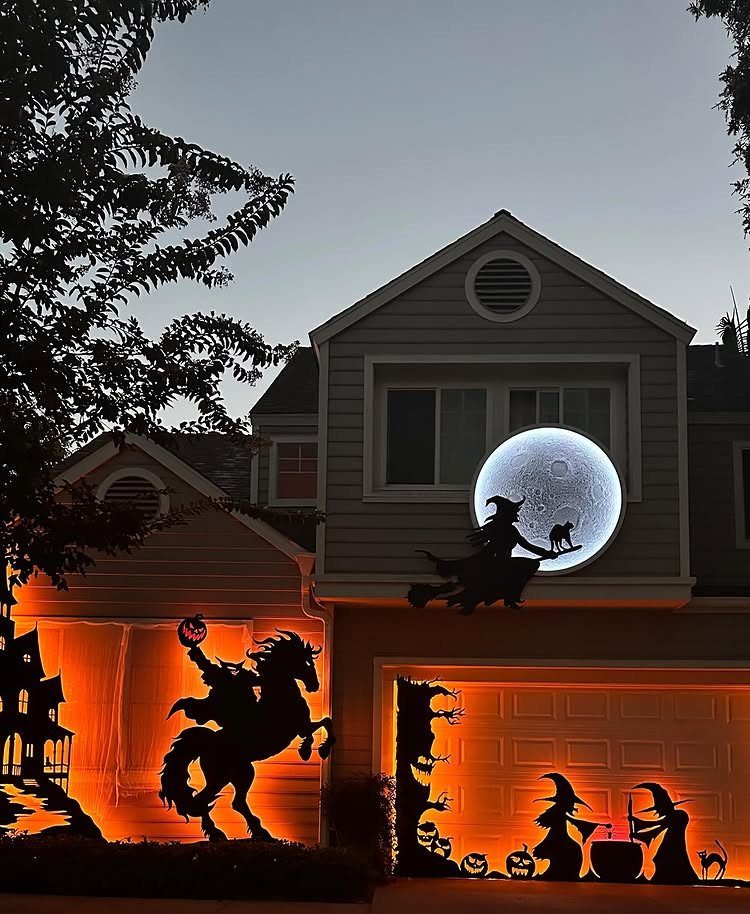
Black shapes on a lit backdrop do the work of a whole display, because a silhouette needs no detail to be recognized.
Pick figures with a clear outline, like a witch’s hat and broom, a cat with an arched back, or a rider with a horse.
Cut them from black cardboard or plywood, then mount them against a pale wall with orange light behind or beside them. A round moon shape in the corner finishes the scene.
14. Eyeballs in Yard Bushes
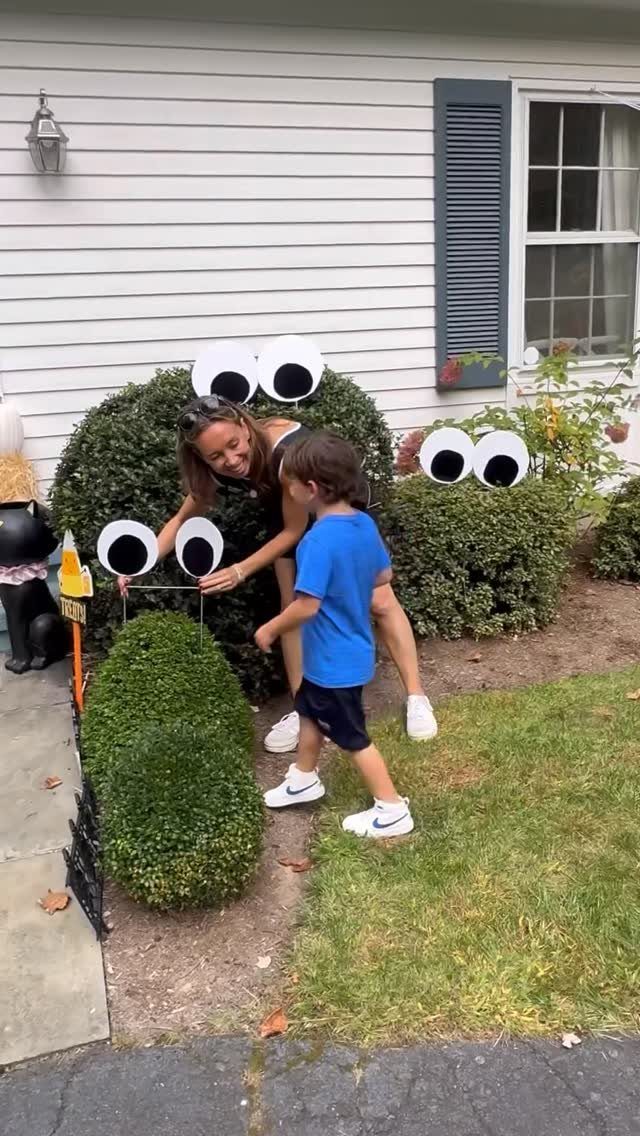
Bushes make the cheapest monster you can build, since the foliage is already the body. Tuck pairs of large white eyes deep into the leaves, and the hedge starts watching the sidewalk.
Cut the eyes from white foam board or plastic, then paint on big black pupils.
Keep the cartoon style bold rather than realistic. A "Trick or Treat" sign nearby gives the joke a destination, and this is an easy job to hand a kid.
15. Pallet Skeleton Graveyard
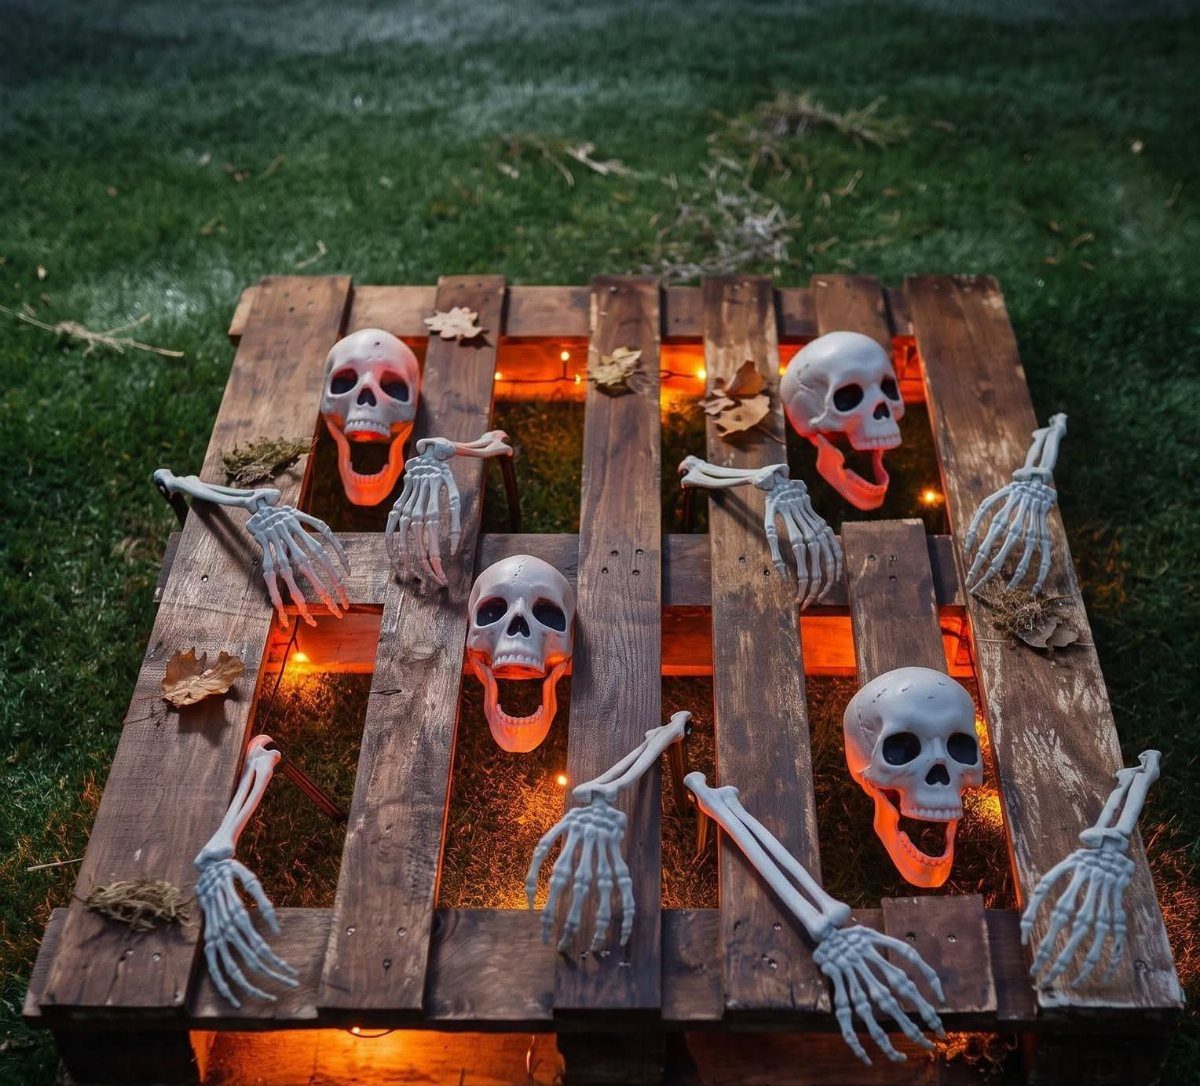
A wooden pallet already looks like a grave cover, so the job is mostly pushing things through the gaps. Stand the pallet flat on the lawn, then poke plastic skulls and skeletal hands up through the slats.
I would put warm orange lights underneath, so the glow rises through the gaps and lights the bones from below.
Pallets are often free, which keeps the whole build cheap. Cluster the hands unevenly rather than spacing them out.
16. Crashed UFO Alien Scene
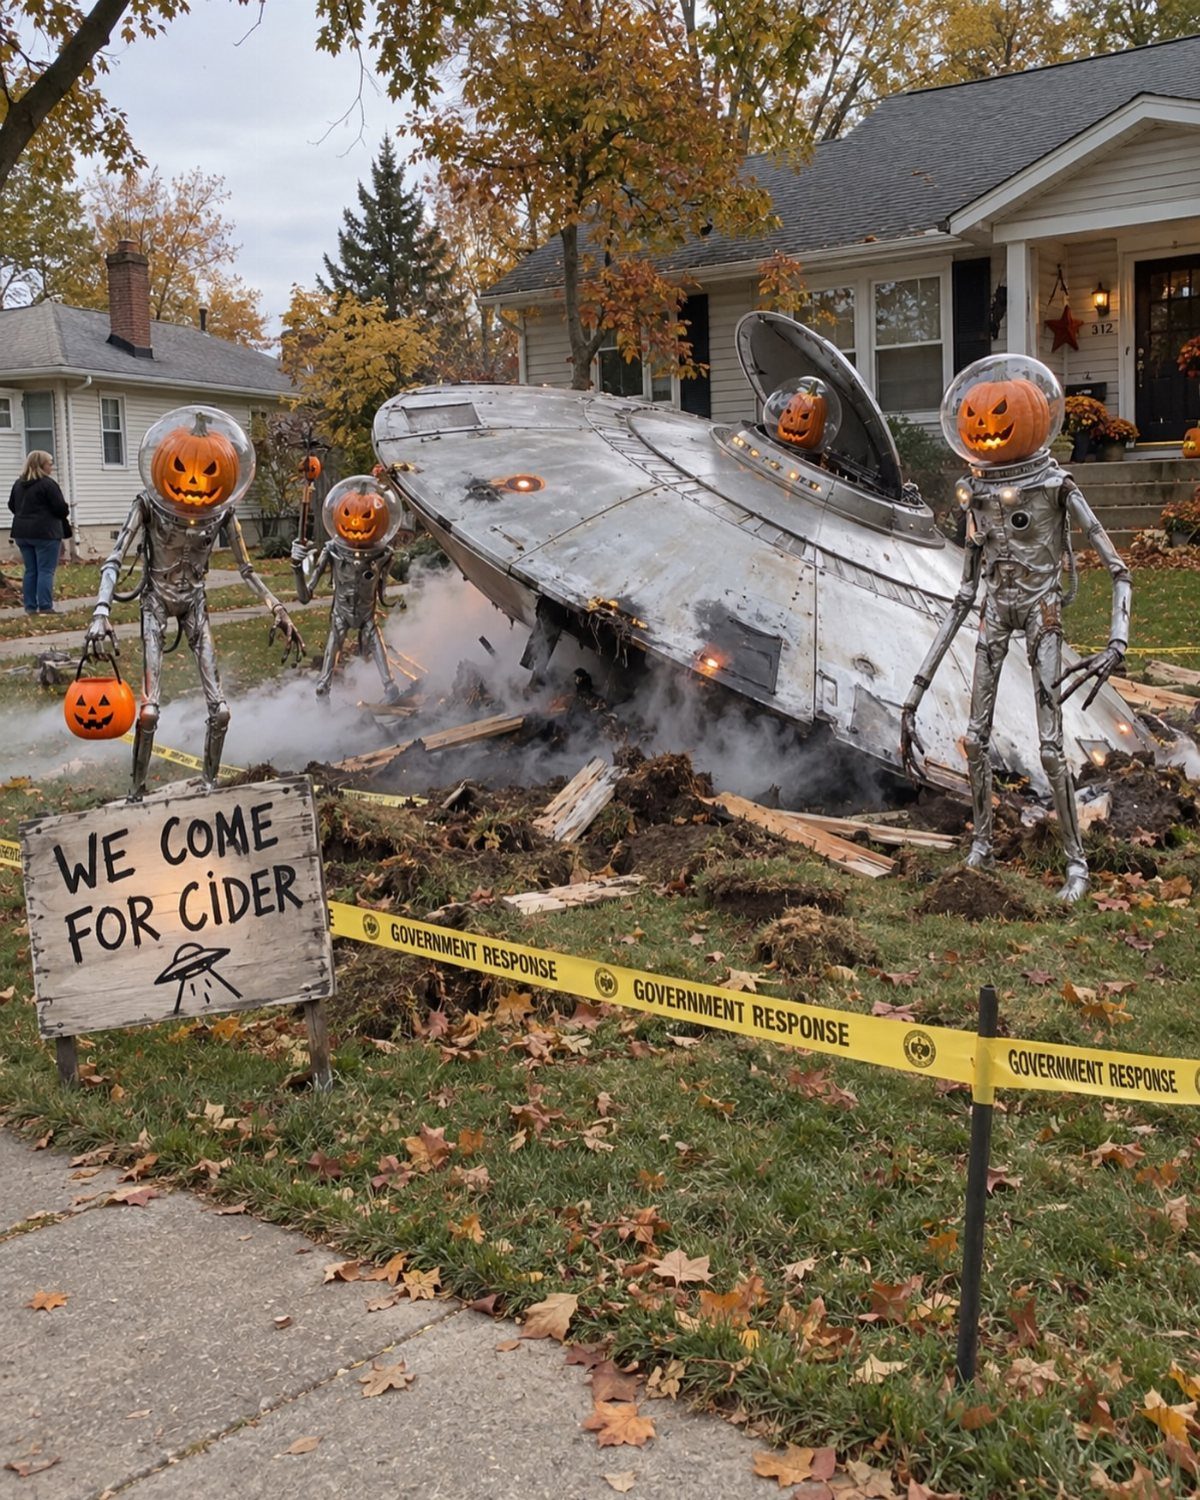
Humor sells this scene more than the spacecraft does. A pumpkin-headed alien that wants cider is a better joke than any glowing saucer, and kids will read the sign aloud.
Build the UFO from silver-painted bowls or a pair of large lids, then tilt it so it looks crashed.
Wrap yellow caution tape around the site. Pumpkins for heads cost little, and a short, punny sign keeps the story simple.
17. Pumpkin Pathway Archway
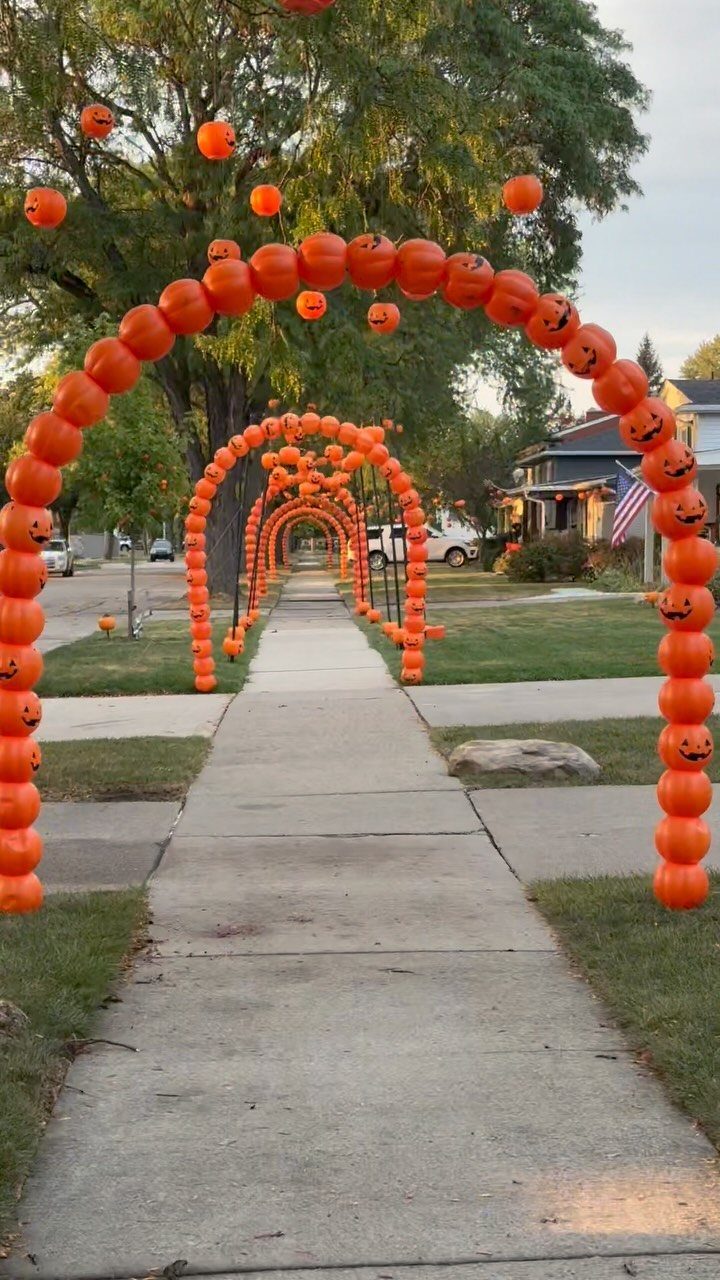
Orange pumpkin-shaped balloon arches turn a plain sidewalk into an entrance, with the guests walking through the display instead of past it. Space the arches evenly along the walkway so they lead toward the front door.
Balloons are the cheap route, but they are the least durable, so I would stake or weight each arch down in case of wind. Build them a day ahead and keep them away from sharp edges.
18. DIY Eyeballs on Stakes
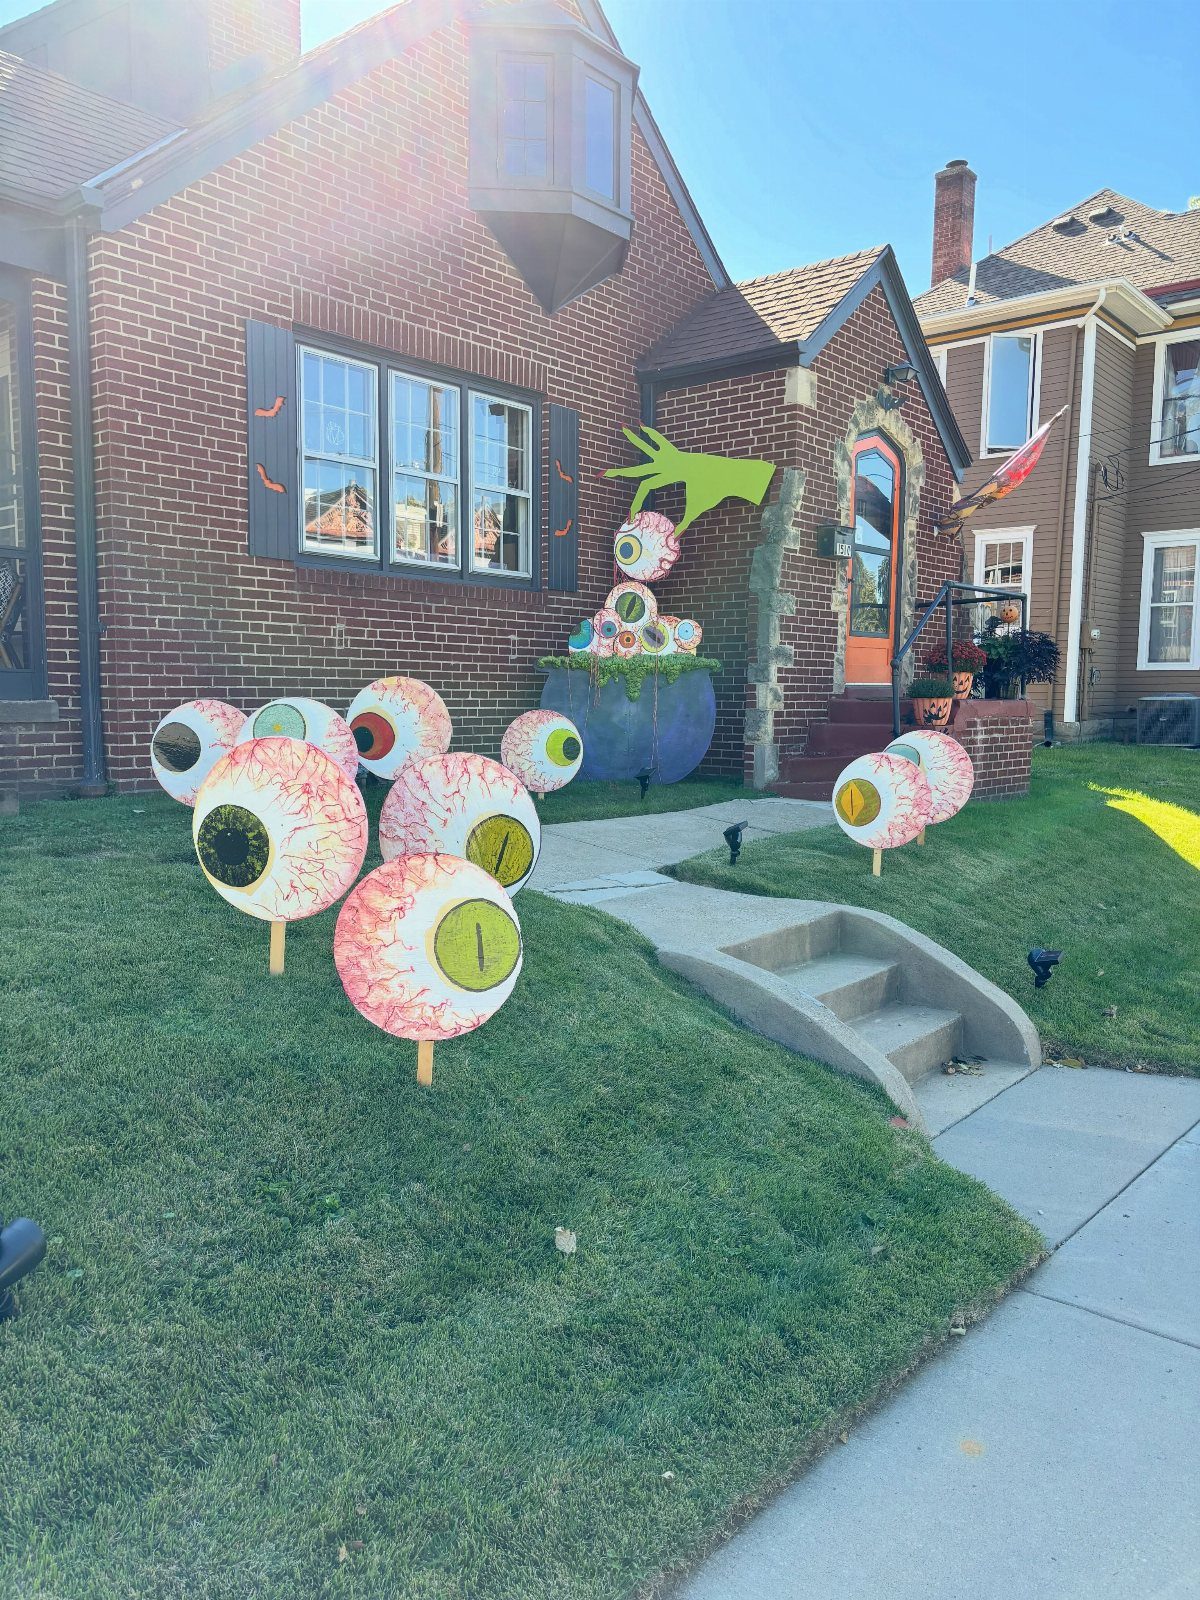
Oversized eyeballs on sticks are quick to make and fill empty lawn fast. Paint or wrap large spheres in white, add bright irises in a few colors, then push the stakes into the grass at different heights.
Colorful irises read as friendly, which suits a family yard.
Tuck a few into porch planters too, so the eyes sit at several levels. A group reads as a crowd rather than a stray prop.
19. Wooden Yard Stakes
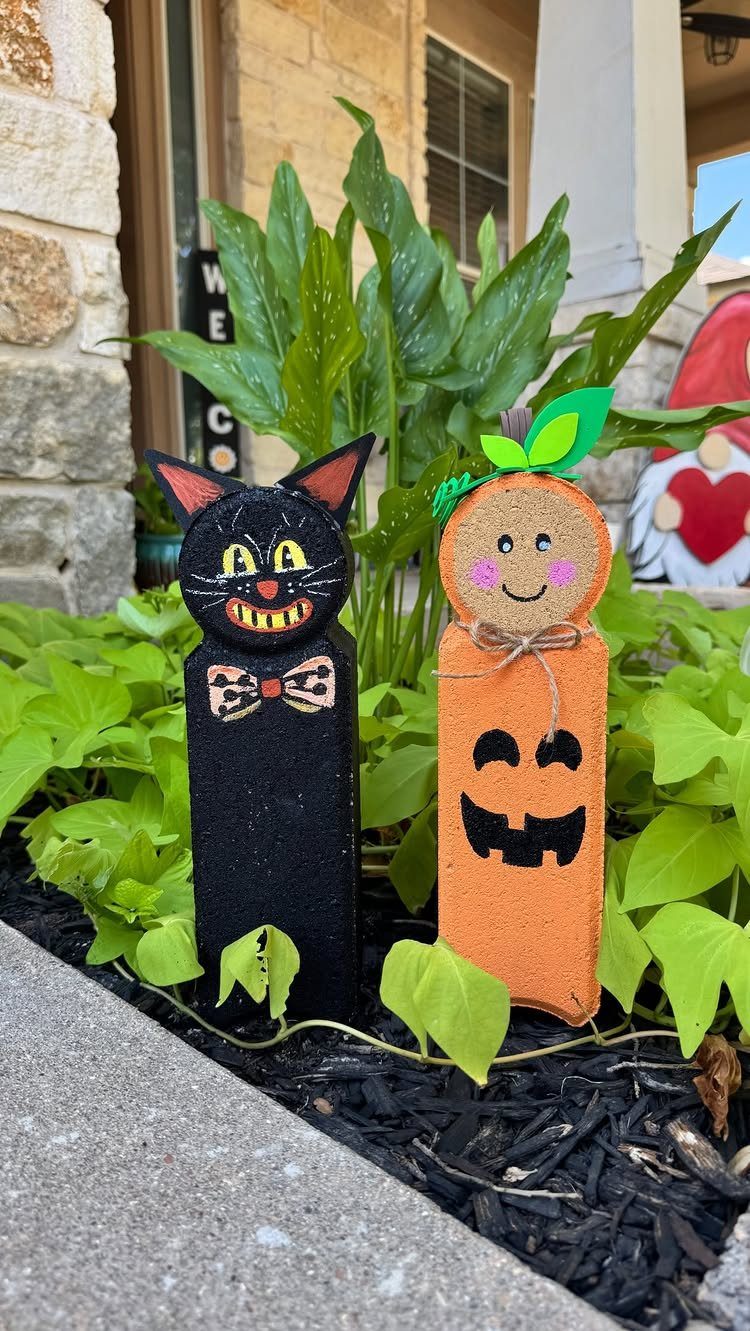
Flat painted shapes in a garden bed take an afternoon and a few paint colors. A black cat and an orange pumpkin are the easiest pair, since each reads from its outline alone.
The maker called them 2 new friends for the garden, and that is the right scale: a pair tucked into mulch beside green plants, not a crowd.
Push the stakes in at slightly different heights so they look placed rather than lined up.
Black against orange gives the best contrast, so keep the detail minimal.
20. Ground-Breaker Skeleton Lawn Display
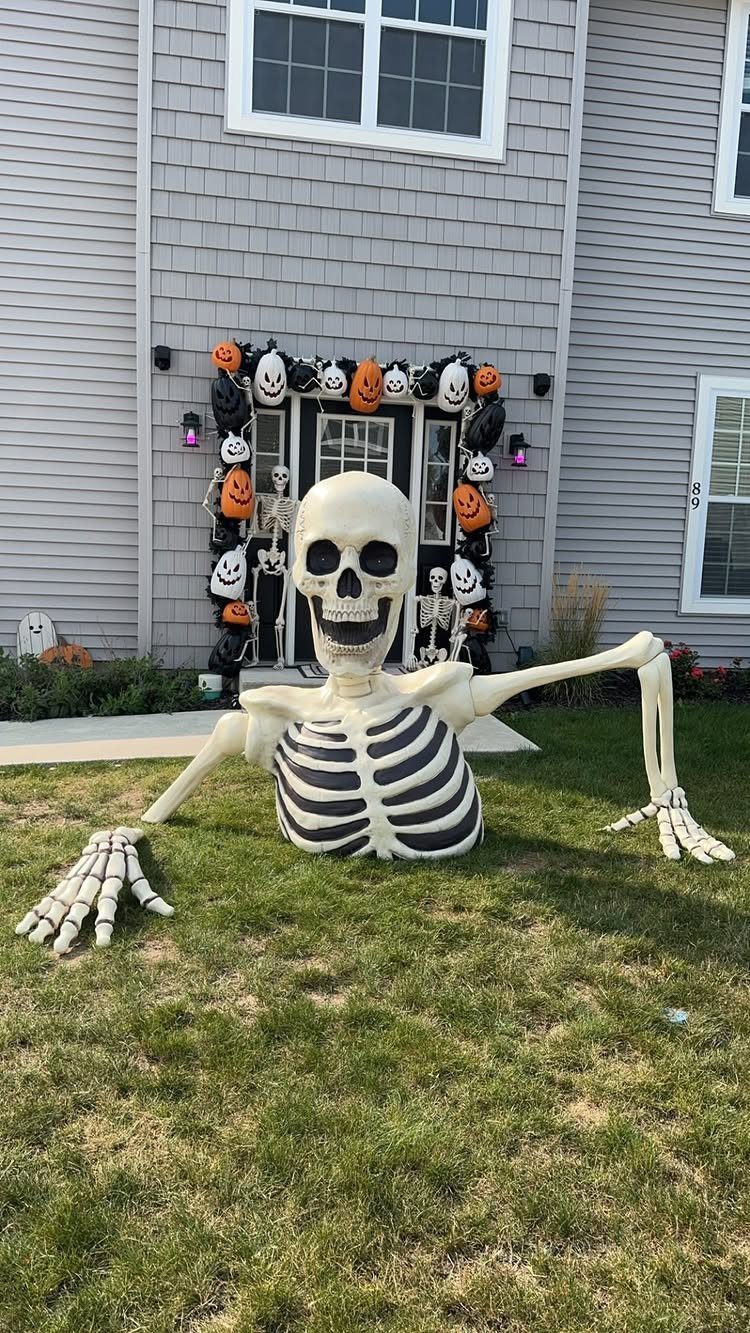
A skeleton climbing out of the lawn gets the whole yard talking, because the torso and arms are the only parts you ever see.
Burying the rest of the body is the joke, and it saves you from buying a full figure.
Set it in front of the porch, where pumpkins and other skeletons already sit, so it joins a scene. Arms reaching forward look more purposeful than arms hanging at its sides.
21. Stacked Wooden Pumpkin Cutouts
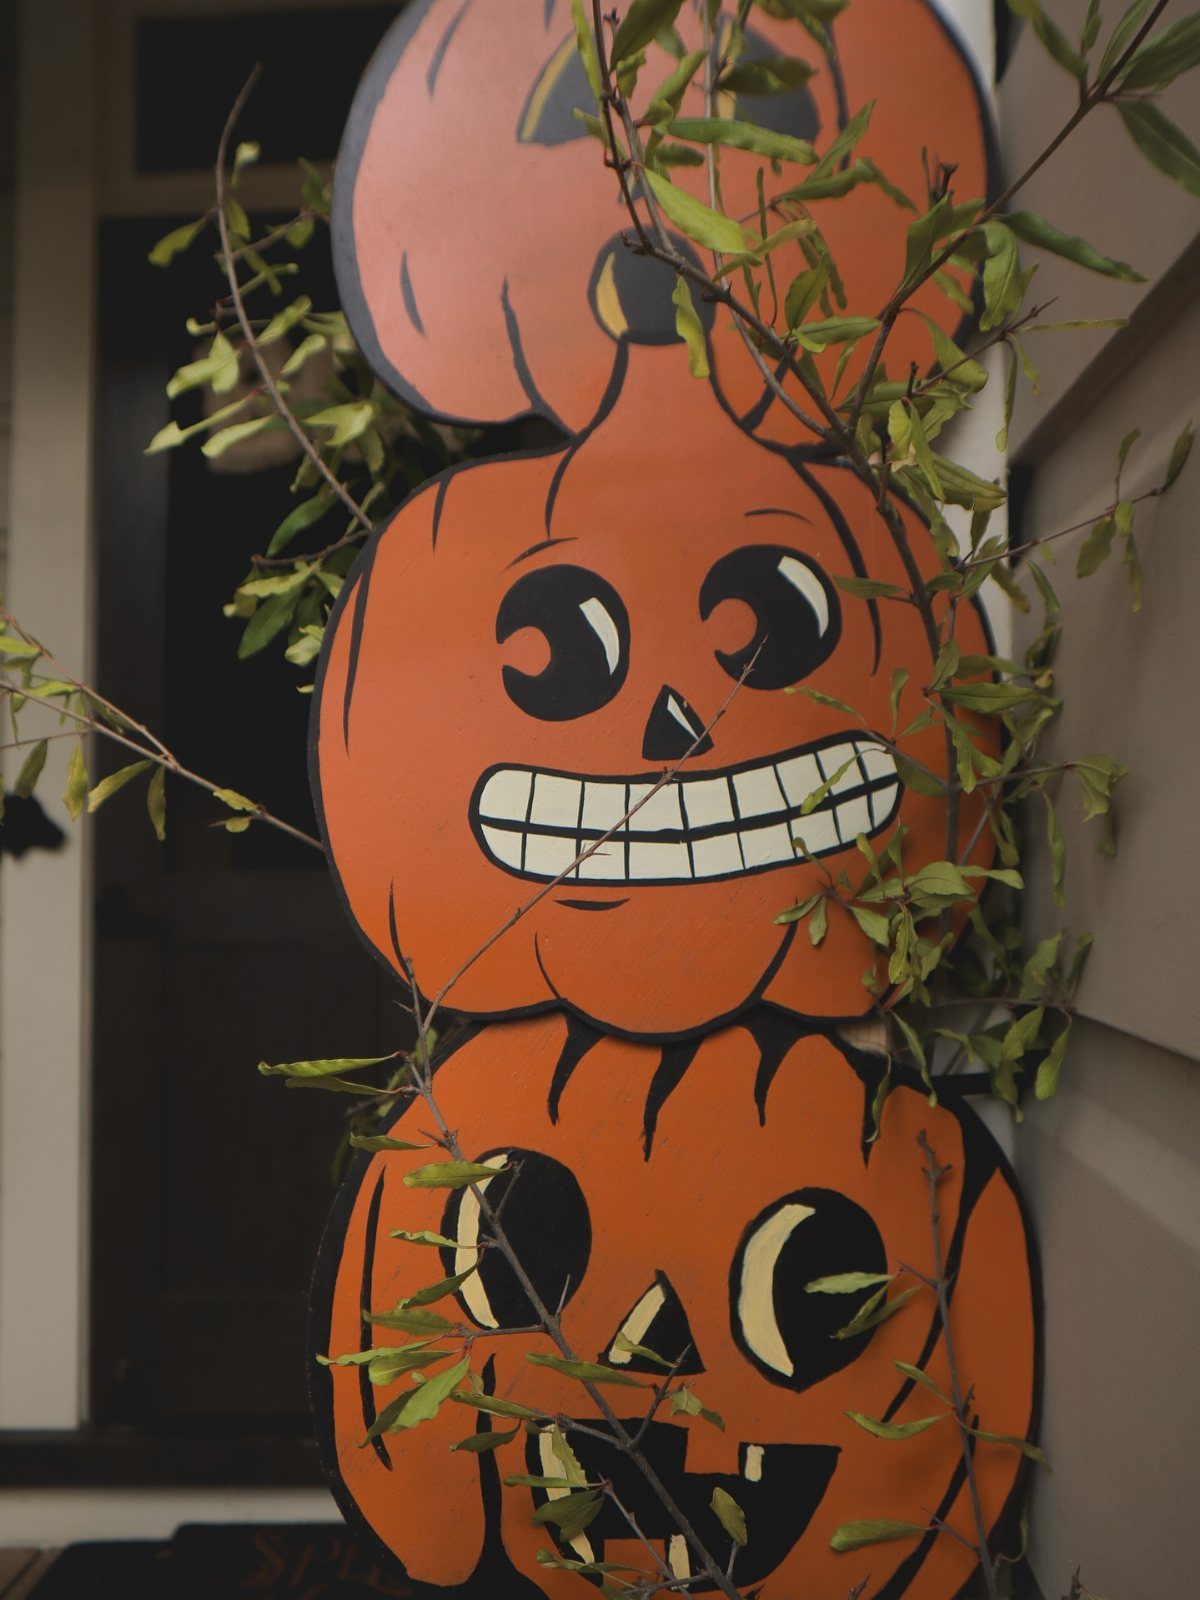
3 orange pumpkins stacked straight up make a tall, friendly totem that fits a narrow strip beside a wall. Painted smiling faces keep the mood cheerful, and I would vary the expressions slightly so the stack has personality.
Lean the cutouts against a wall or fence so they stay upright. Leafy branches in front soften the edges, and they cost nothing if your garden already has them.
22. Hay Bale and Pumpkin Vignette
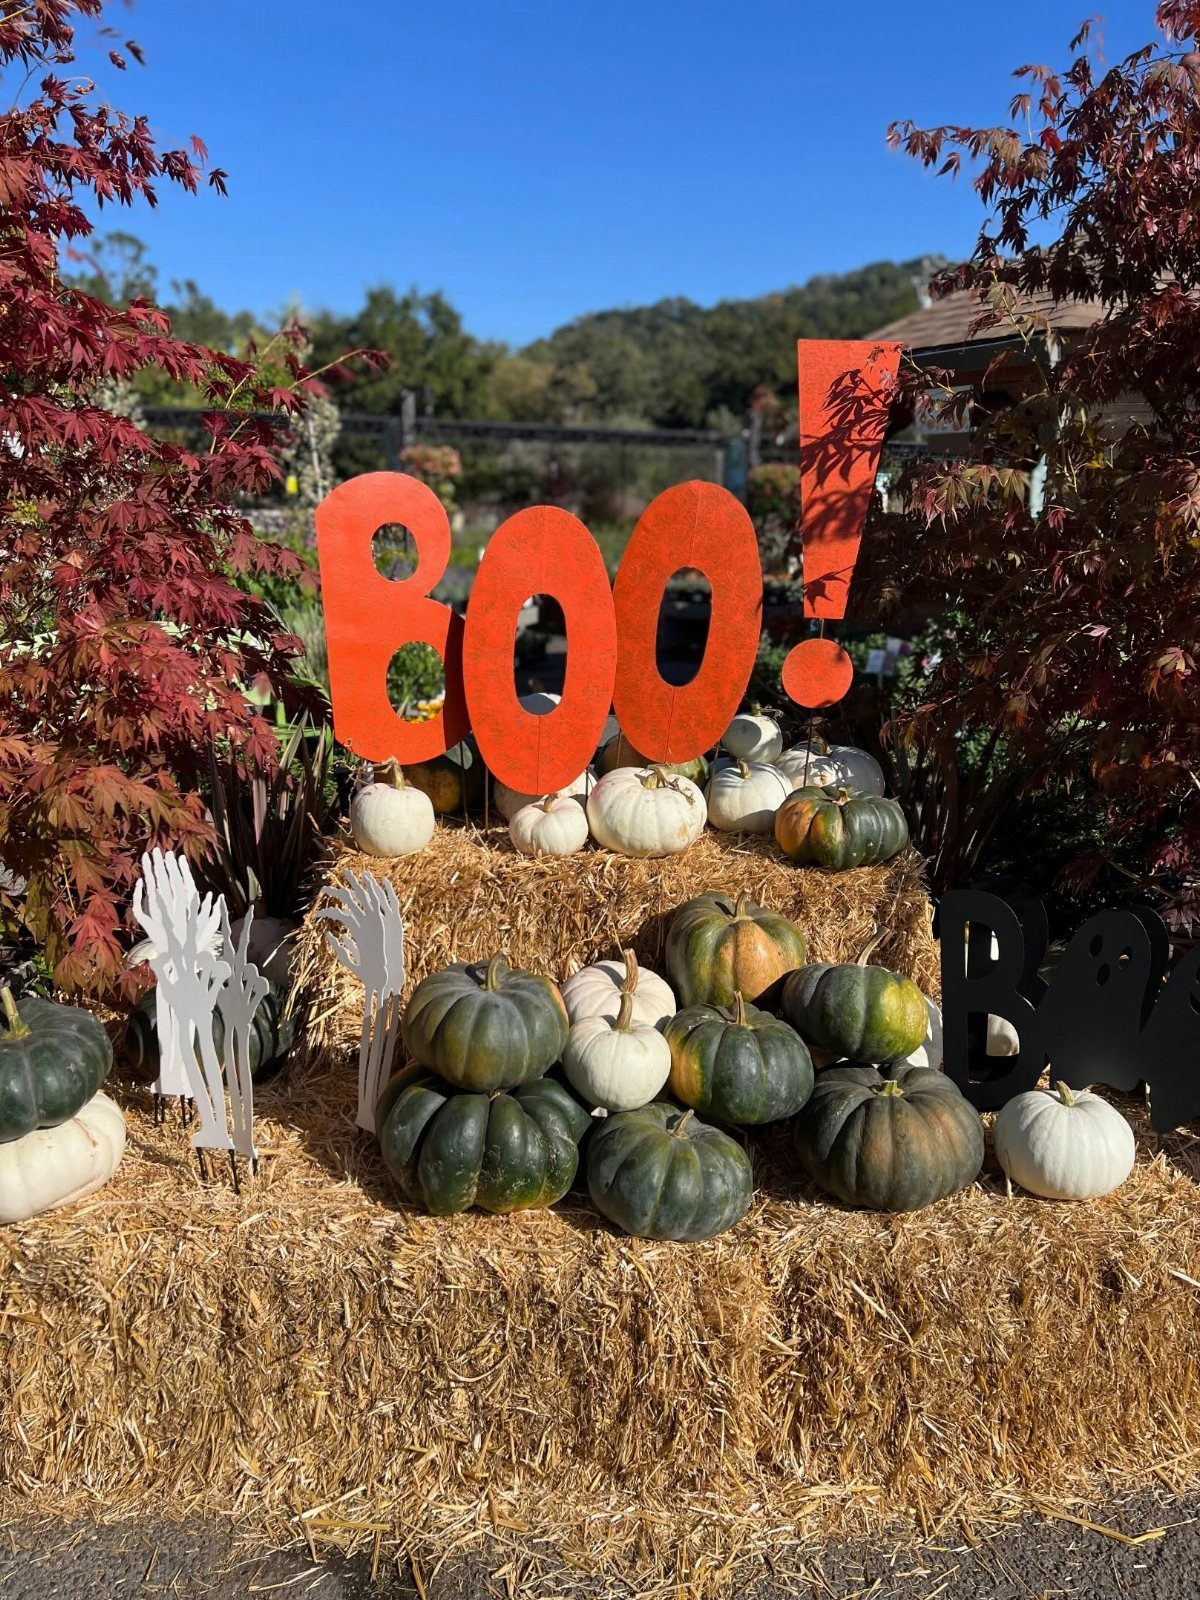
Hay bales are the base that makes everything else look intentional. Stack them at 2 heights, then set a big orange "BOO!" sign across the front, with pumpkins in white and green tucked in around it.
Pale pumpkins keep the color from going all orange, and a few white skeleton hands reaching from between the bales add the spooky note. Place the biggest pieces at the back and let the smaller ones spill forward.
23. Nighttime Glowing Jack-O’-Lantern Patch
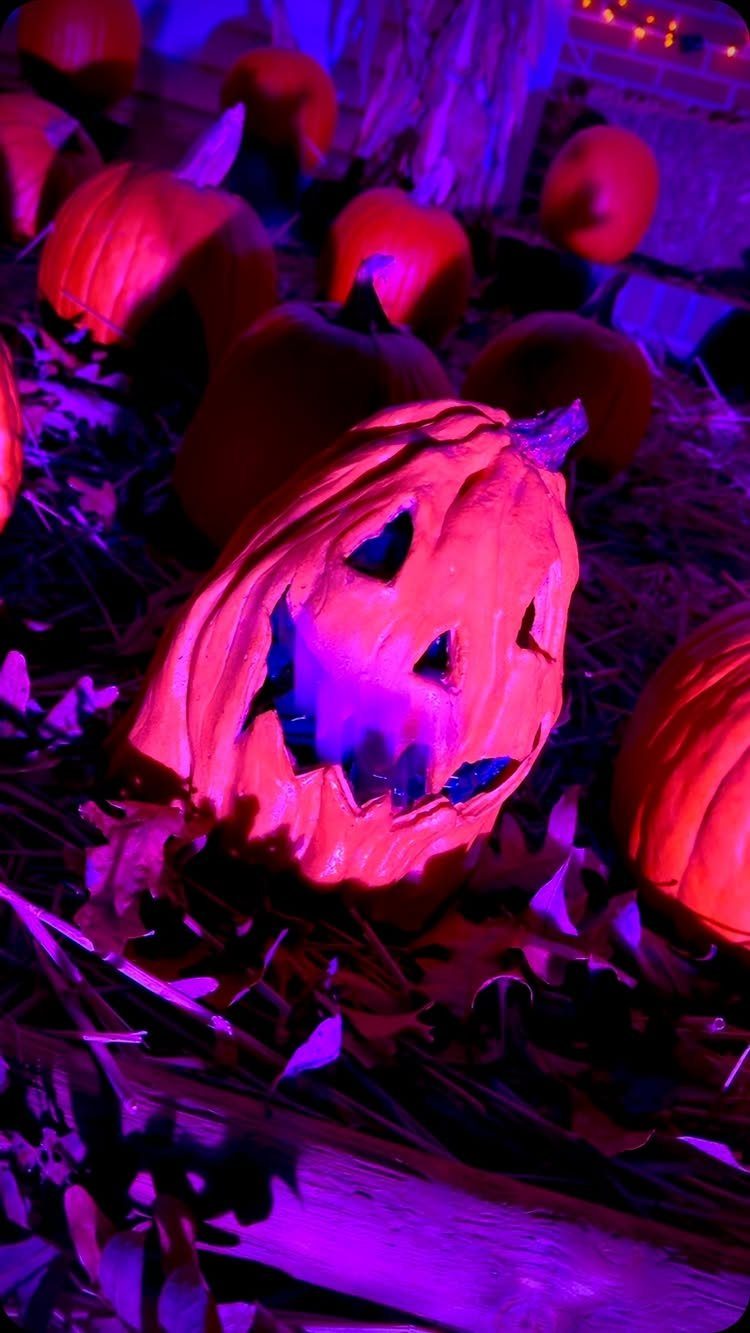
Colored light does more than carving skill here. Scatter carved jack-o’-lanterns across straw and fallen leaves, then aim purple and red spotlights at them so the faces glow against the dark ground.
Uneven spacing looks best: a few grouped tightly, a few set apart. The straw and leaves hide the ground and give the patch a messy, grown-there look.
I prefer purple as the main light, with red as the accent.
Budget-friendly Decorating Tips
Look through the house before you buy anything.
Before you buy anything, check the recycling bin and the linen closet: a worn white sheet becomes a ghost, flattened cardboard becomes tombstones or bats, trash bags make cheap black drapery, and old plastic tubs work as cauldrons or planters.
Spend money only on the pieces that are hard to replace: sturdy tomato cages, outdoor-safe paint, LED lighting and reliable garden stakes.
For anything that will sit outside in the weather, plastic tablecloths or garbage bags hold up better than fabric.
A dollar store black doormat is another cheap base. Trim the mat into a web shape, then mark the radiating lines and cross threads with a paint pen or a marker.
You don’t need masterful crafting skills or a huge budget to make a big impact. These simple DIY outdoor decorations, from creepy door wreaths to colorful pumpkin displays, make any home feel festive.
Family-friendly Projects
Start with one or two bigger projects, then add small pieces around them. Tomato-cage ghosts, tombstones or a giant spider make good anchors, and bats, pumpkins, webs and witch hats fill in afterward.
That order helps when kids are involved. You build the frame or the base, and they handle the low-stakes parts: painting, stuffing, placing and arranging.
Start with what’s already in your garage and closets, and buy new supplies only for what’s still missing.
Sheets, cardboard, rope, paint and plastic containers cover a lot of ground, and a child can’t ruin materials that were headed for the recycling bin anyway.
Customization Options
Paint is the quickest way to make a decoration yours. Pick two or three colors from your own porch or house trim, and repeat them across every piece so the yard looks planned.
Stencils help when your freehand lettering is shaky. They give clean, repeatable shapes, and you can reuse them on signs, stakes and mats.
Add one detail nobody else has: your family name, your street number or a joke about your own house. That small personal touch is what people remember from the sidewalk.
Frequently Asked Questions
How to decorate a patio for Halloween?
Start with one focal point, such as a giant spider or a cauldron with an orange light and fog, then fill in around it with string lights and pumpkins.
Hang pieces like ghosts or webs at different heights so the space has layers.
Look at your siding before you buy anything: white ghosts and cobwebs pop against a dark wall, and black bats or cats show up best on a pale one.
When should you start decorating outside for Halloween?
Early October is the usual advice, which gives you the whole month of display. Anything that will hang for weeks outside should be made of sturdier material, like beach balls instead of balloons for eyeballs.