The projects here run from quick paper and felt crafts that take under 10 minutes to Halloween Jar Lanterns and Monster Pinch Pots that need a drying wait, so the clock and the child’s age settle which one you pick.
Toddlers do best with Tissue Paper Pumpkins, Felt Cat Faces and Frankenstein Handprints, while older kids can take on Halloween Jar Lanterns, Fabric Witch Ghosts and the Glitter Felt Pumpkin.
Party hosts get the best flow by setting out a fast craft beside a slow one, so kids can switch to the quick project while the paint on the other one dries.
1. Leaf Ghosts
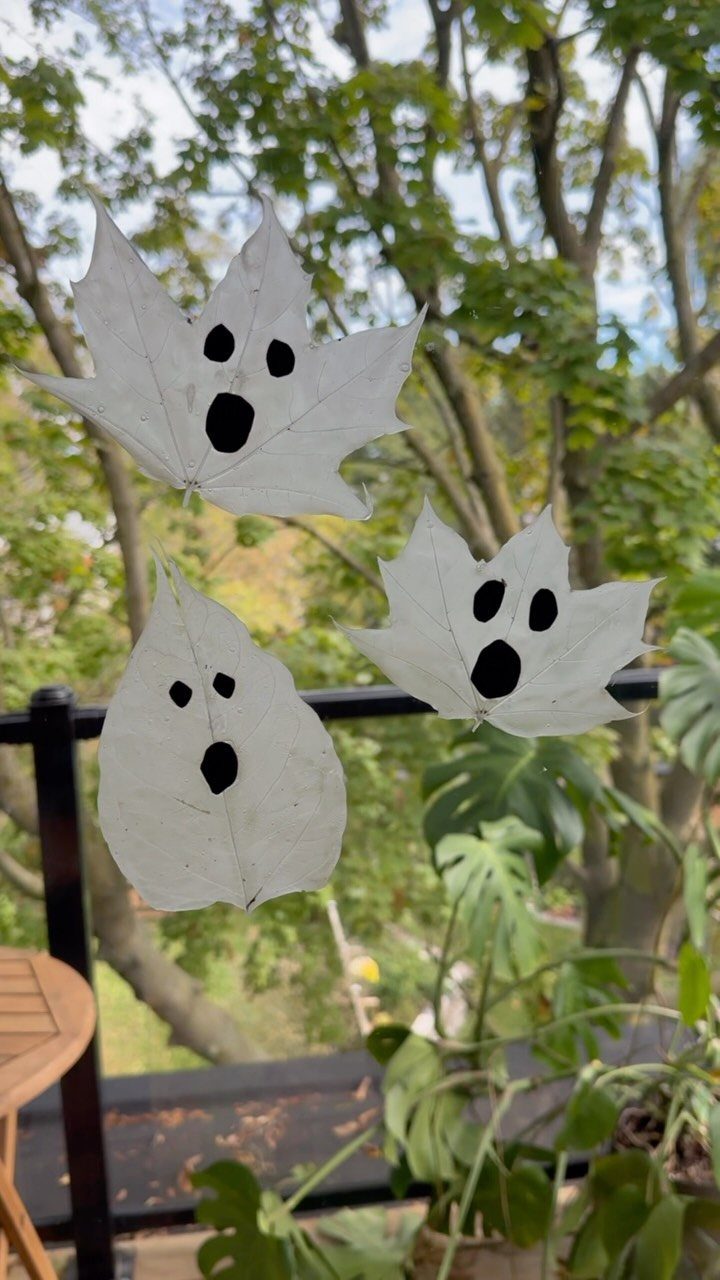
Leaf glue ghosts are a process-art project, which means the fun is in the gluing and painting, not in a perfect result.
The maker of this one pitched it at children ages 3–7, and I agree: small hands can handle a leaf and a glue bottle.
Pick flat, fairly sturdy leaves so the white paint covers evenly. Add the black faces last, once the white is dry, and a window is a good place to show them off.
2. Salt Painted Spiderwebs
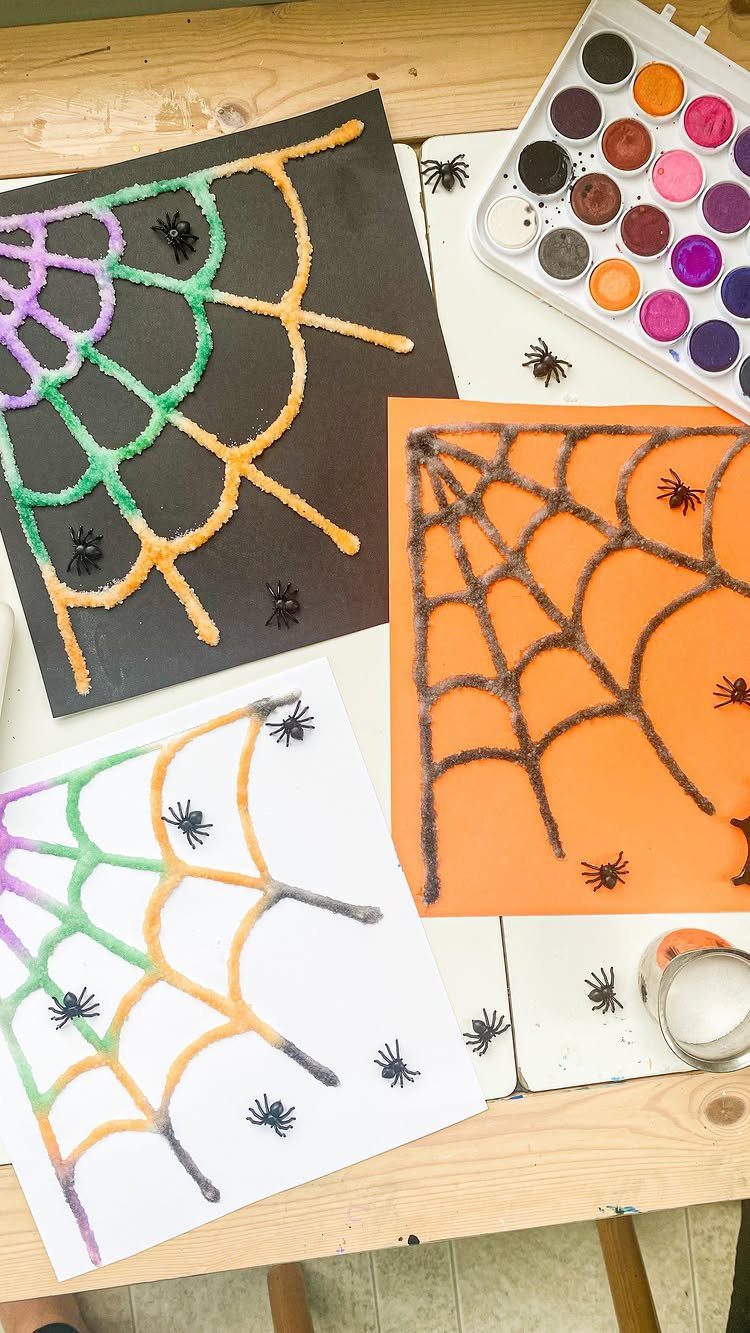
Salt painting turns a simple web outline into something with texture.
Draw the web with white glue, sprinkle salt over the wet lines, then touch a watercolor-loaded brush to the salt and the color pulls along the line in feathery patterns.
Dark paper makes the colors glow, but white shows the salt effect most clearly, so I would offer both.
Plastic spiders set on the finished webs give kids something to show for the waiting, and the salt lines make a good place to park them.
3. Frankenstein Handprints
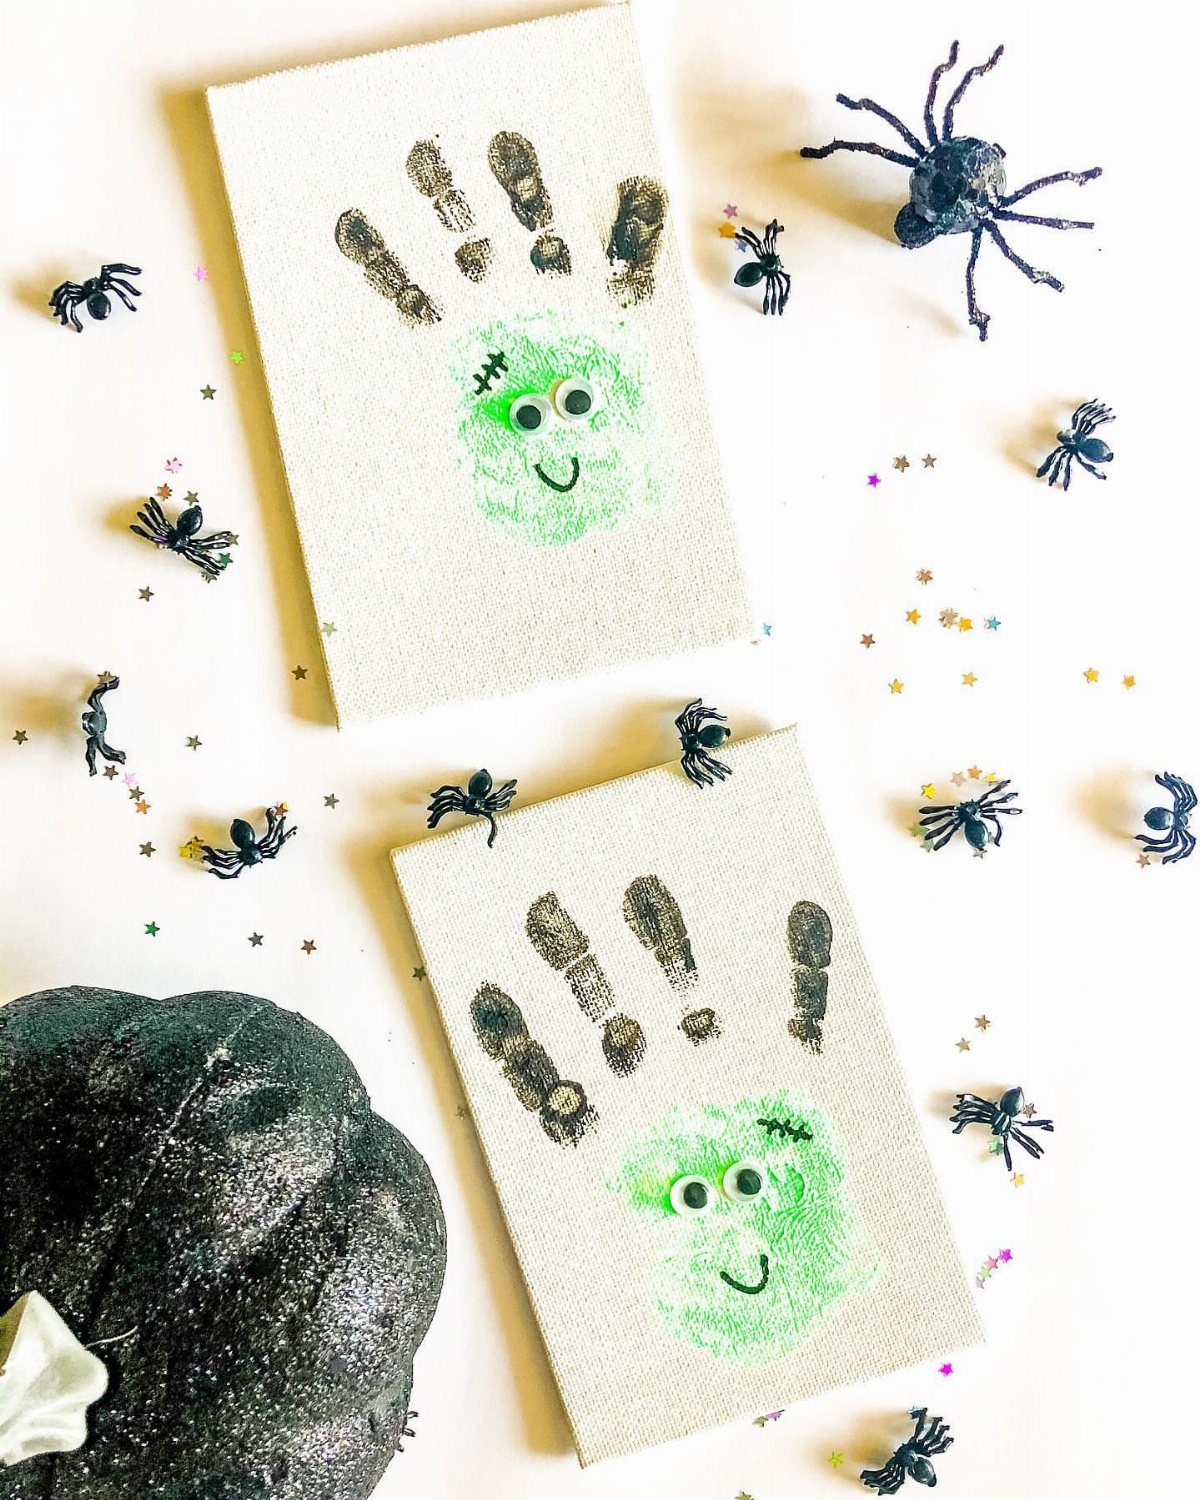
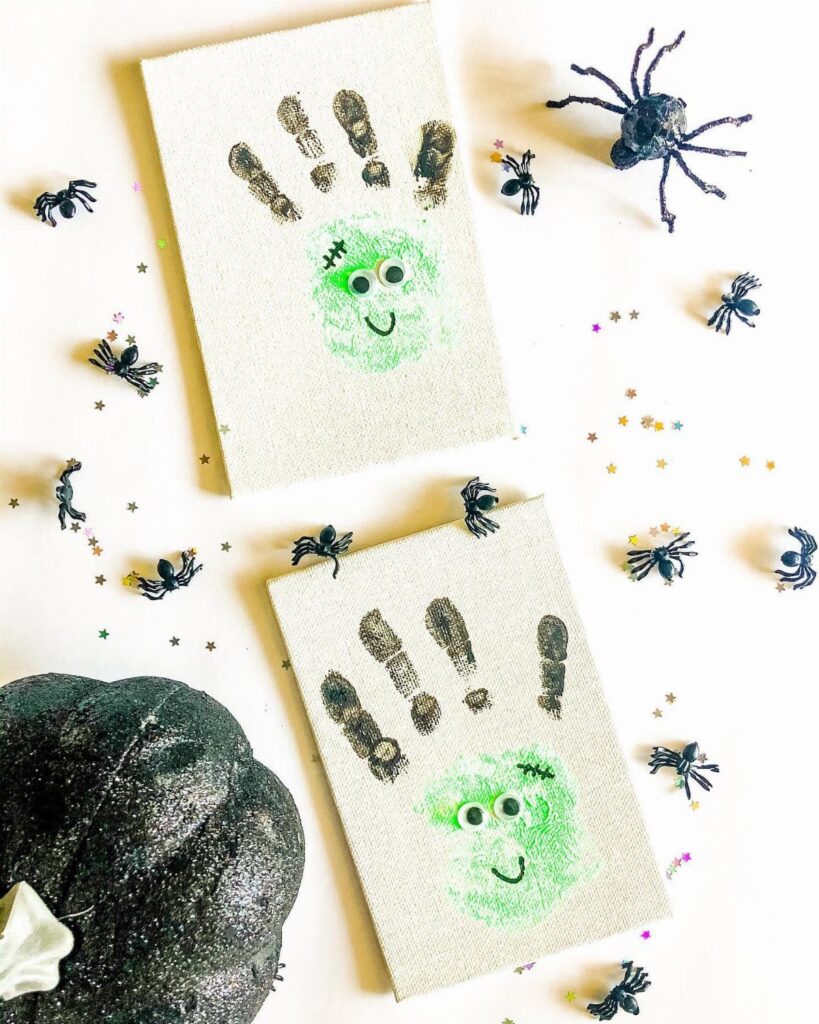
A green handprint makes a surprisingly good Frankenstein head: the palm becomes the face, and the fingers can be the flat top of his hair.
Press a painted hand onto a small canvas, then let the googly eyes do the personality work.
Wash-up is the real cost, so set a wet cloth or a bowl of water beside the paint before anyone starts.
4. Paper Bag Haunted Houses
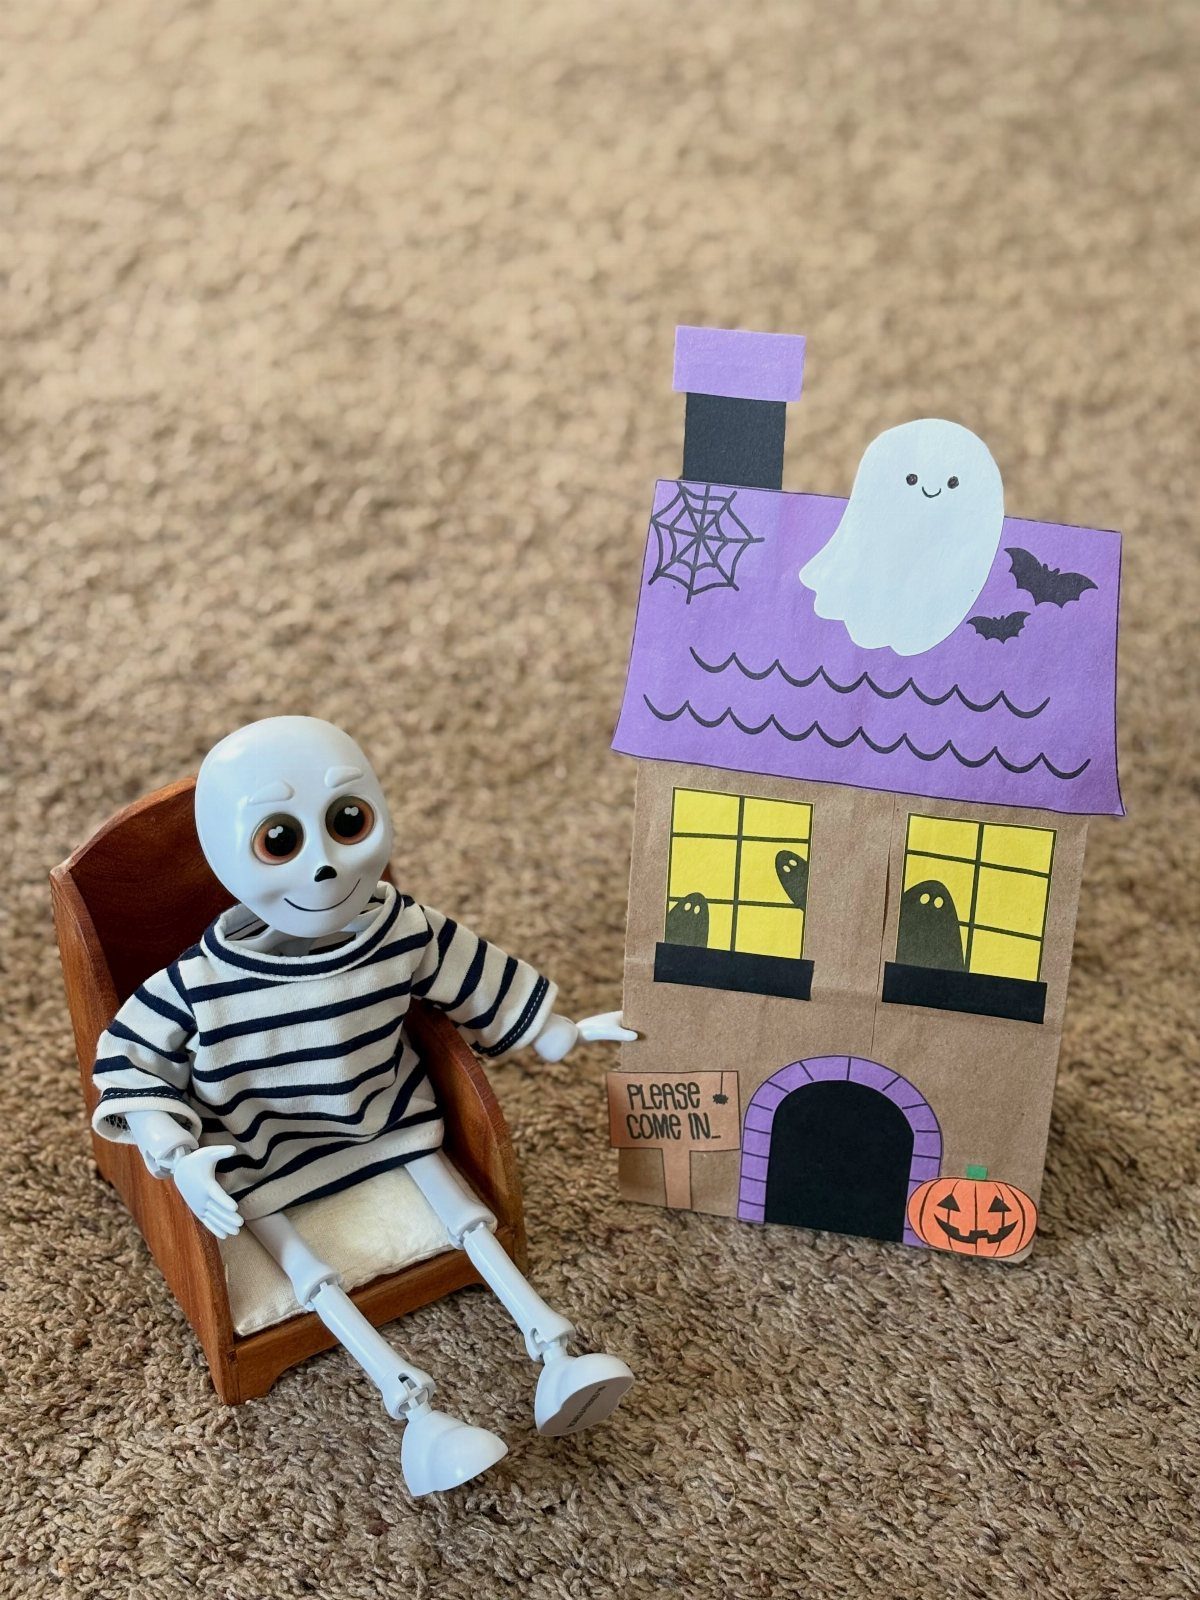
Paper bags make a good haunted house because the shape is already there: a box with a flat front for windows, doors and a sign.
Kids can paint or glue on a roof, ghosts and bats, then write a welcome message across the front.
The best part comes afterward. A finished house is small enough for toy figures to visit, so the craft turns into playtime.
5. Paper Plate Pumpkins
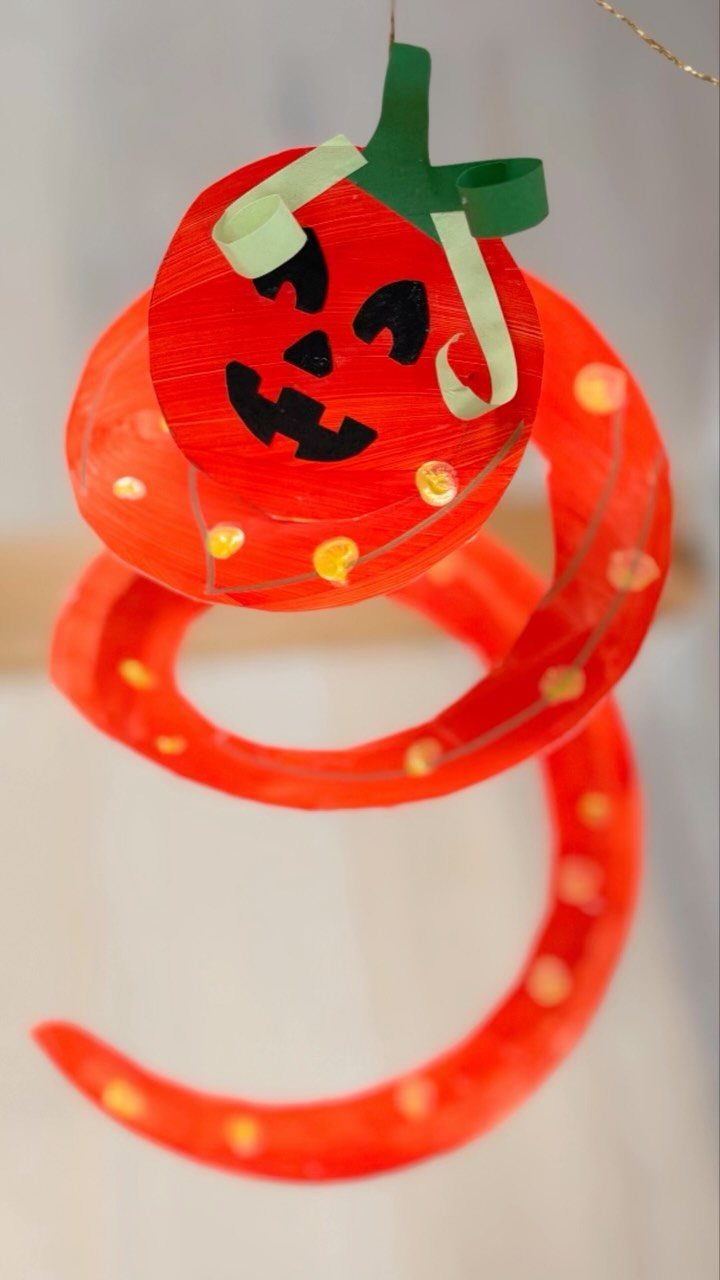
Orange paper plates are nearly a pumpkin already, which saves you from painting a base color. Here, a plate becomes the face, and strips of orange paper spiral below it so the whole thing can hang.
Green paper accents make the stem and leaves. A paper plate holds up to glue better than printer paper, so it suits younger kids who press hard.
6. Straw Skeletons
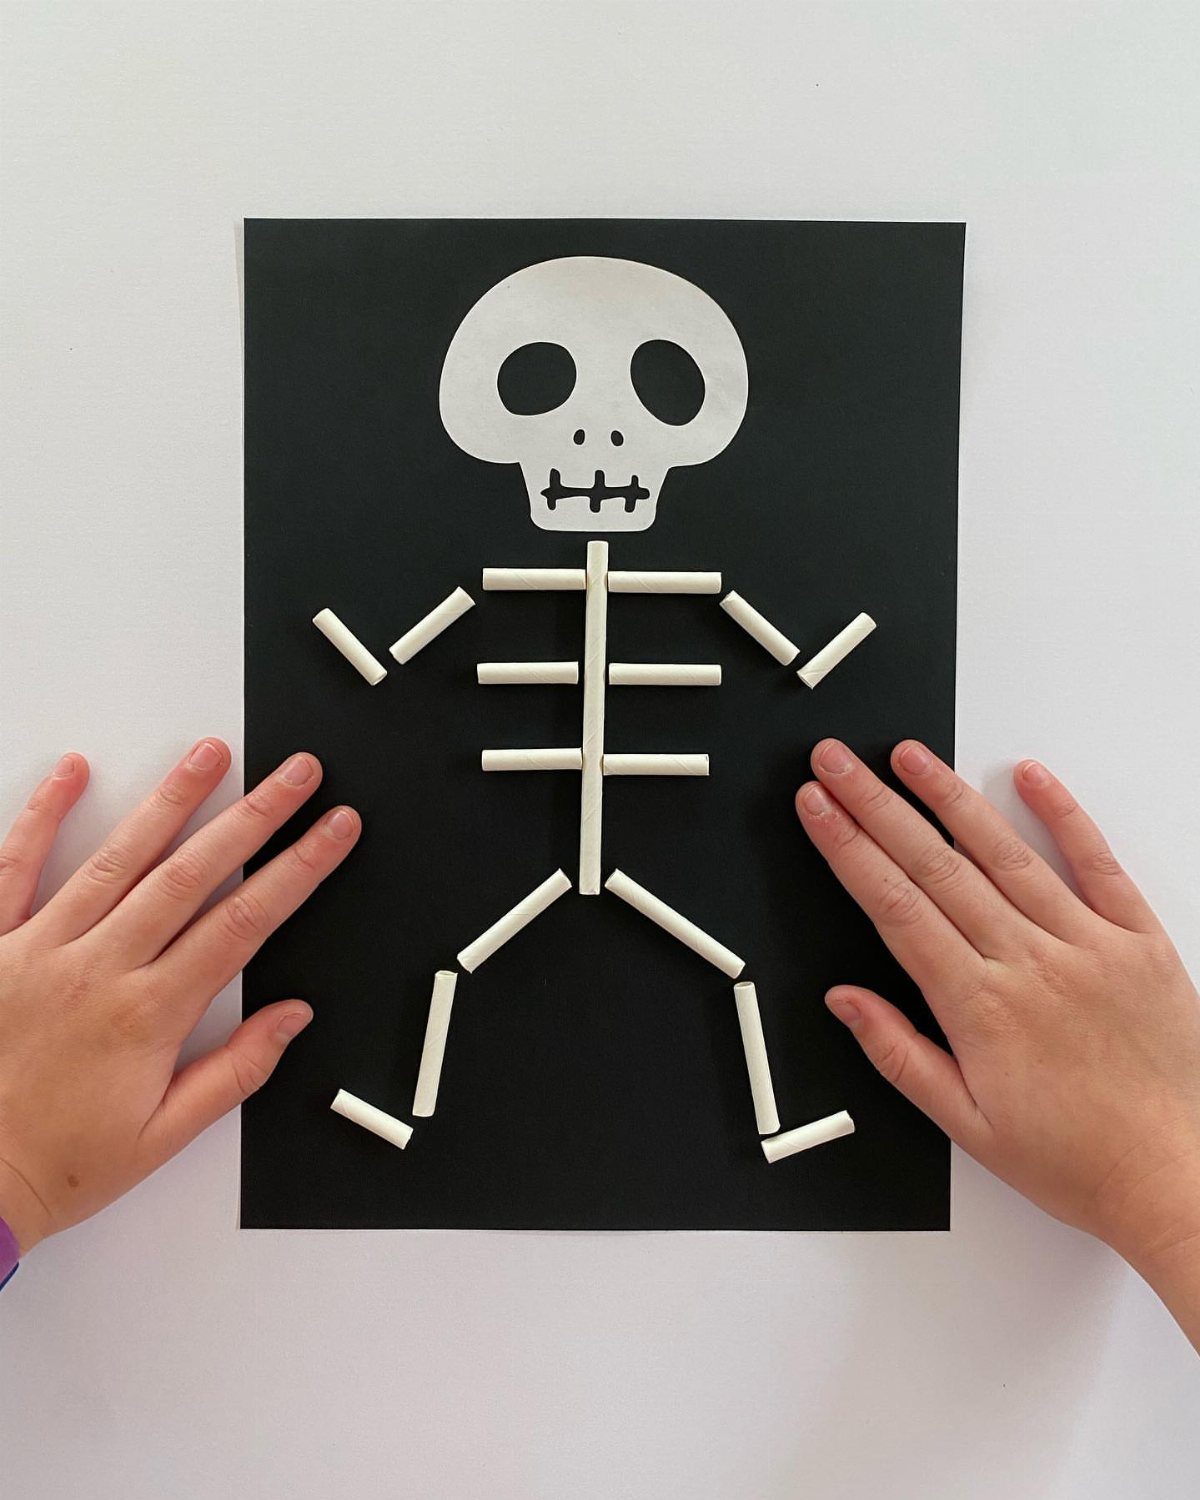
White straws make convincing bones because they are already long, thin and hollow. Cut them into pieces for ribs, arms and legs, then glue them onto black paper beneath a paper skull.
Contrast does the heavy lifting, so stay with white on black. Scissors are the only prep for an adult, and the cut straws can be sorted into piles for kids to place.
7. Mini Witch’s Broom
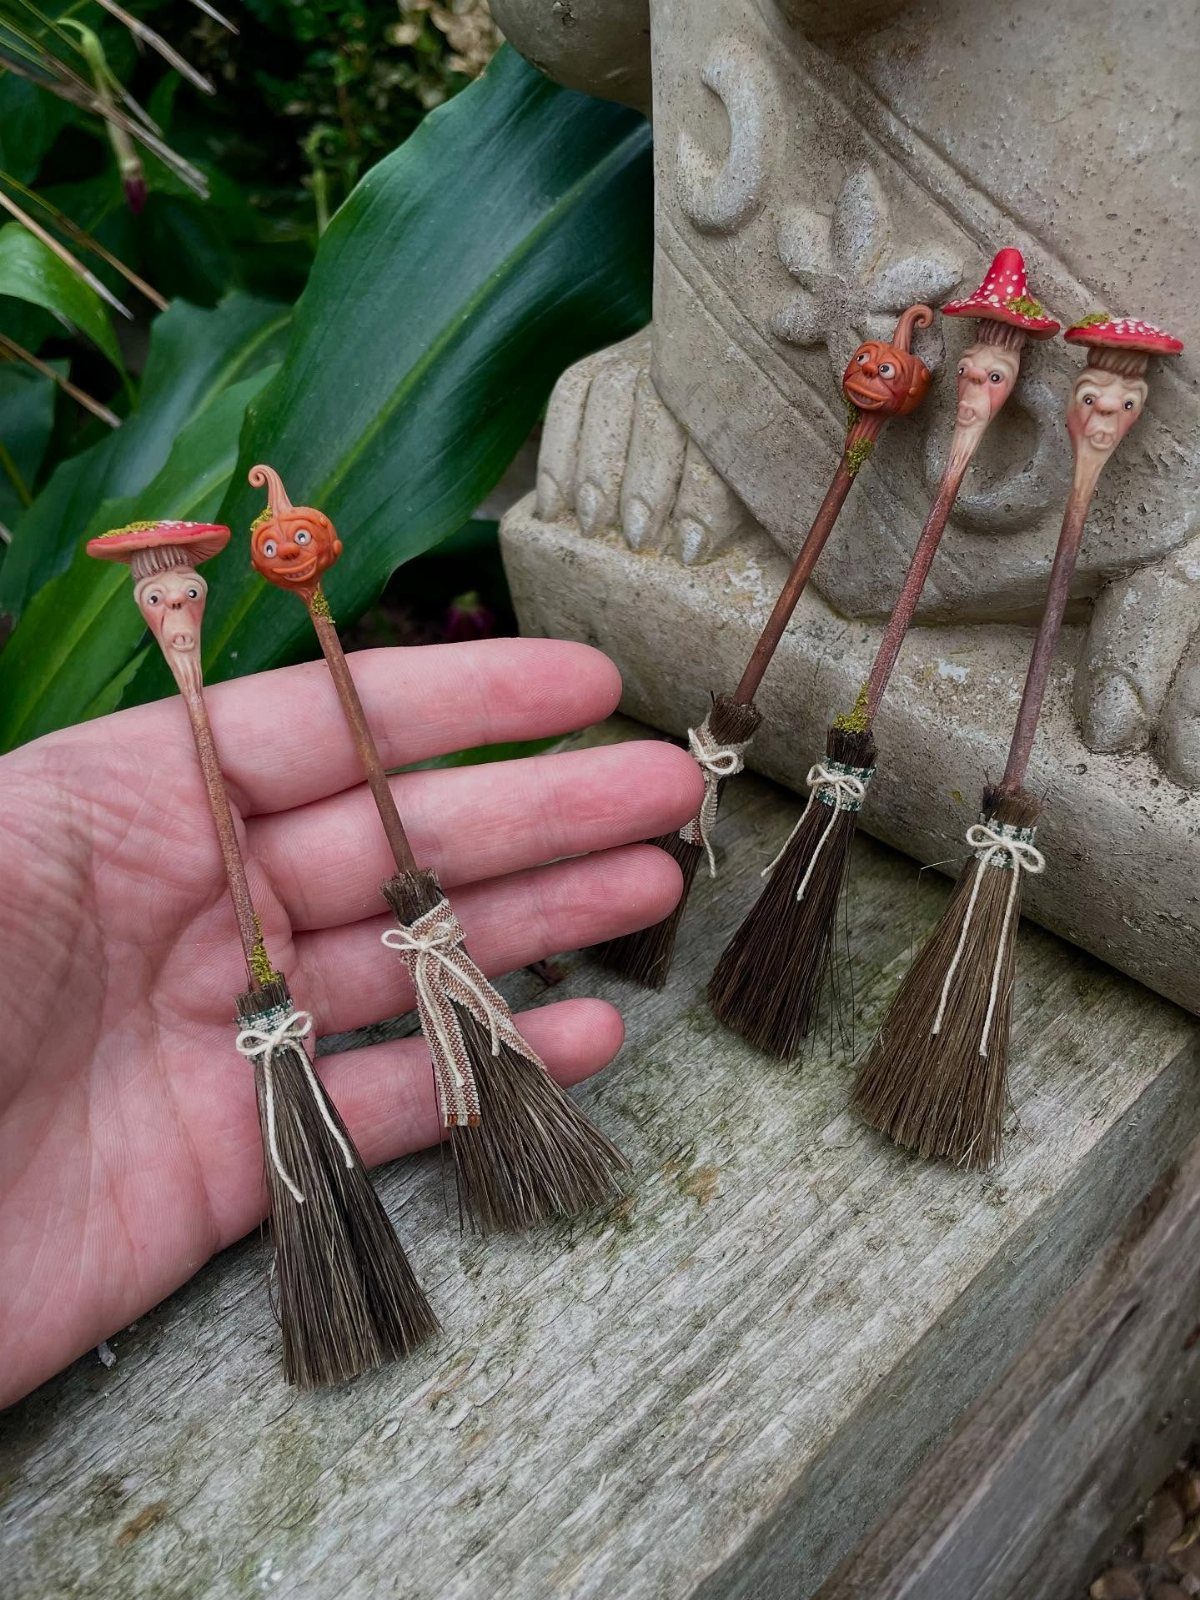
A broom this small is really a sculpting project: a tiny face, a little hat and a bundle of bristles, all at a scale that fits in one palm.
Make a few at once, since they look best lined up on a shelf or ledge.
Faces are where I would spend the time. Pumpkins and mushrooms make easy variations, and they suit older kids better than toddlers, because every detail is fiddly.
8. Monster Pinch Pots
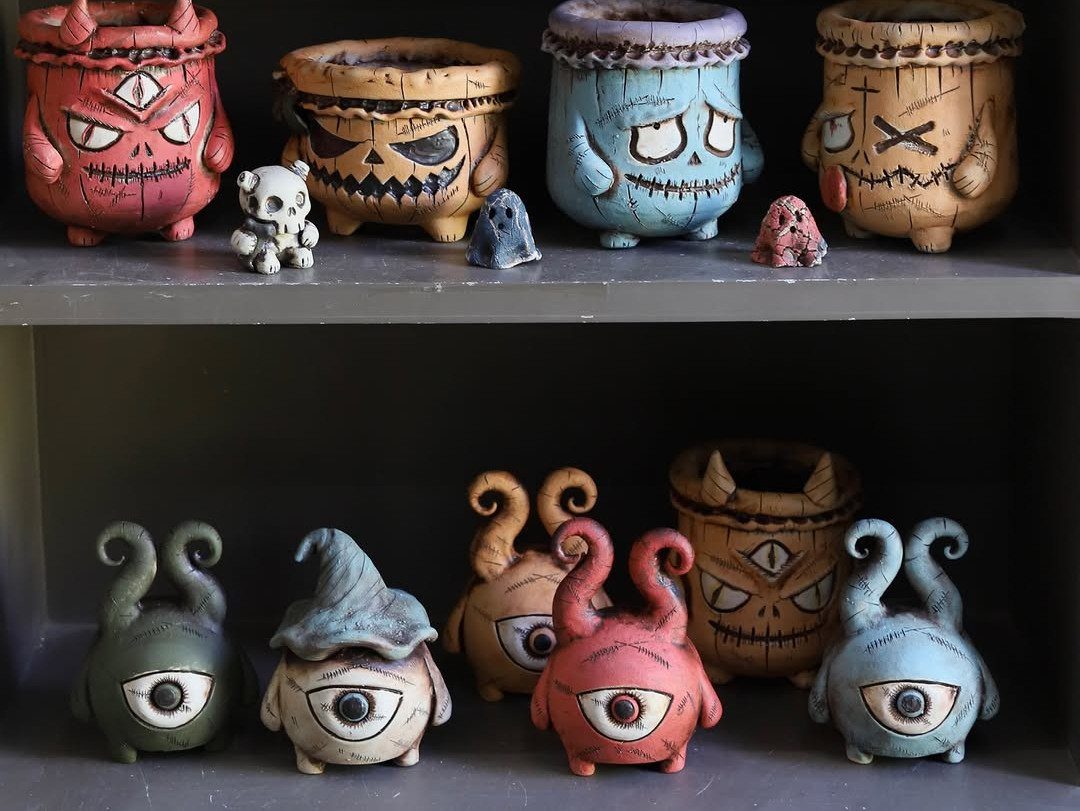
Clay is a gentle first step into sculpting, and a pinch pot is the simplest form there is: press a thumb into a ball, then pinch the walls outward.
Each pot becomes a monster once it has eyes, a stitched mouth and a bright coat of paint.
Bright colors read well on a shelf, so let kids pick their own. Expect a drying wait before painting, so plan this as a two-part craft.
9. Bubbling Cauldron
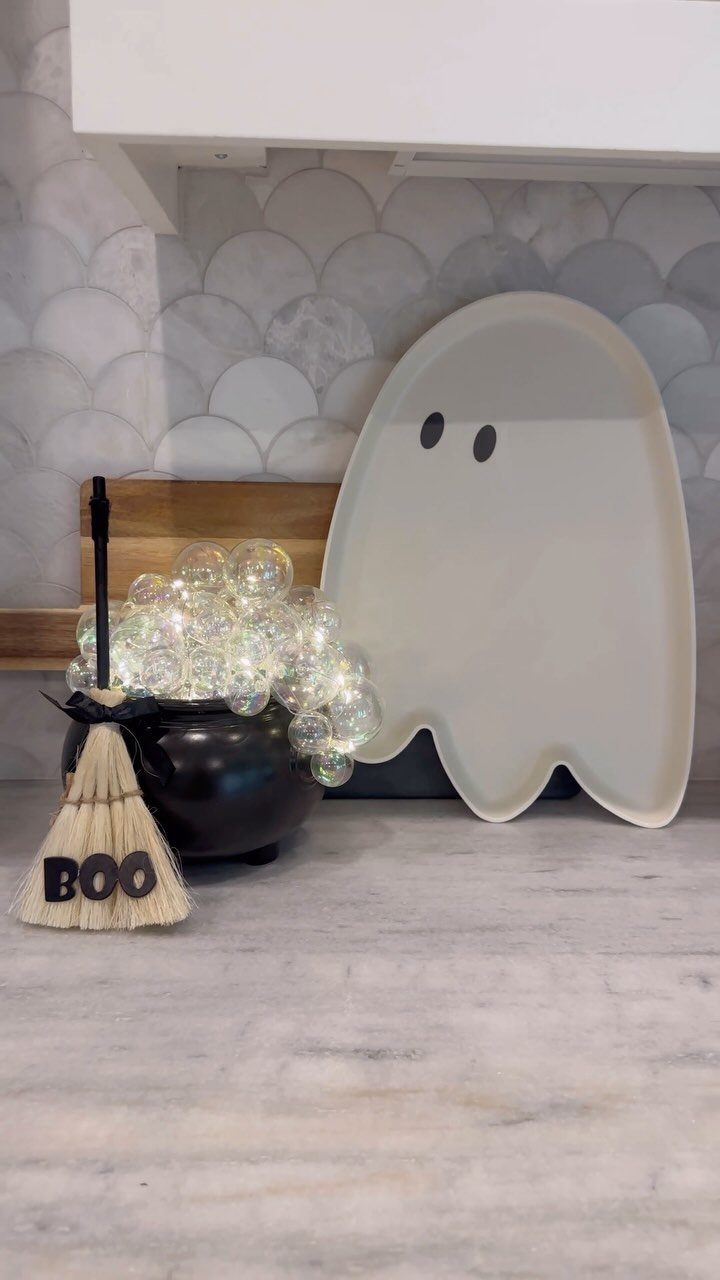
Clear balloons piled into a black cauldron look like glowing bubbles, and nobody has to cook anything or wipe up a spill. That is the appeal: all the potion drama with a clean counter.
Add a small broom or a sign to the side, and a ghost-shaped tray nearby for snacks.
Kids can blow up the balloons themselves, which gives them a job. I would fill the cauldron right before guests arrive so the balloons stay full.
10. Halloween Terrarium
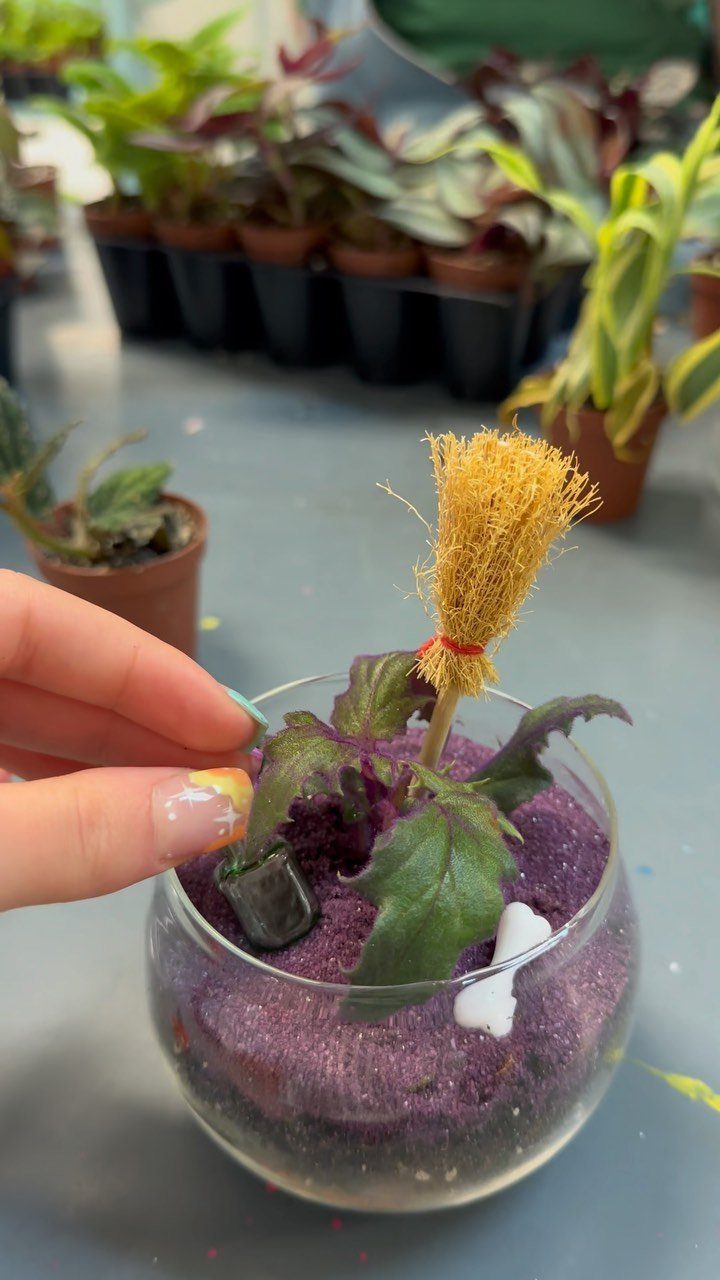
A glass bowl, a handful of moss, a few mini props and some dried twigs are enough to build a small Halloween scene, and the clear sides let you see every layer.
Start with a layer of colored sand, purple here, then set in a small plant, a miniature broom and a little white figure.
Keep the pieces few so the bowl does not look crowded. Kids can choose the sand color and place each figure, which makes this a good fit for a rainy afternoon and a mantel afterward.
11. Bat Handprint Craft
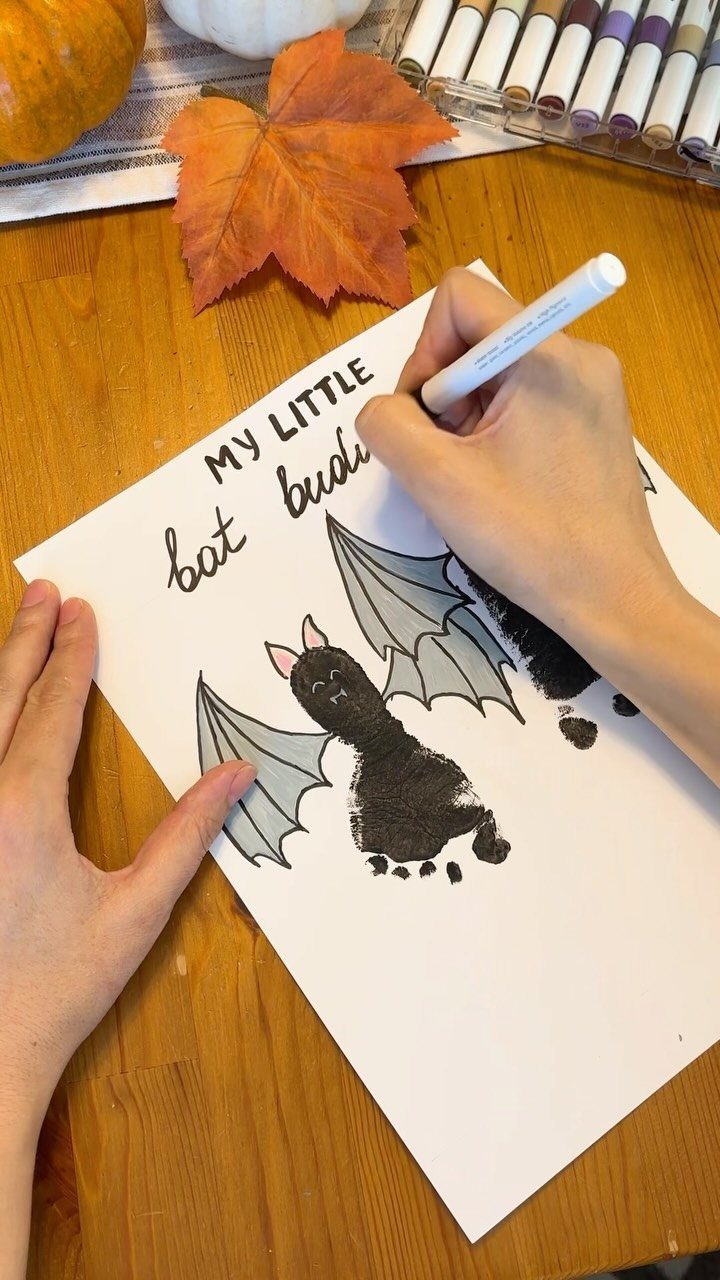
Handprints make convincing bats because the spread fingers read as wings. Paint a hand black, press it twice side by side on white paper, then add eyes and details with a white marker.
A caption gives the page a keepsake feel, so write one in pencil first for little ones.
Keep wipes within reach. I would date the back of each sheet; they are easy to save and hard to repeat once hands grow.
12. Book Character Pumpkins
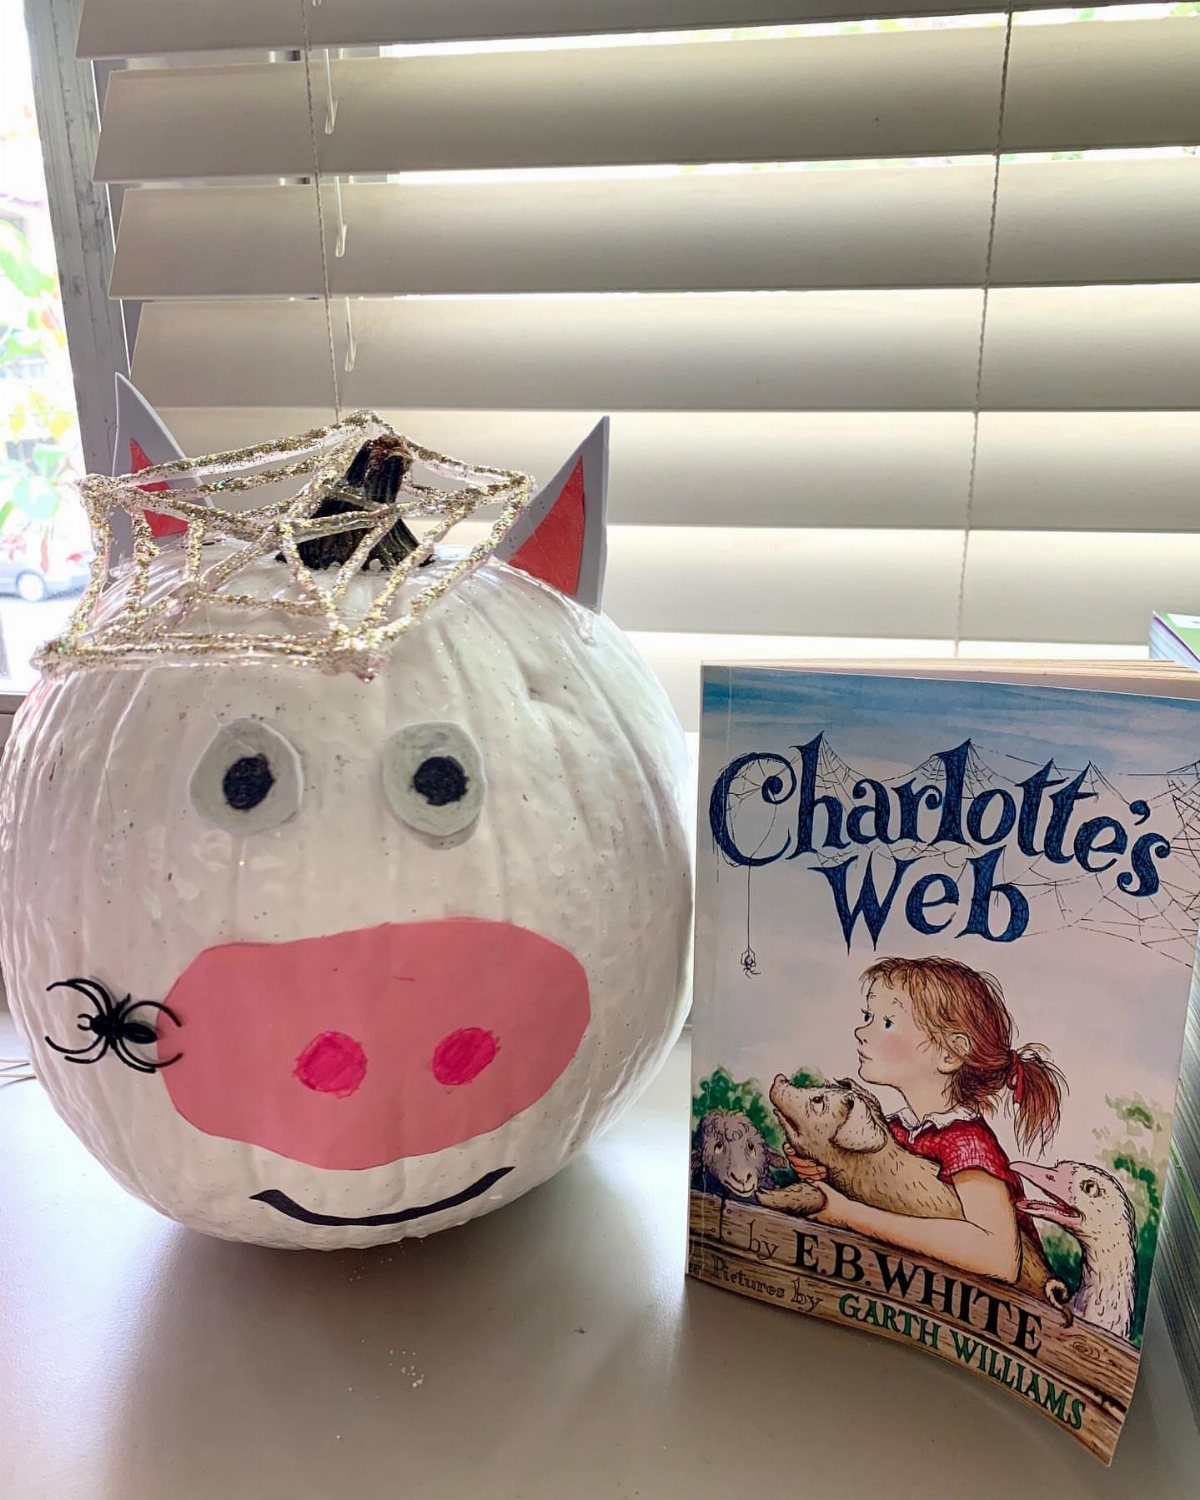
Painting a pumpkin as a favorite storybook character gives reading time a craft to match.
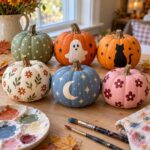
For a Wilbur pumpkin, I’d start with 2 coats of white acrylic paint, let it dry fully, then add pink for the snout, ears and cheeks, and finish with a web in glitter glue or a paint pen to nod to the story.
Choose a book the kids already love, and set the finished pumpkin beside its copy. Paint is the better medium for little hands than carving, and the pumpkin stays safe for them to handle.
13. Dried Flower Halloween Wreaths
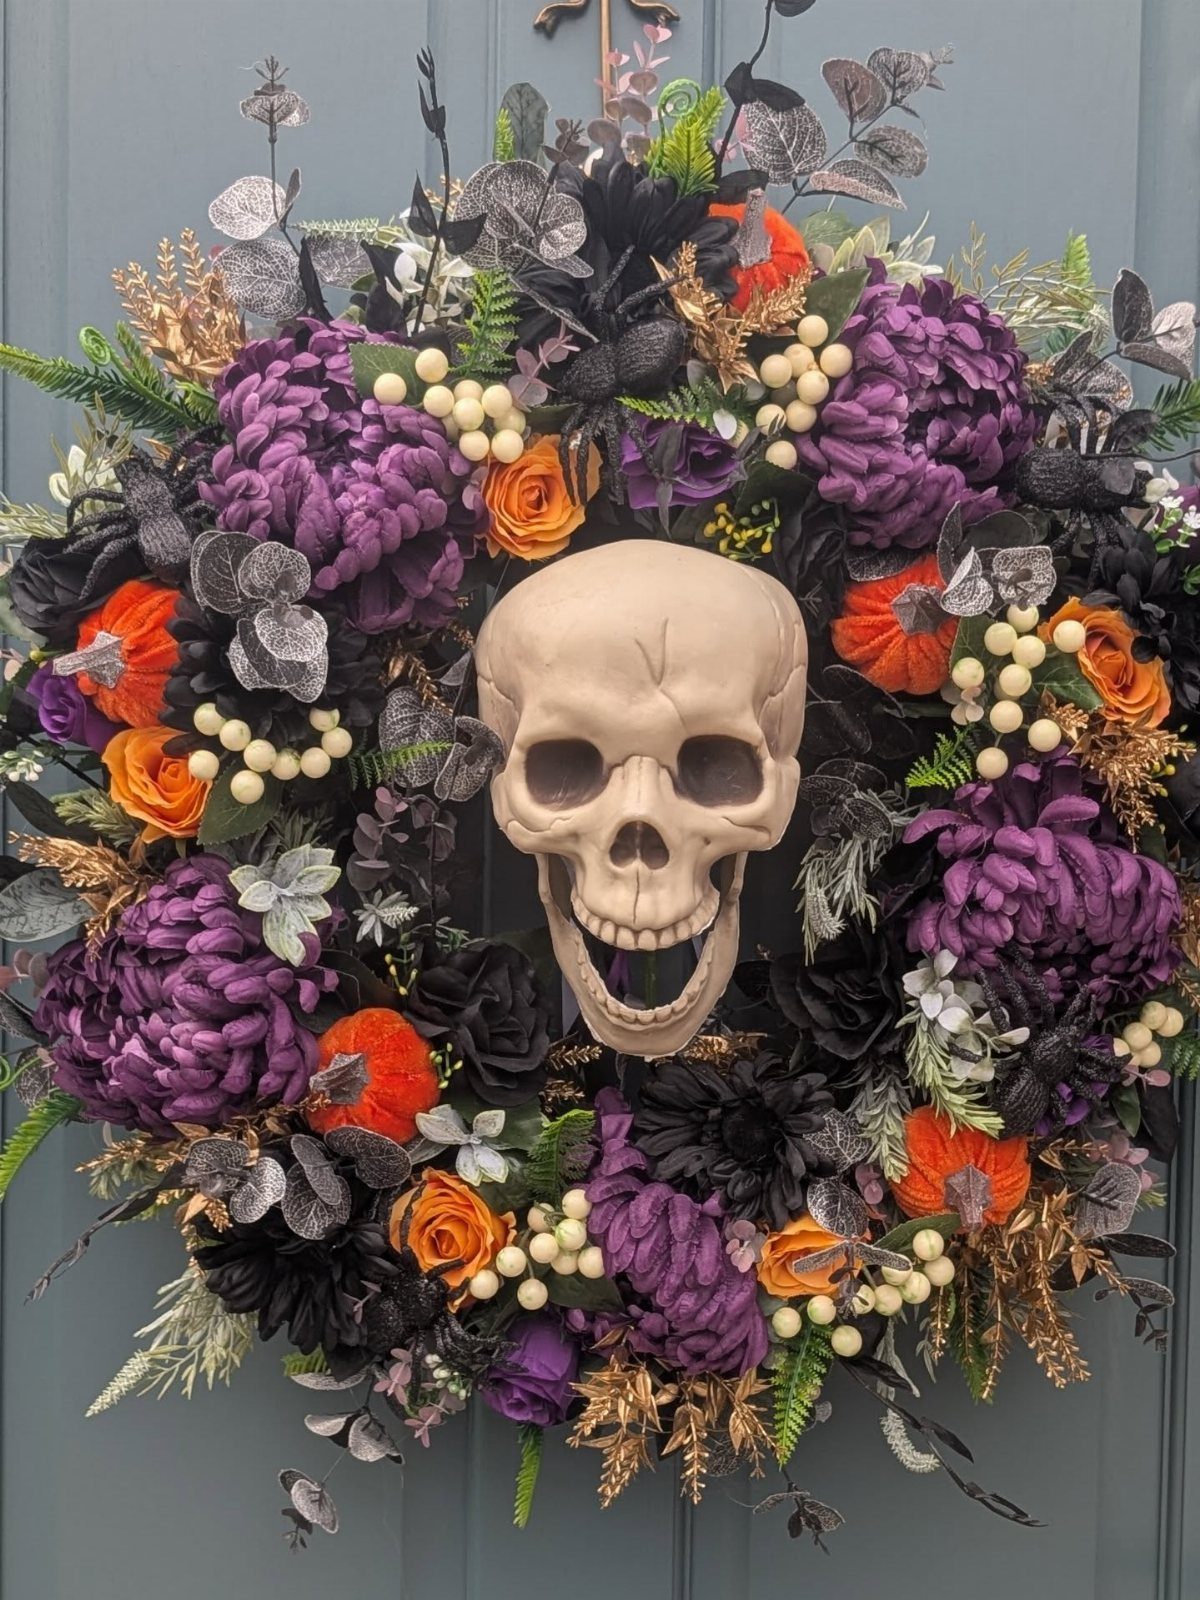
A wreath built from dried flowers keeps its color for the whole season, so you can hang it early and leave it up.
Purple, orange and black blooms with silver leaves make a good Halloween palette, and a skull at the center gives the eye a place to land.
Kids can tuck stems into the base while an adult handles any hot glue. Hang it on a covered porch or inside the door, since dried flowers are delicate.
14. Spooky Halloween Signs
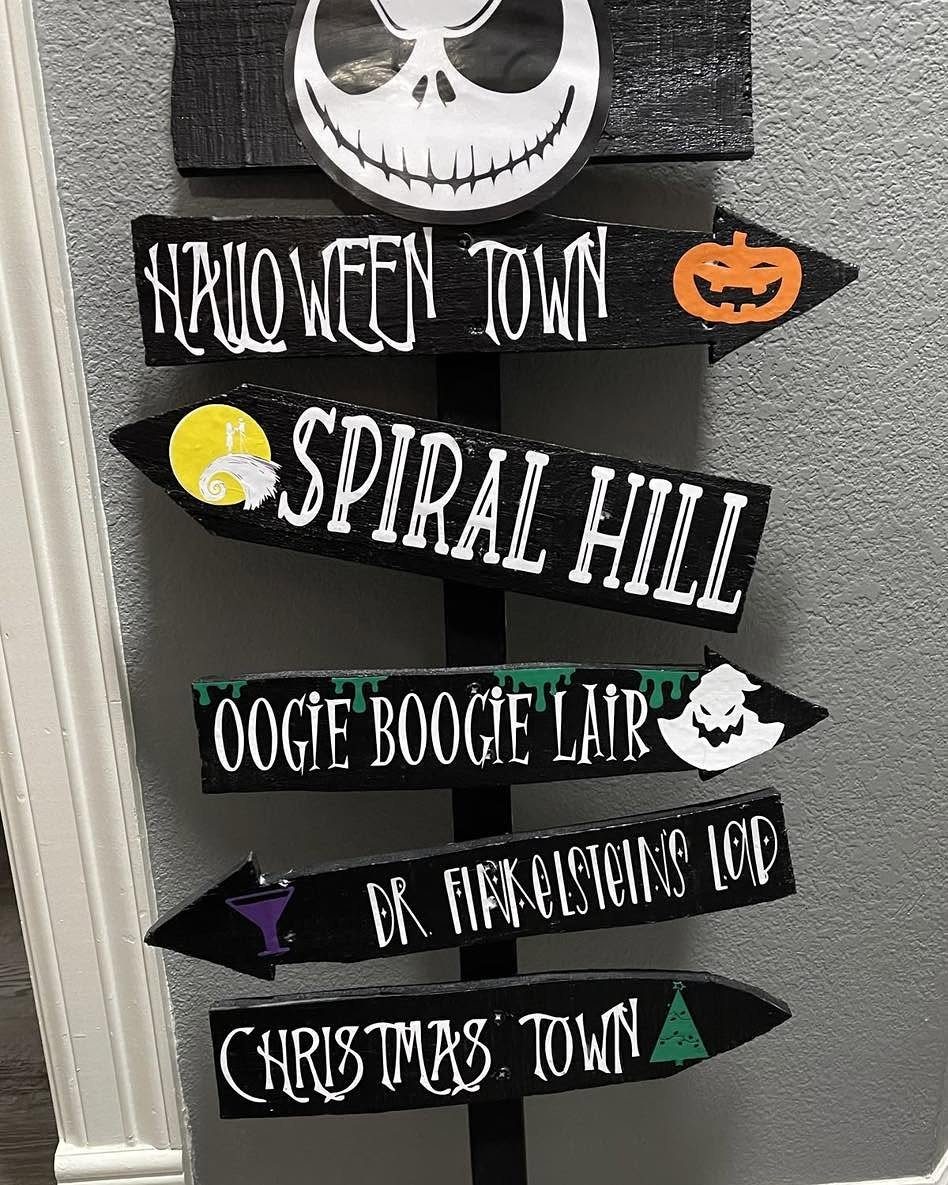
White lettering on black wood is the combination to copy, because it reads from across a room.
Pick a favorite movie or story and write its place names on the arrows, one per board.
Pencil the letters first, then paint over them. Older kids can handle the lettering; younger ones can paint the black base coat.
15. Egg Carton Halloween Characters
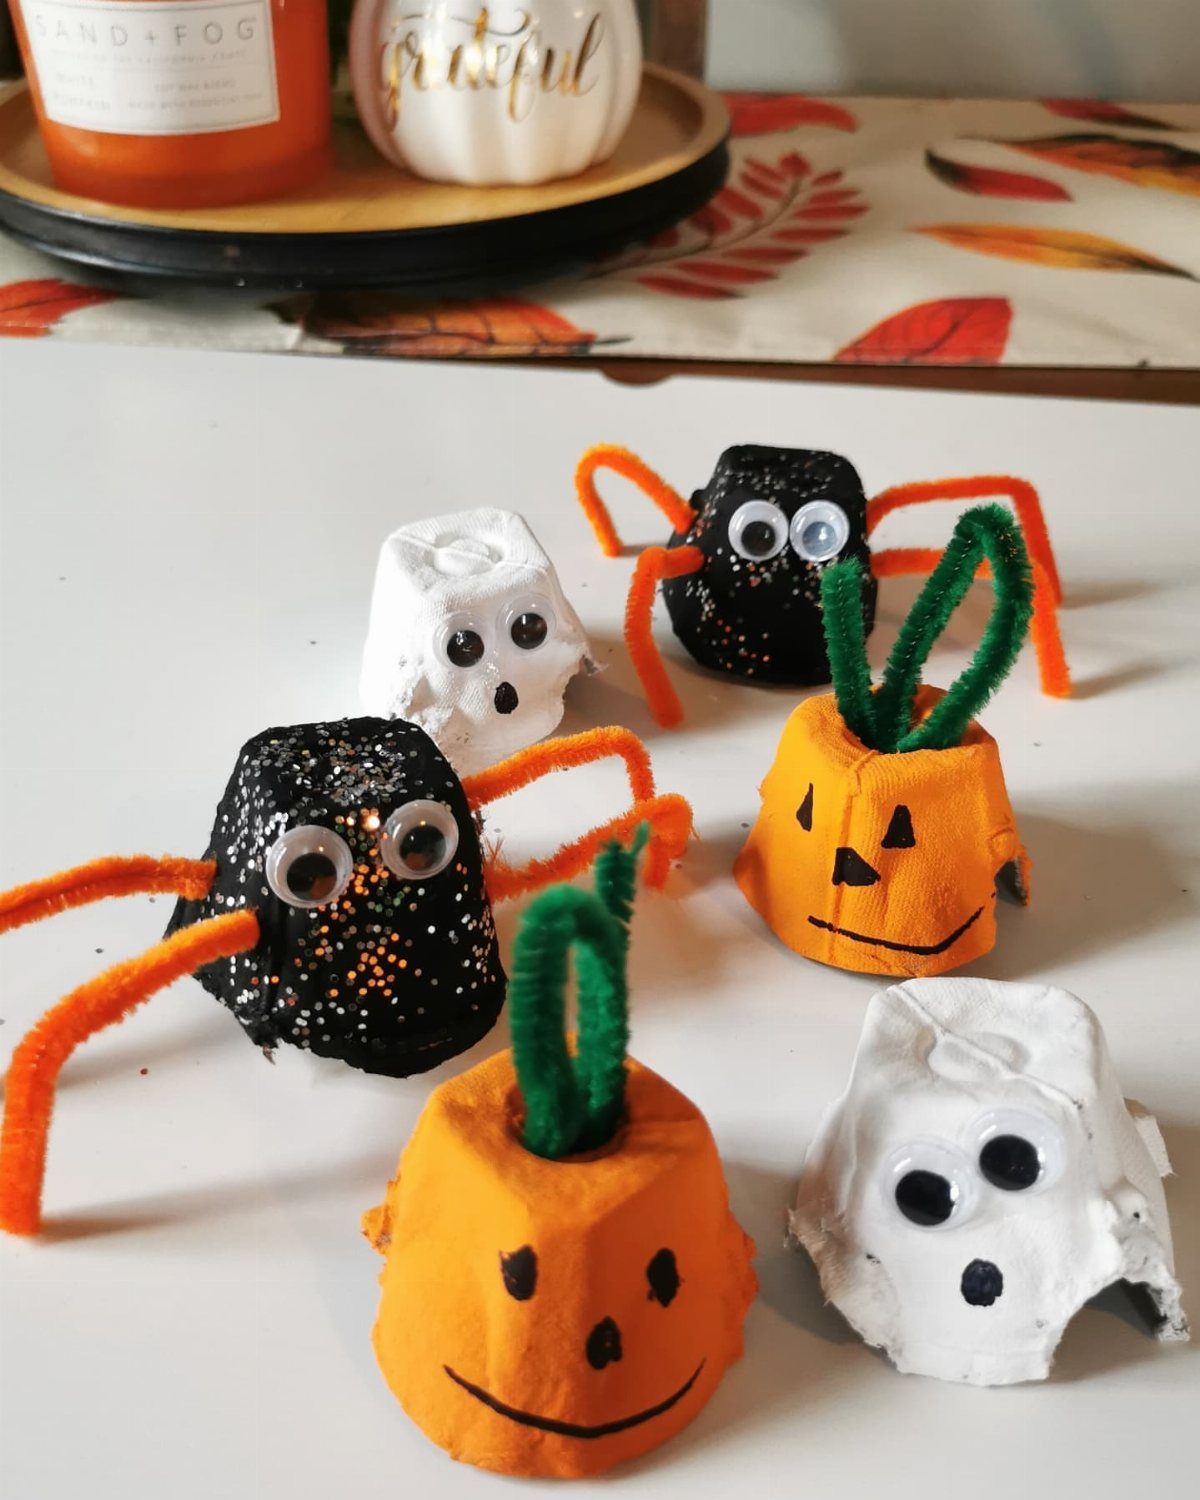
Egg carton cups are already the right size for tiny pumpkins, ghosts and spiders. Cut them apart, paint them orange, white or black, and add pipe cleaner legs to the spiders.
Paint is the slow part, so do it in one sitting and add faces after it dries.
A six-piece set looks best grouped together on a mantel or table. Adults should do the cutting; kids can take over from there.
16. Toilet Paper Roll Mummy
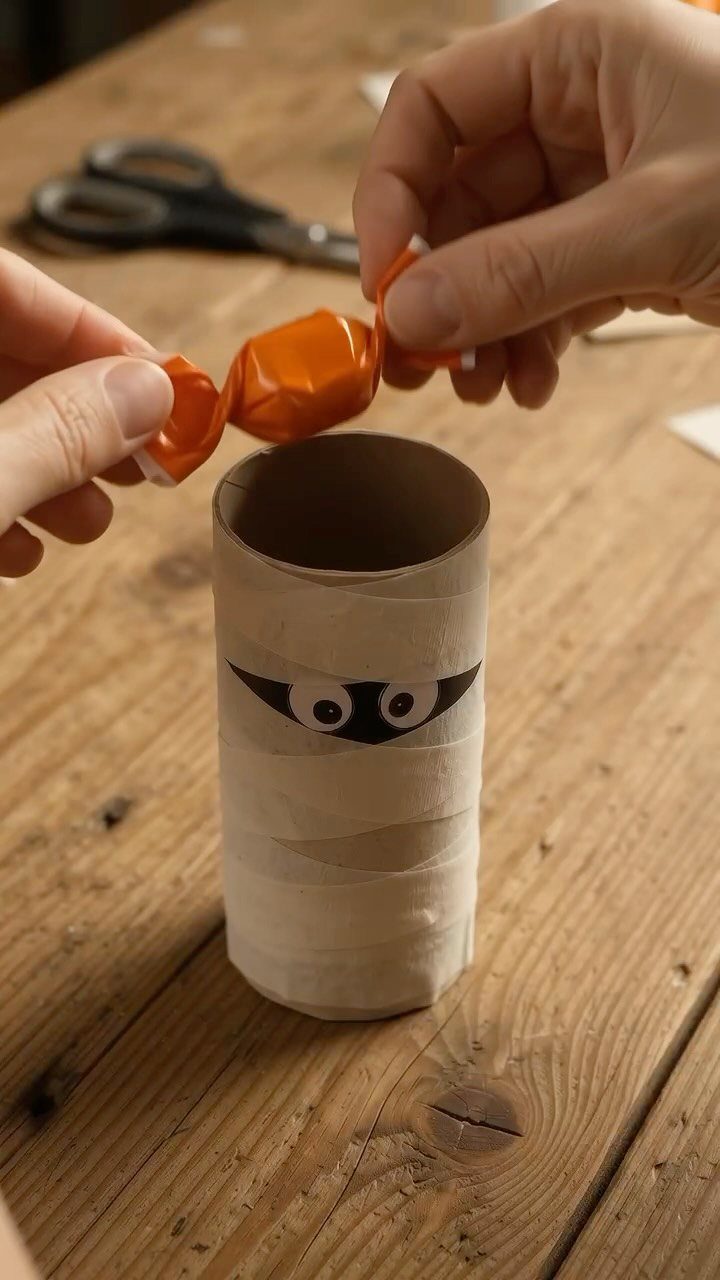
Wrapping a cardboard tube in white paper strips makes a mummy, and googly eyes give it a face. What I like is that it holds candy, so the craft doubles as a treat holder.
Overlap the strips loosely rather than neatly; mummies look better a little messy. Leave a gap for the eyes, glue the bottom closed, and fill it right before handing it over.
Don’t toss those empty toilet paper rolls just yet! Save them for a crafty Halloween afternoon so kids can transform them into colorful monsters, jack-o’-lanterns, mummies, and more.
17. Tissue Paper Pumpkins
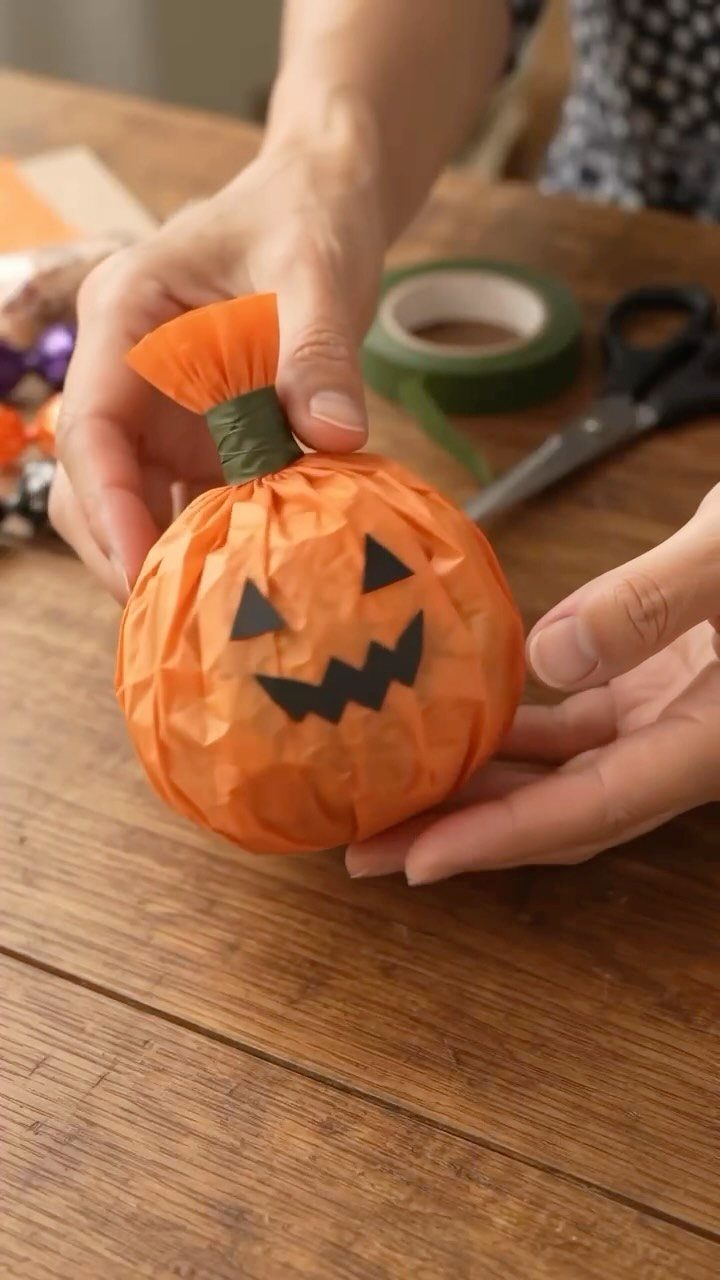
Crinkled orange tissue paper makes a soft, puffy pumpkin with almost no equipment. Scrunch the paper into a ball, then add a black paper face cut into a jack-o’-lantern grin and a bit of green tape for the stem.
Tissue paper is light and forgiving, so it suits younger kids better than stiff cardstock. Cut the face shapes ahead for little ones and let them choose where each goes.
18. Felt Halloween Garland
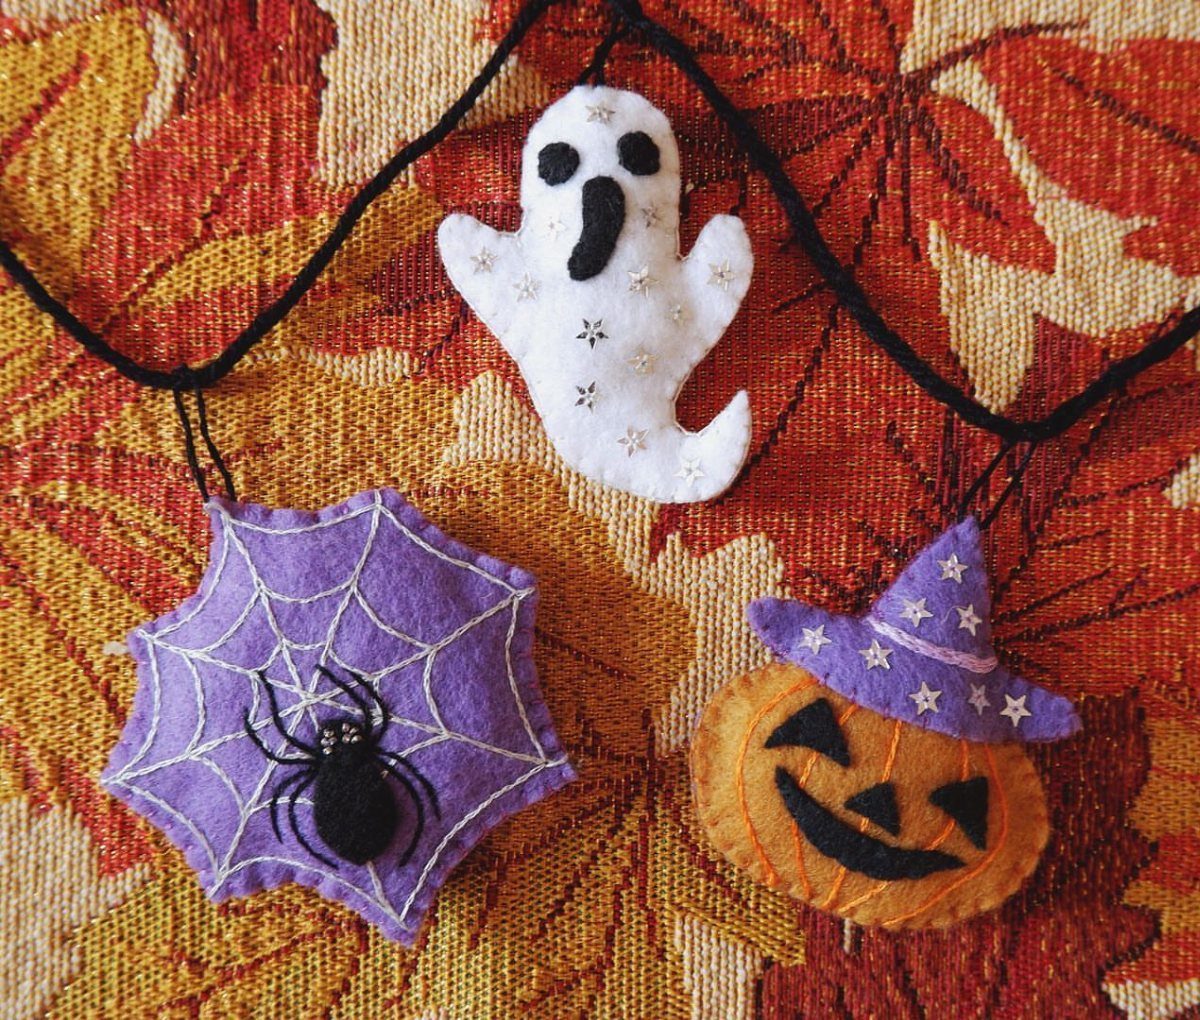
Felt holds its shape and does not fray, so cutouts hang cleanly from a black cord.
A ghost, a spiderweb and a pumpkin in a witch hat make a good trio, and a few extra shapes can fill a longer cord.
Cut the pieces from a paper template first, then glue or stitch them onto the cord.
Felt is easier for kids to cut than fabric, and hot glue or fabric glue both work. Hang it across a mantel.
19. Mosaic Window Clings
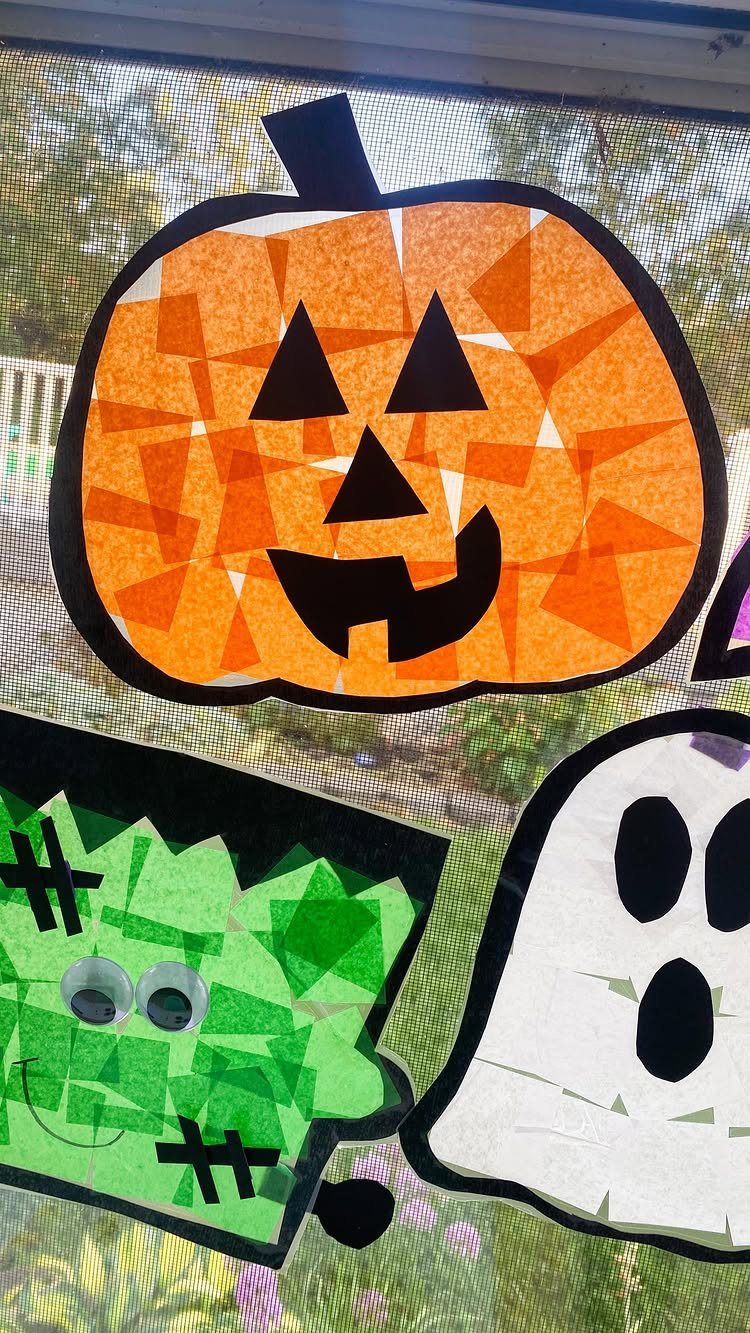
Mosaic film cut into small translucent pieces turns a window into a miniature stained-glass panel.
Cut tissue paper into small squares, layer them on contact paper in a pumpkin or ghost outline, seal with a second sheet, and stick the finished shape to a window.
Cut the pieces ahead of time so kids can focus on placing them.
Keep the outline shapes simple, since a pumpkin or ghost reads better from the yard than a detailed face. Put them where the sun hits the glass.
20. Felt Cat Faces
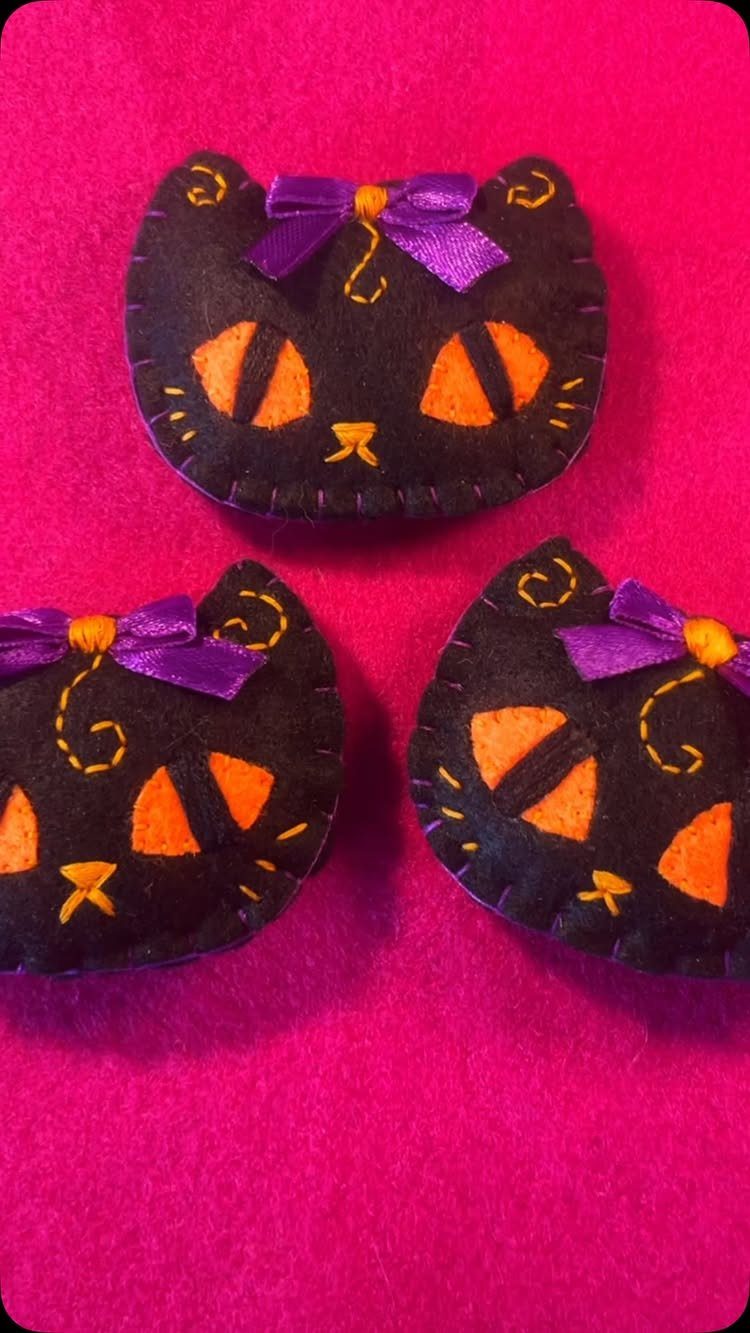
Small black felt cat faces, with orange eyes and purple bows, are a good first sewing project because the shapes are tiny and forgiving. Cut 2 ears and a rounded head, then add the eyes and bow in contrasting colors.
Stitches can be uneven; a cat looks fine with a little wobble.
I would make three so they sit together as a set. Older kids can sew, and younger ones can choose the bow color and glue it on.
21. Paper Leaf Garland
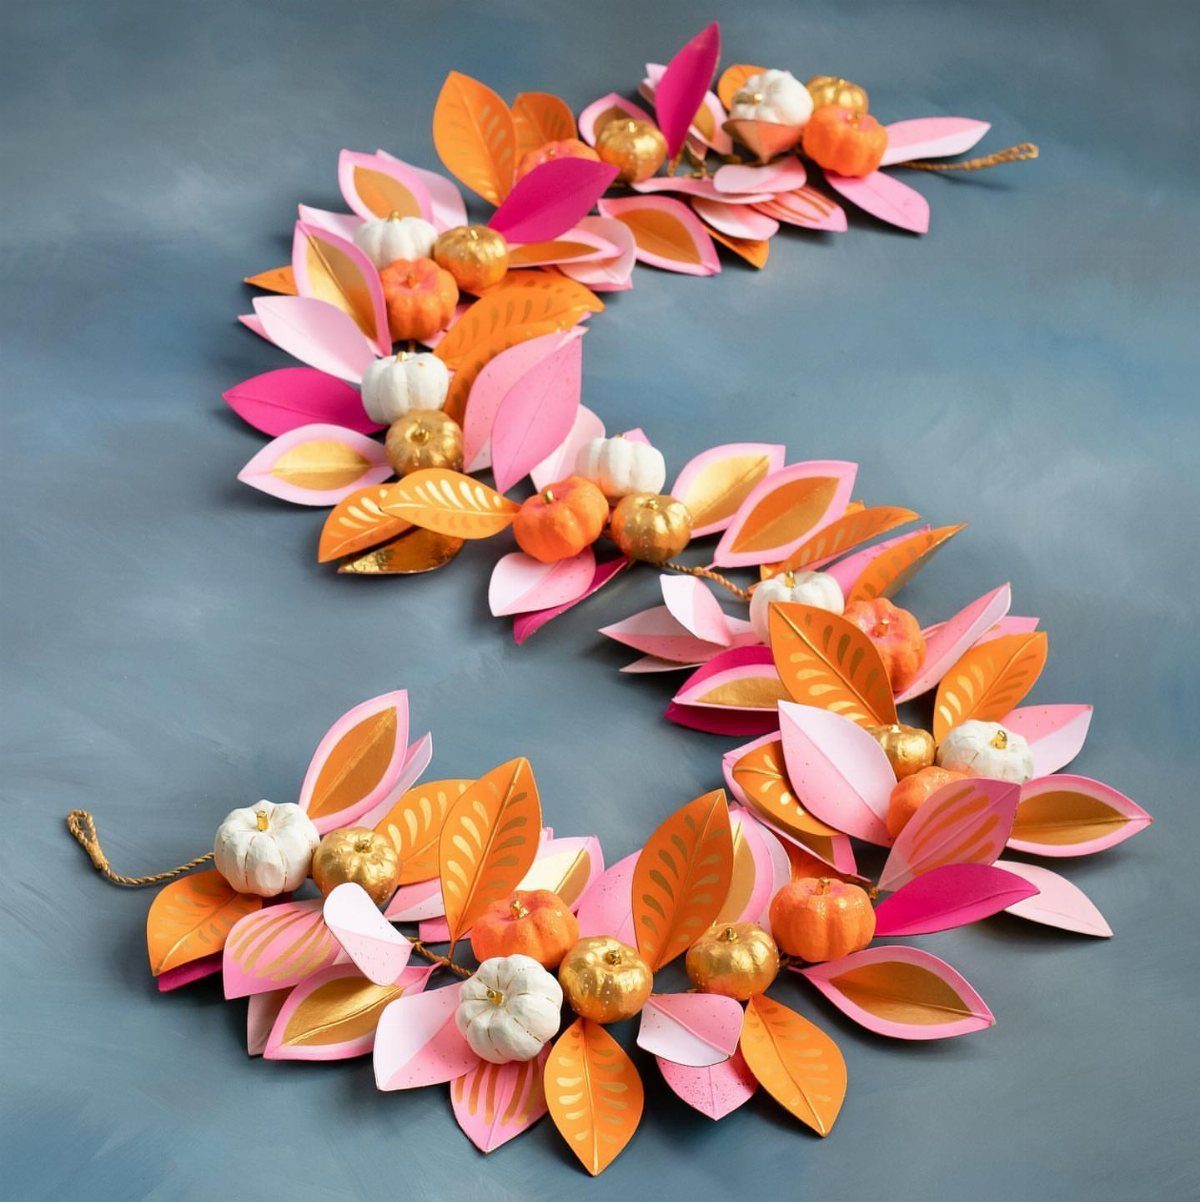
Leaves and little pumpkins cut from paper in orange, pink and gold make a garland that feels like autumn more than Halloween, so it can stay up after October ends.
Cut a pile of each shape, then string them in a loose mix rather than a strict pattern.
Kids can cut the leaves, and the pumpkins can be traced from one template so they match. Drape the garland in an S-shape across a wall or shelf, and let the curves do the decorating.
22. Paper Spider Craft
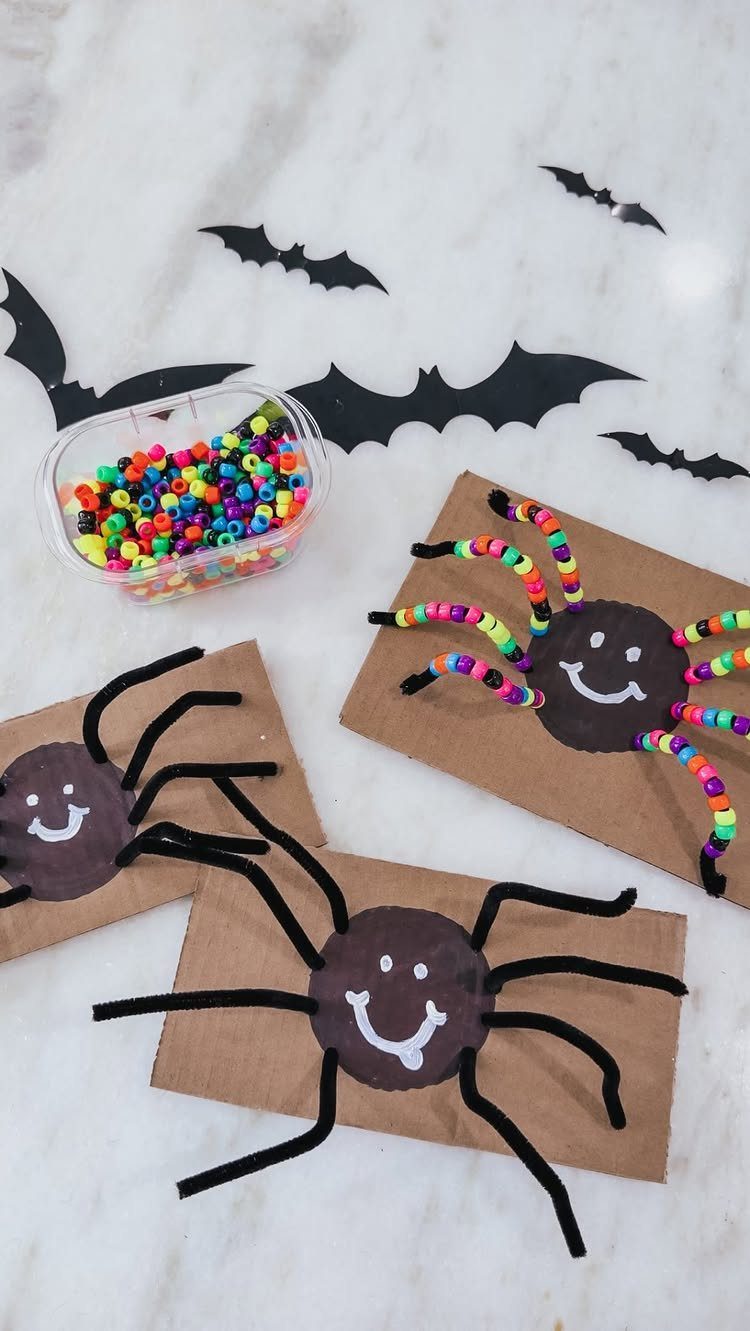
Brown paper spiders with pipe cleaner legs have a friendly look, thanks to a drawn smile instead of a scary face. Pony beads can be threaded onto the legs for color and a bit of weight.
Beads are the fussy part, so give younger kids fewer legs to fill, or let them skip the beads altogether.
Bend each leg at a knee before the spider is done; it stands better and looks more alive. A marker is all the face needs.
23. Halloween Jar Lanterns
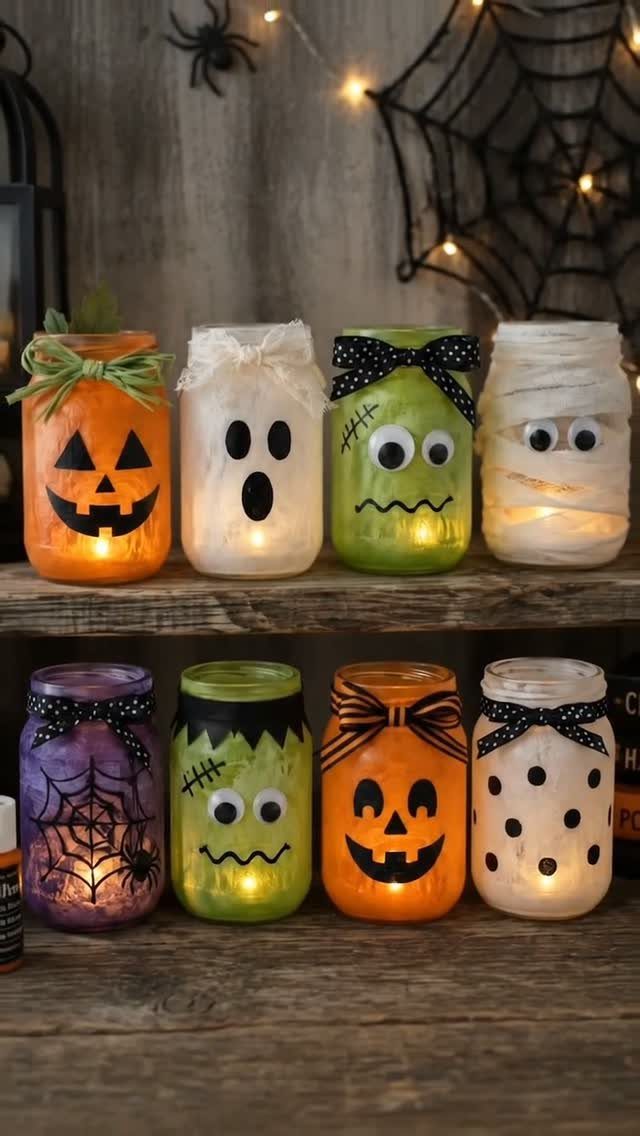
Glass jars painted as pumpkins, ghosts and mummies glow once a light goes inside, and a row of them on a shelf looks like a whole parade.
Paint the jar in a solid color first, then add faces or bandage lines on top.
Fairy lights or a small battery light work well inside.
Let each coat dry before the next so it does not streak. Painting glass is slower than paper crafts, so I would give this one to older kids and keep an adult nearby for the lights.
24. Paper Strip Skeleton
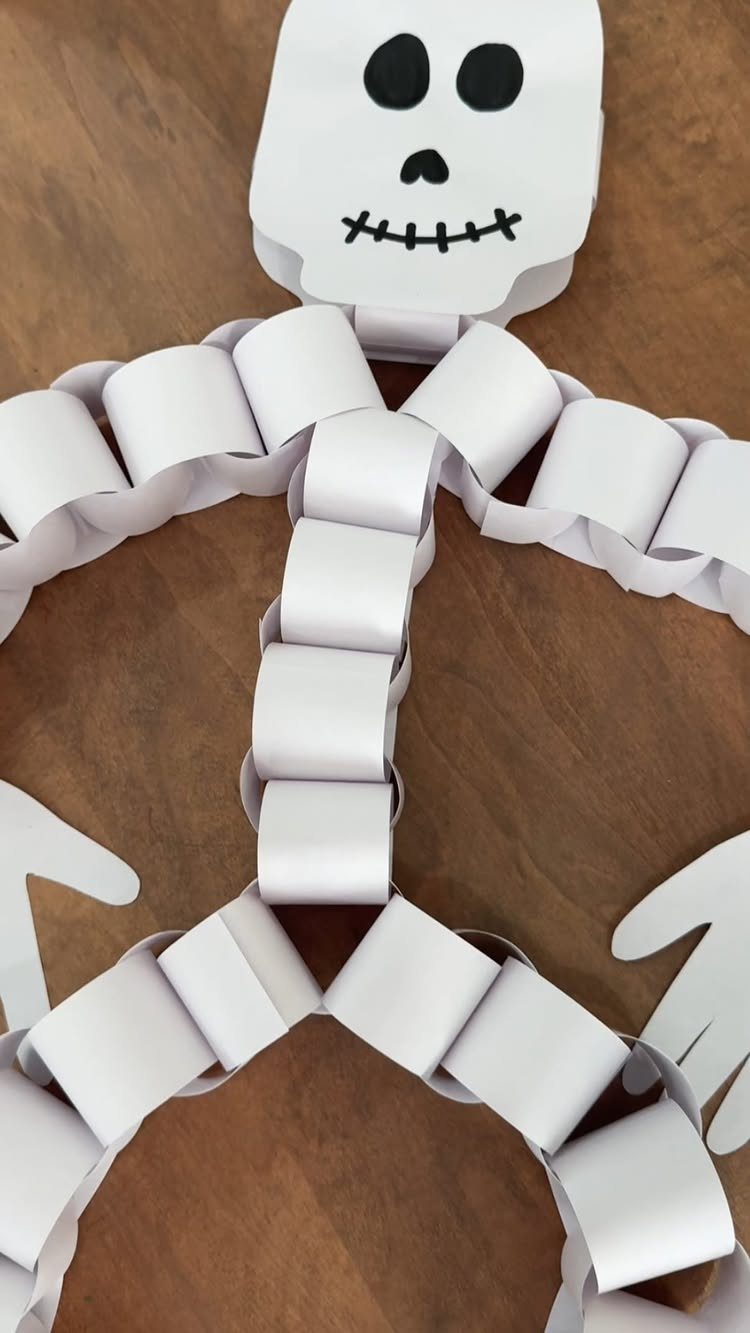
Looped white paper strips make a skeleton with real bounce: each loop becomes a bone, glued in a chain down from a drawn skull. Cut the strips all the same width so the loops come out even.
Strips are easy for kids to cut or for an adult to prepare, and gluing the ends of a loop is a good fine-motor task.
Draw a circle for the head, add 2 triangles for eyes and a nose hole, and mark a line of rectangular teeth across the bottom. Lay the finished skeleton on dark paper or a wall for contrast.
25. Fabric Witch Ghosts
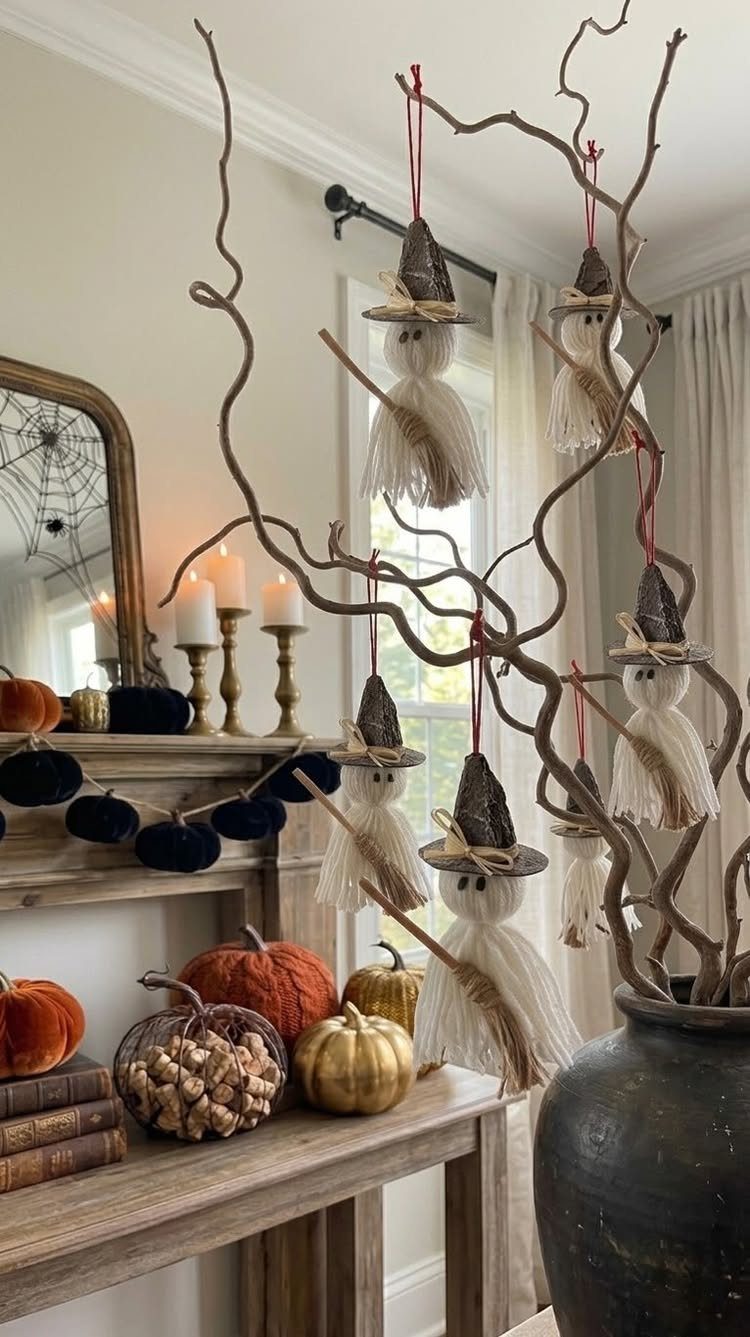
A scrap of white fabric draped over a small form becomes a ghost, and a tiny black witch hat gives it a personality.
Hang a few from bare branches in a vase, and the whole thing doubles as a table centerpiece beside pumpkins and candles.
Fabric holds a soft drape that paper cannot, so these look best hung at different heights. Let the kids decide which ghost wears which hat, then keep the needle and the glue gun for yourself or another grown-up.
26. Glitter Felt Pumpkin
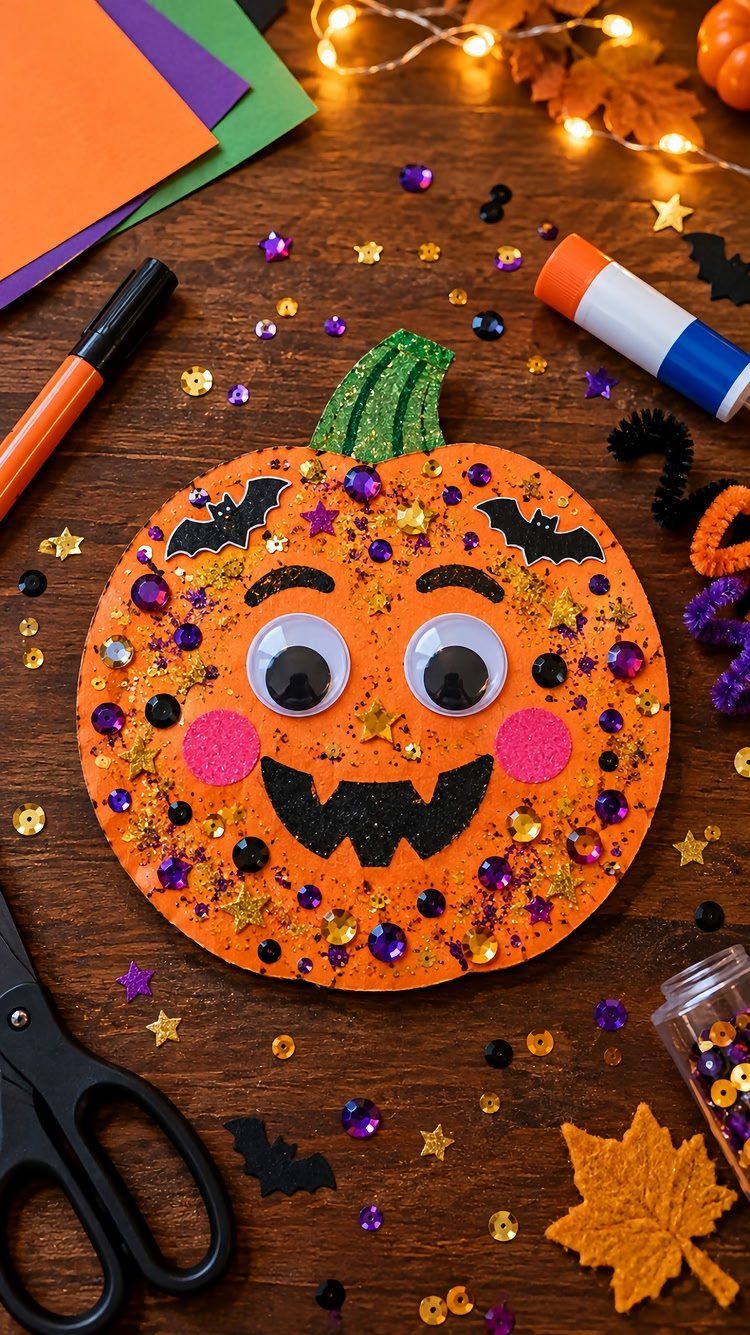
Glitter on felt gives a pumpkin sparkle without the shedding you get from loose paper shapes. Cut the body from orange felt, then add googly eyes and small black bat cutouts across the front.
Sequins and glitter glue are the fun part, so let kids decide where they go.
Set out scissors and markers before starting, and expect a little sparkle on the table afterward. Felt is easy for small hands to cut, which makes this a good pick for beginners.
27. Paper Pumpkin Garland
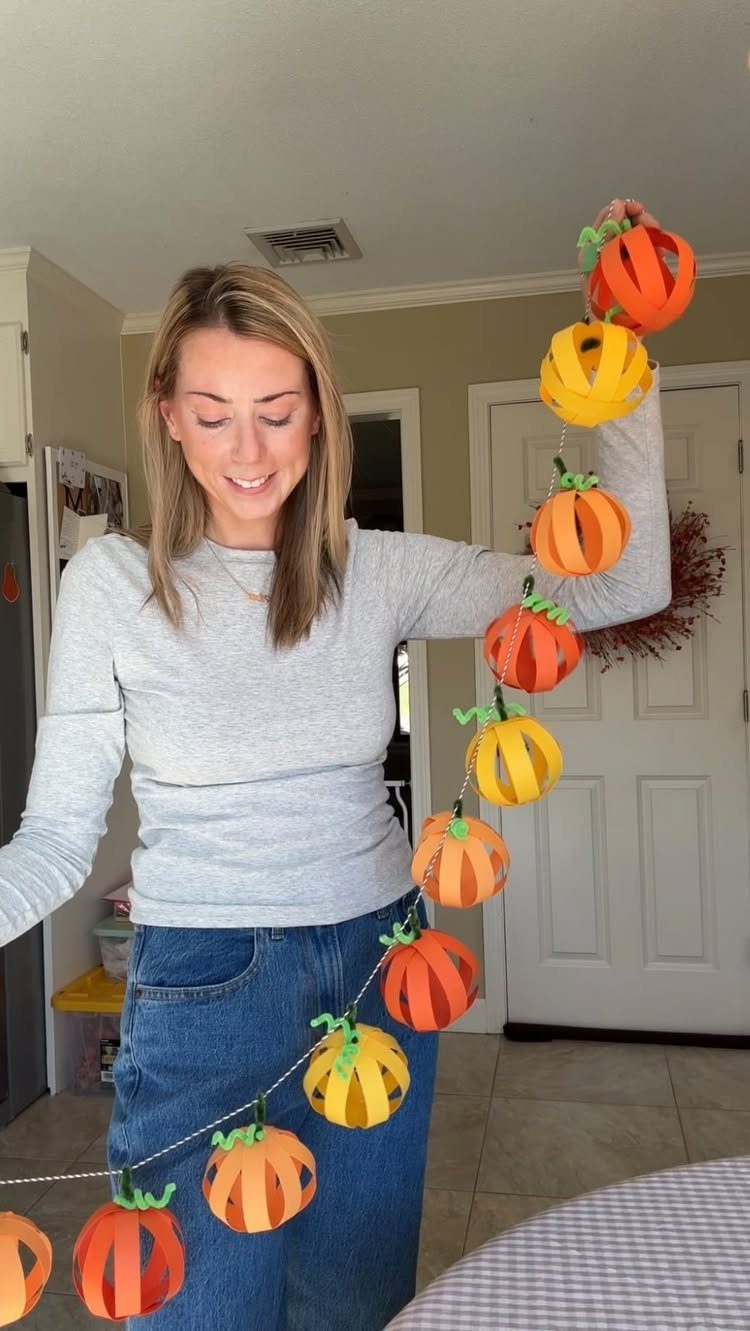
Three-dimensional paper pumpkins strung on a line make a garland with real depth, and the orange and yellow mix looks warmer than a single shade. Fold or curve each piece so it puffs outward, then thread them along a string.
Make them all from one template so the sizes match.
I would give kids the folding and threading, since a long string of pumpkins keeps several pairs of hands busy at once. Hang it across a doorway or kitchen shelf.
28. Window Ghost Cutouts
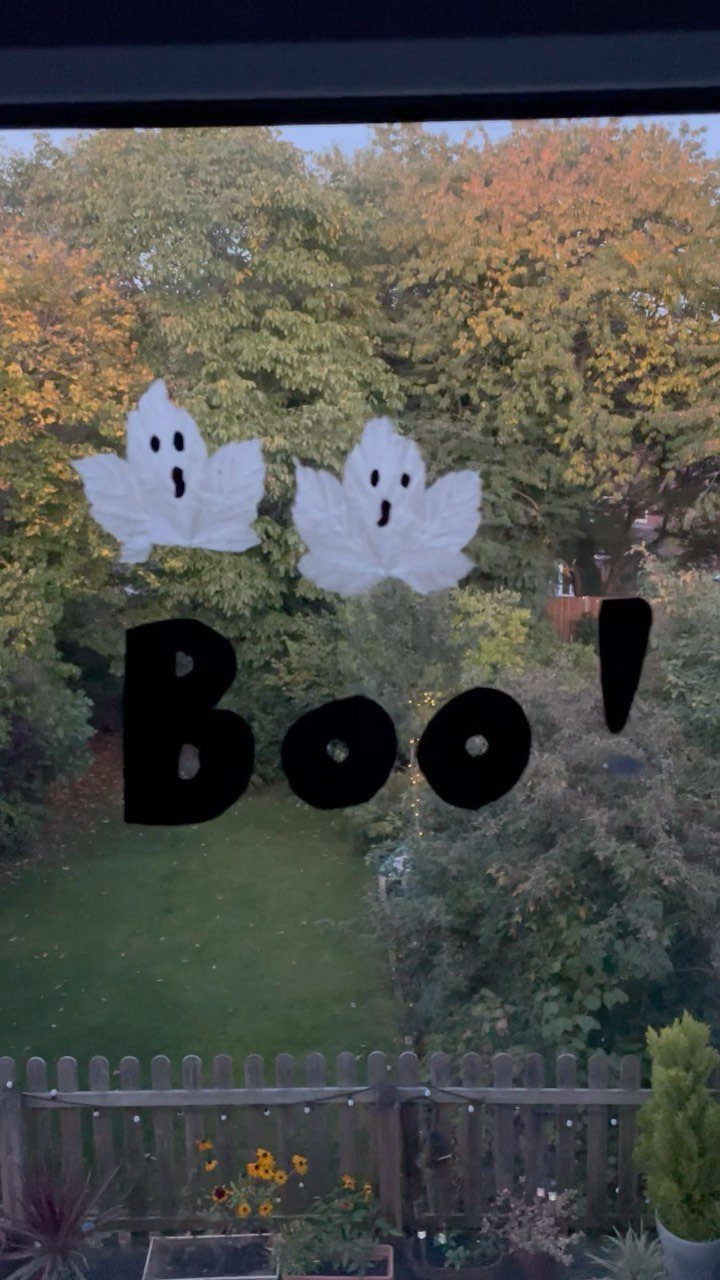
White paper ghosts and a black "Boo!" cutout turn a plain window into a Halloween scene, and the white shows best against a dark yard at dusk.
Cut the ghosts in a simple rounded shape, then stick them to the glass with tape.
Keep the lettering chunky so it reads from outside.
Kids can draw the faces on the ghosts, and an adult can cut the "Boo!" if the letters get tricky. Two ghosts and one word is plenty.
Crafting with Kids
Before picking a project, ask 4 questions. How much time is there, how much mess can the table take, who is doing the cutting, and is this one child or a group?
Parties and classrooms call for projects that go quickly, need little supervision, and can be cut and sorted ahead of time in big batches.
Let the result be wobbly. A crooked face is part of the charm, and kids stay interested when nobody is fixing their work.
Materials Needed
Most Halloween crafts come from one small kit, so stock it once and you can say yes to almost any idea.
Base materials: felt, foam sheets, cardstock, paper plates and cardboard tubes.
Adhesives: glue sticks, white craft glue, double-sided tape and a low-temperature hot glue gun.
Color: washable tempera, acrylic paint, and black, orange and purple cardstock.
Details: googly eyes, pipe cleaners, buttons and sequins.
With kids around, my pick is a low-temp glue gun. Felt and paper stay put just fine under it, and the risk of a burned fingertip drops a lot.
Add paintbrushes, scissors and a black marker, and the kit is complete. Save cardboard tubes and similar clean recyclables through the year, and they cost nothing.
Time Considerations
Match the project to the clock. Sticker and coloring crafts take under 10 minutes, which makes them a safe pick when guests are already arriving.
Prep saves the most time. Cut shapes, sort supplies into trays and cover the table before anyone sits down, and a 30-minute craft stays at 30 minutes.
For a group, pair one quick project with one slow one. Kids can move to the fast craft while the paint dries.
Frequently Asked Questions
What are the easiest Halloween crafts for beginners?
Paper plate pumpkins and toilet paper roll mummies are two of the simplest.
An orange plate is nearly a pumpkin already, so no base coat is needed, and a cardboard tube wrapped in loose white paper strips with googly eyes becomes a mummy that can hold candy.
Paper plate spiders, sticker scenes and painted rock pumpkins are hard to ruin: a few basic supplies, and the paint or glue is dry before the kids lose interest.
How do you decorate a pumpkin without carving it?
Paint it. 2 coats of white acrylic make a good base for a storybook character, with pink or other colors added once it dries fully.
Washi tape, yarn, push pins, stickers and gems also work. A pumpkin left uncut stays fresh for weeks where a carved one sags within days, and a brush is a much safer tool than a knife for small hands.