The ideas here run from a single witch on a door to a Pac-Man game door and a Boo Crew of student ghosts, and the materials stay simple: construction paper, markers and tape.
What decides your pick is how much of the class you want on the door: if each child should find themselves on it, the Boo Crew Student Ghost Door is my choice; if you only have one evening to cut, the Mummy Door Display or a single Witch Door does the job.
The Halloween Banner and Hanging Garland Doorway suits rooms where the door still has to open.
1. Witch Door
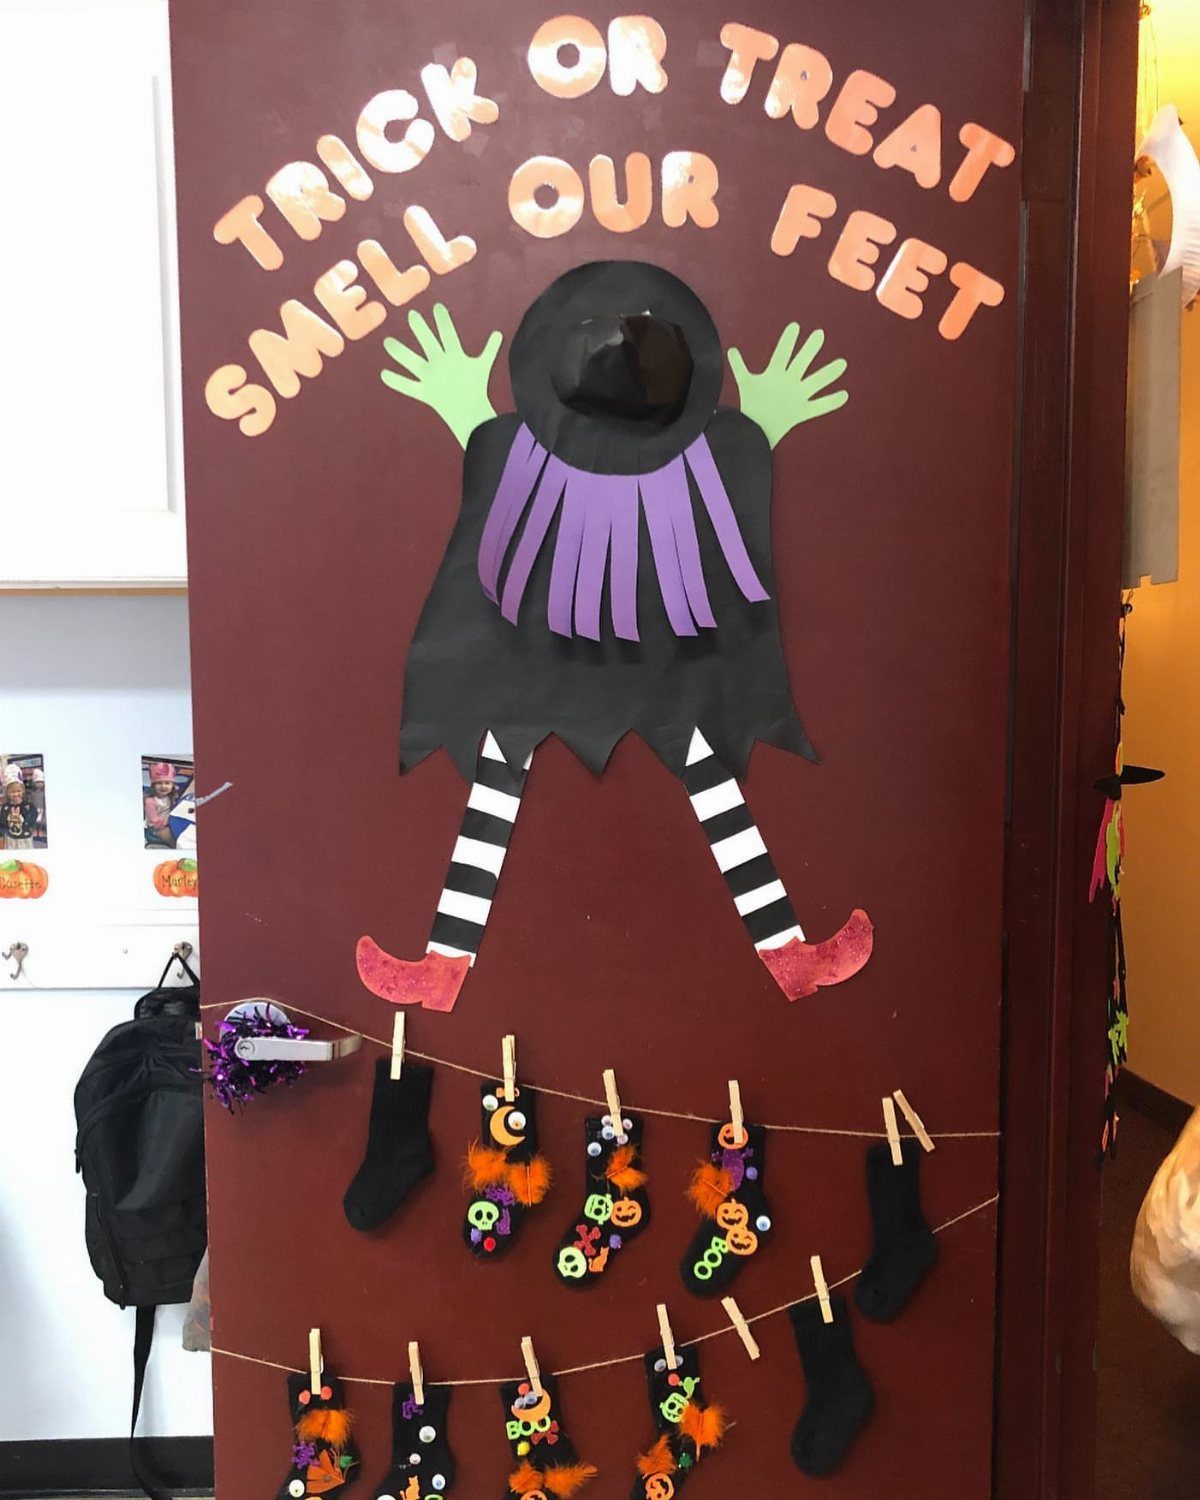
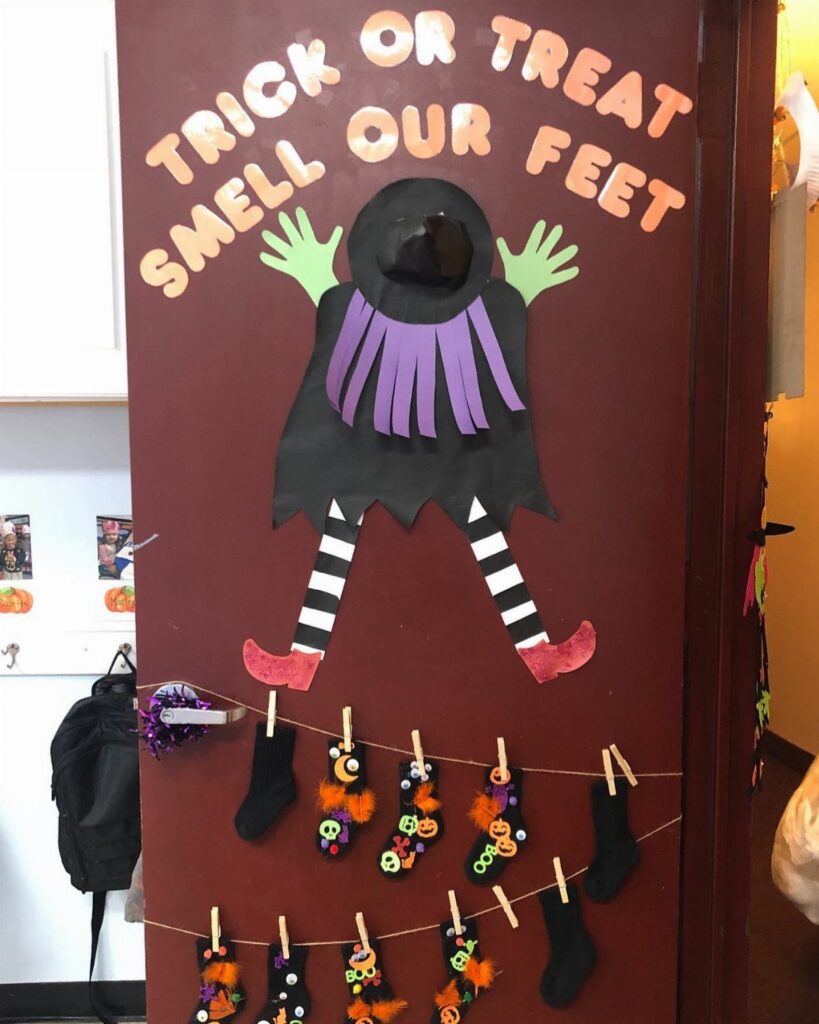
A witch door works best when the rhyme does the talking.
Orange lettering on a maroon door reads clearly from across a hallway. Keep the witch a single large paper cutout, since one big shape beats several small ones on a busy door.
2. Hocus Pocus Classroom Door
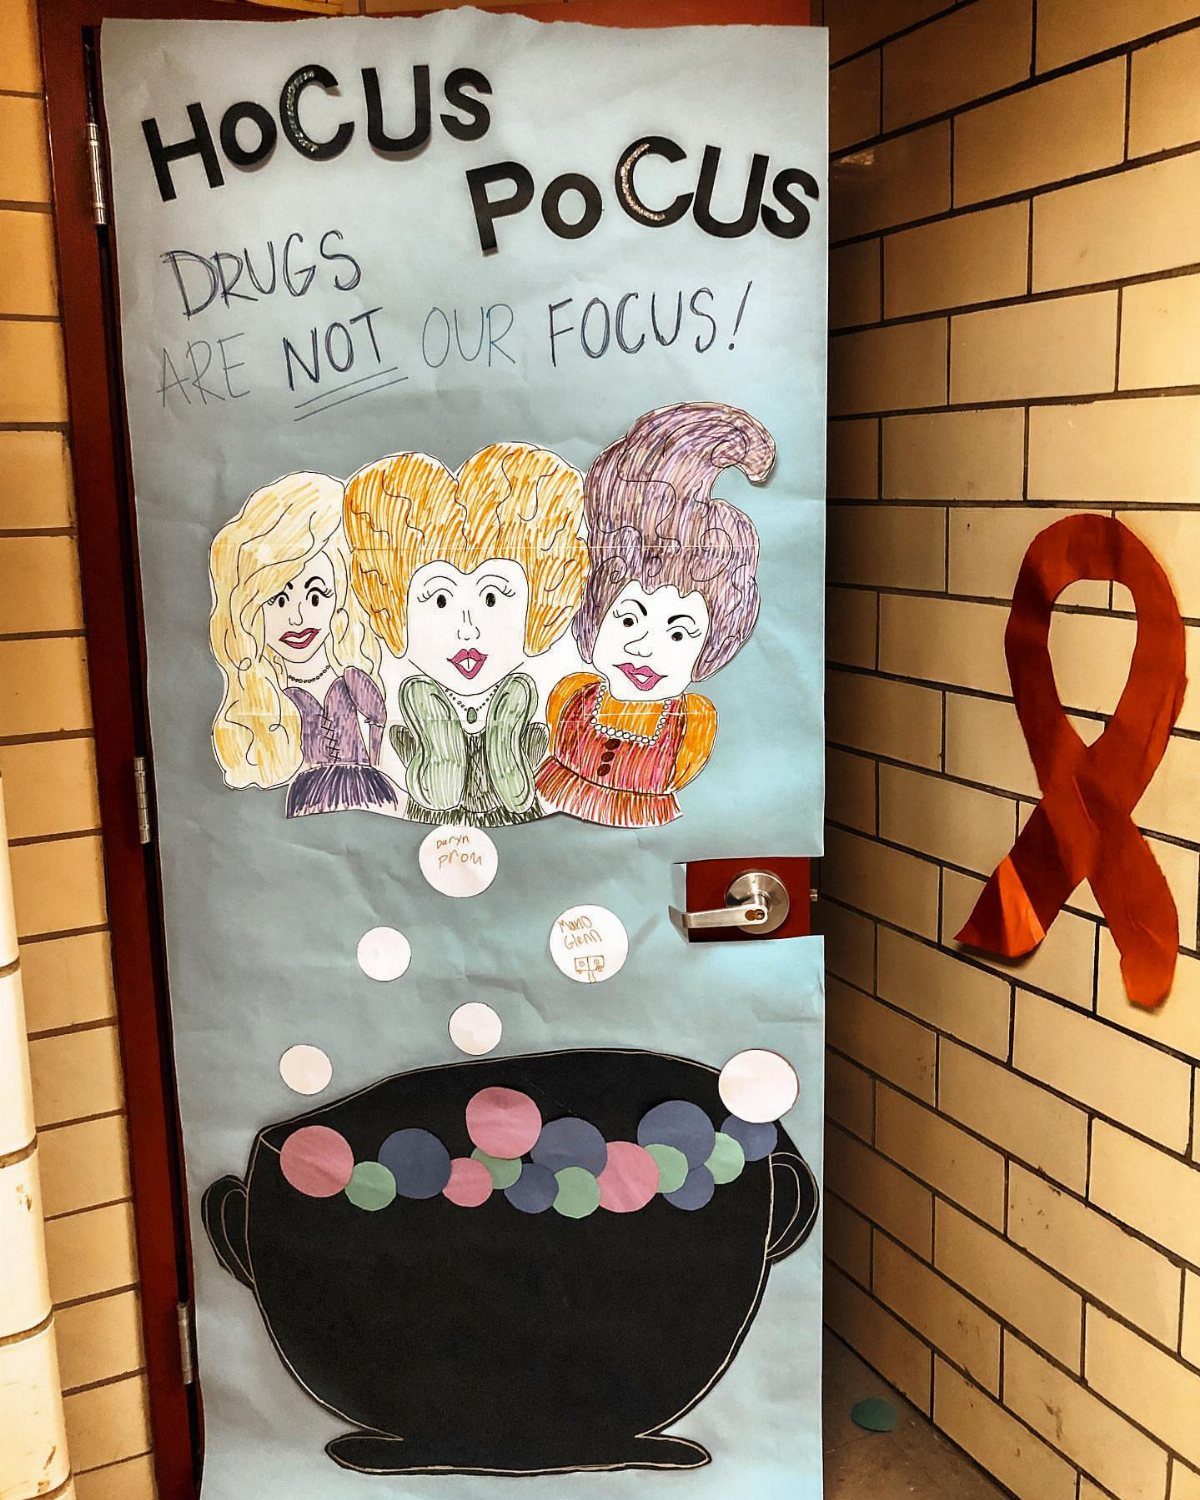
Puns carry this door. 3 witches and a cauldron already say Hocus Pocus, so the slogan gets the final word, and a drug-free message turns a movie reference into a Red Ribbon Week display.
Cut the witches from construction paper and the cauldron from black bulletin board paper; both are cheap and a class can help trace the shapes.
Keep the lettering large, because the slogan is the point and has to be readable from the hall.
3. Mummy Door Display
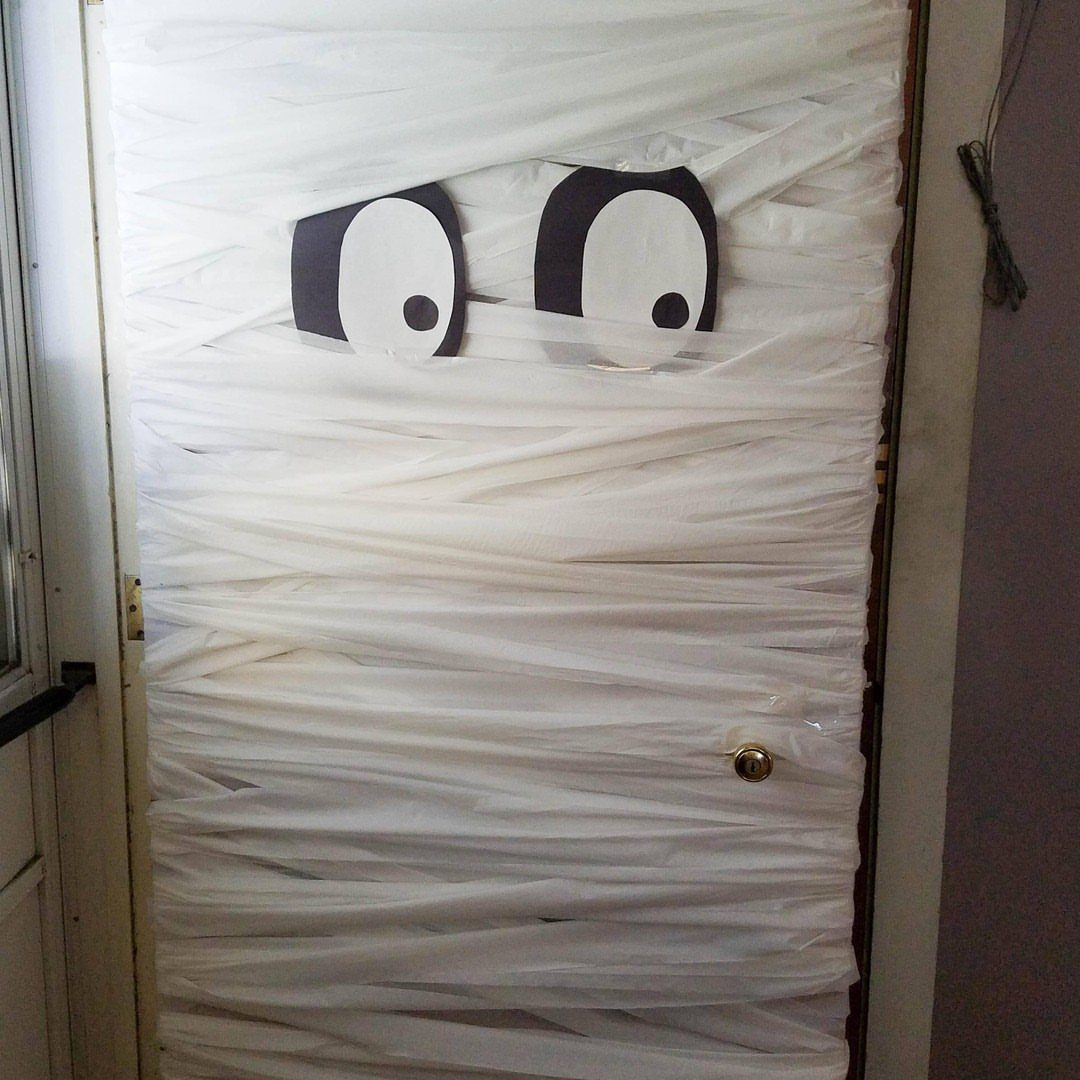
Wrapping a whole door as a mummy is the cheapest big-impact option here. Run white strips across the door and leave them slightly uneven, then tuck 2 oversized cartoon eyes into a gap so they peek out.
Overlap the strips and tape them at the edges so they stay flat. Let the eyes be the only detail; the simplicity is why it works.
4. Caution Tape and Oversized Spiders Door
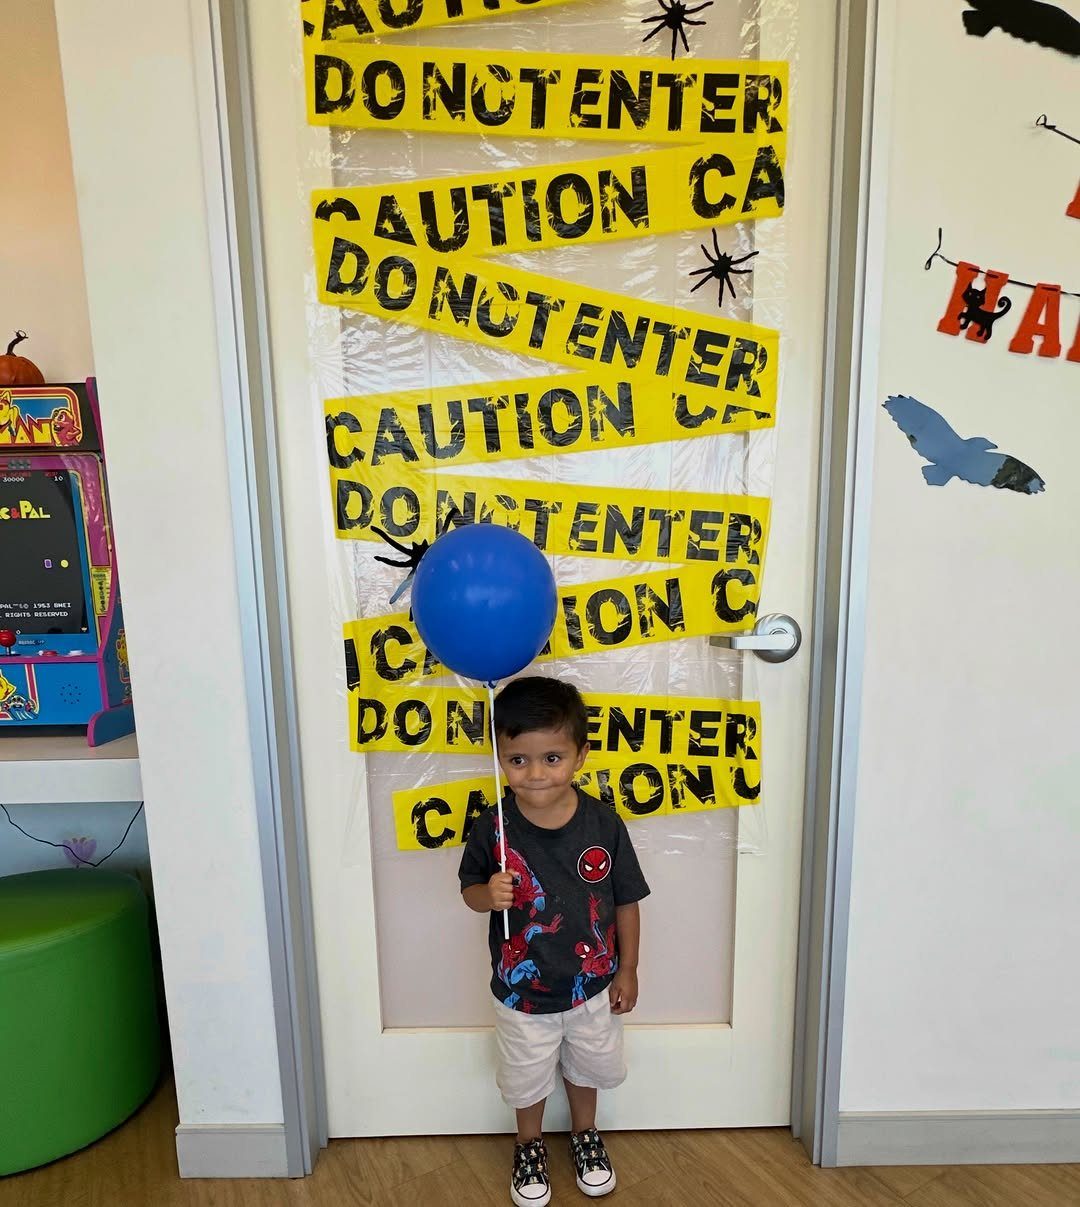
Caution tape does most of the work on this door. Crisscross "CAUTION" and "DO NOT ENTER" strips across the frame, then add black spiders that are far too big to be real.
I like it for older grades, where the joke lands as a dare. Cut the spiders from black paper in a few different sizes, and tape them partway over the tape so they look like they are crawling.
5. Pac-Man Themed Game Door
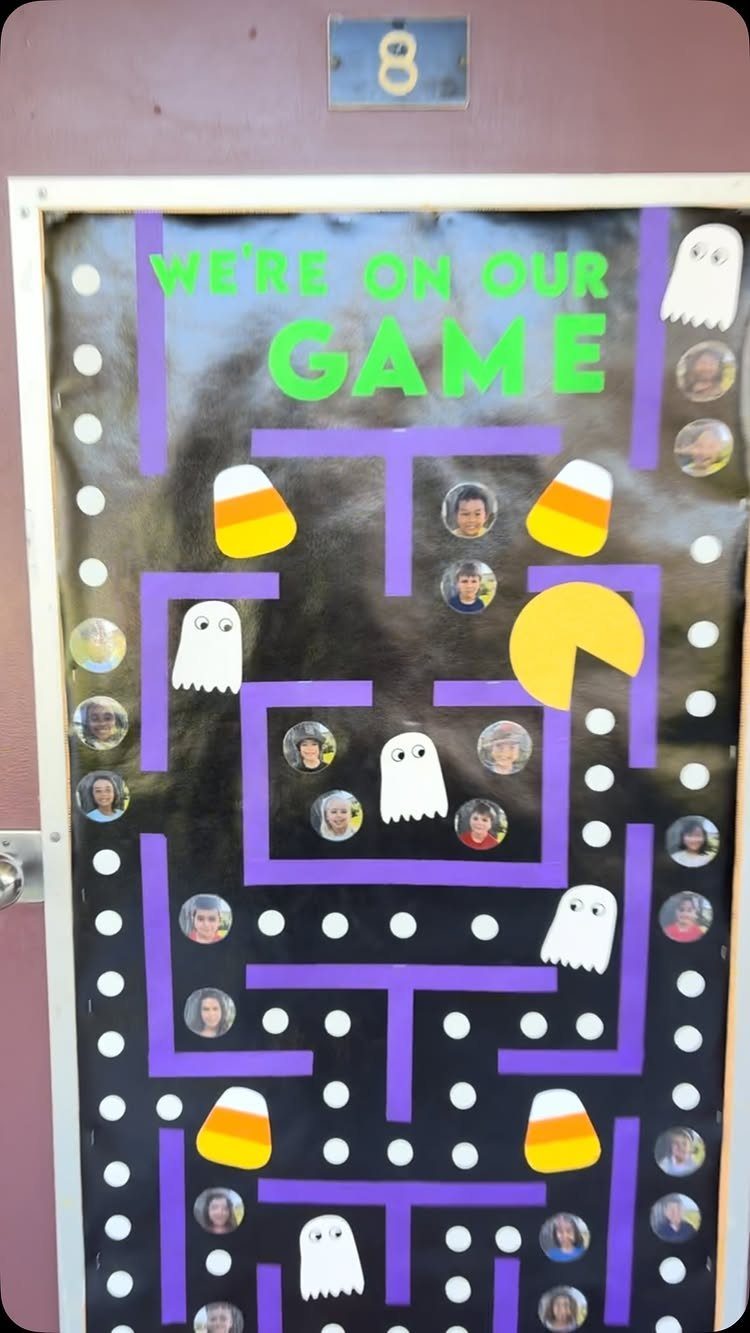
Start with a black door, because it makes yellow and purple look lit from within. Mark the maze walls with purple borders, then place ghosts, candy corn dots and one yellow Pac-Man in the paths.
Round student photo cutouts are the best part: each child becomes a pellet in the maze.
Print the photos at one size so the circles line up. "We’re on our game" works as a caption for any grade.
6. Spooktacular Class Paper Banner Door
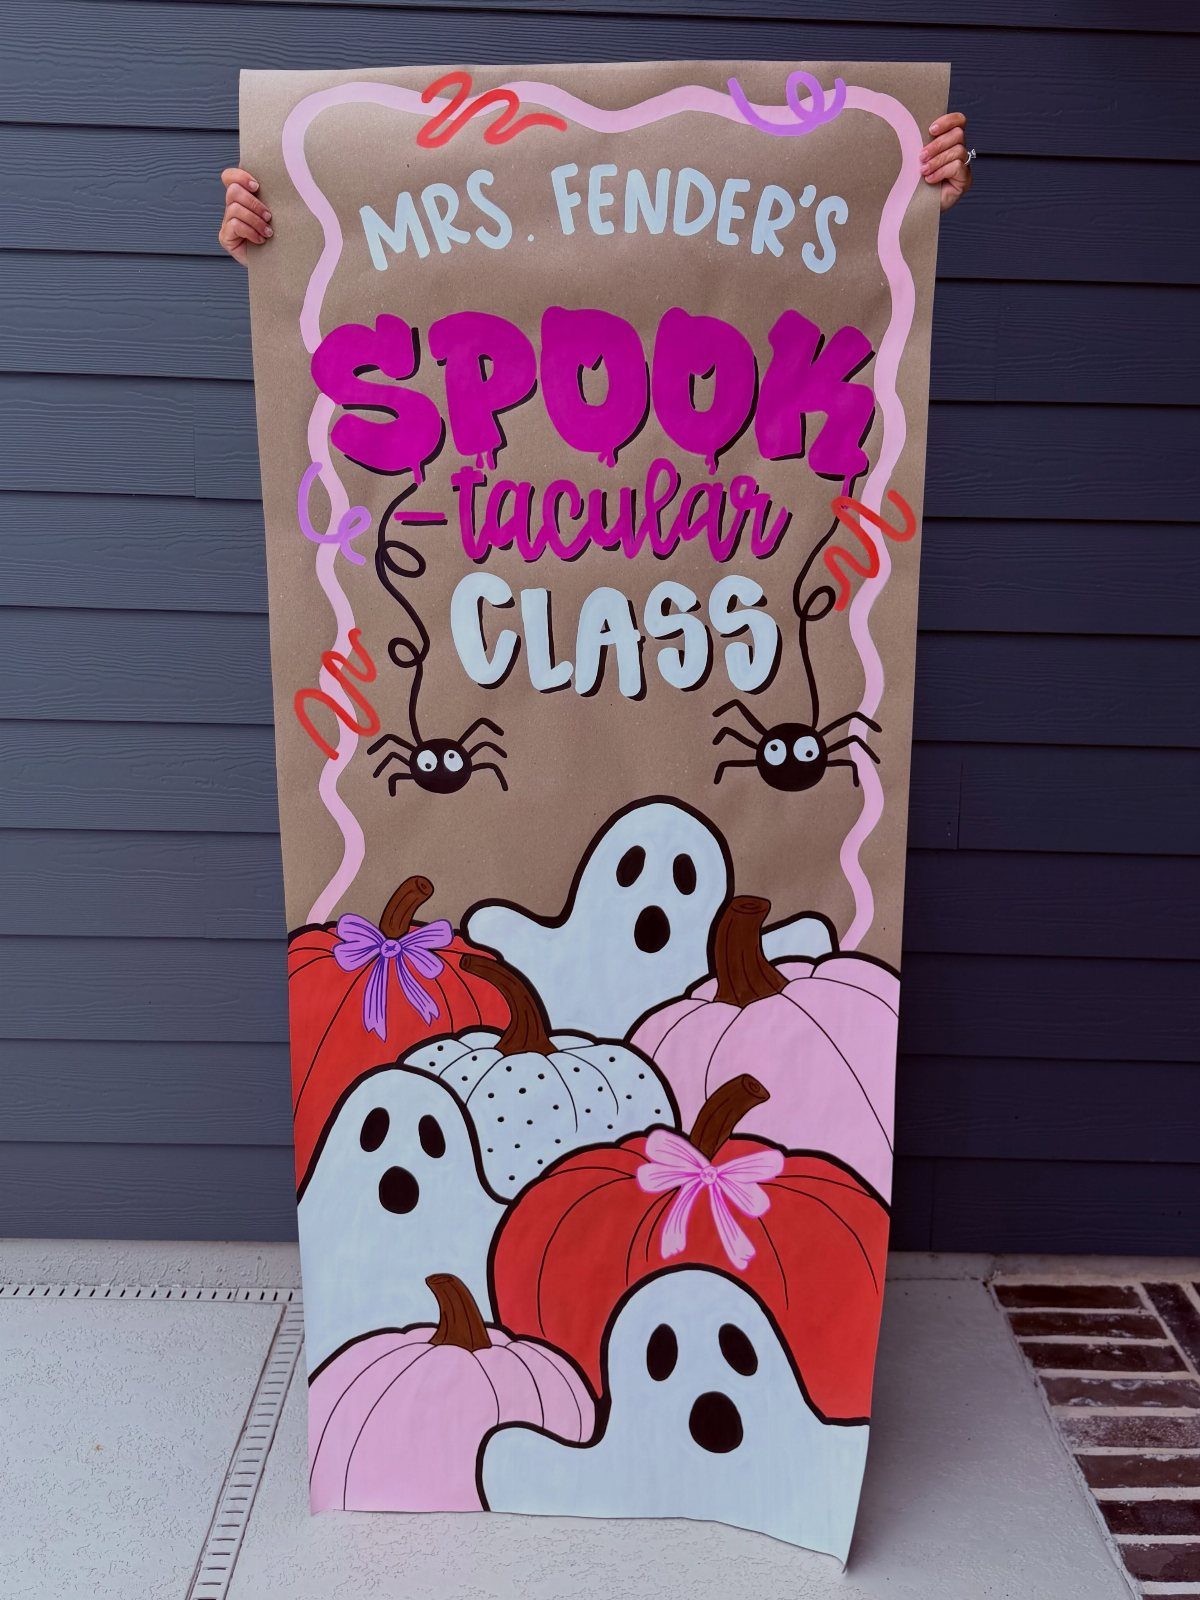
One sheet of brown craft paper, cut to cover the door, makes a banner that looks bigger than it cost. Letter the teacher’s name and "Spooktacular Class" across the top, then fill the space with ghosts and pumpkins.
Pattern the pumpkins with stripes or dots for variety. Draw everything on the floor before hanging, and tape the paper at the top and sides so it lies flat against the door.
7. Screaming Ghost and Bloody Handprints
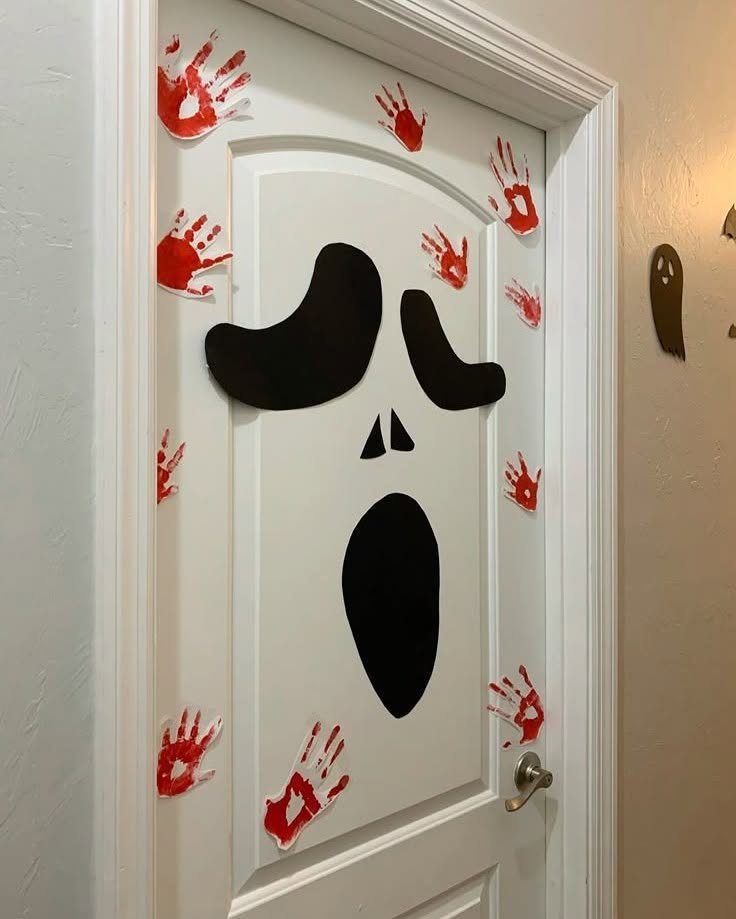
Black against white does the heavy lifting here. A single screaming ghost face cut from black paper reads from the far end of a hallway, and the red handprints add the scare without any extra shapes.
Cut the face large, with a wide open mouth and 2 stretched eyes. Trace your own hand in red paper for the prints, and scatter them unevenly so they look like they were grabbed on the way past.
8. Boo Crew Student Ghost Door
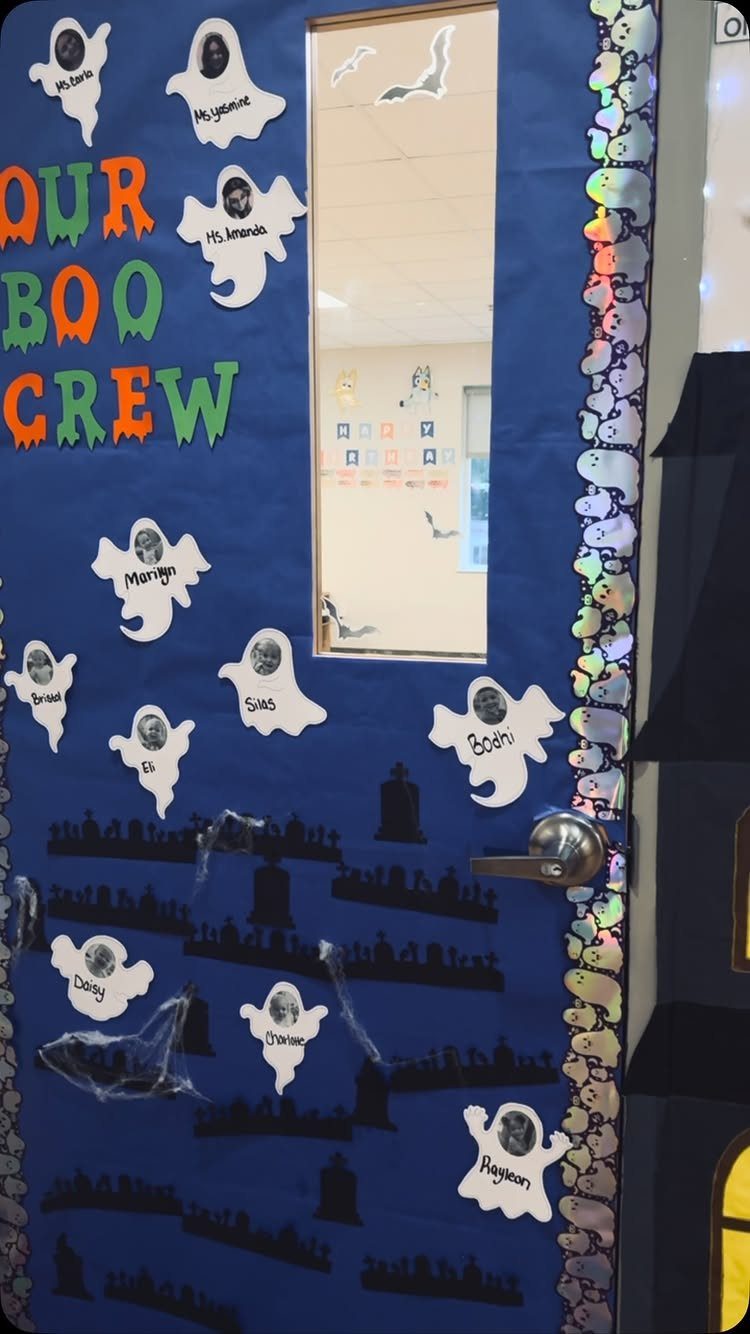
Every child gets a ghost on this one, and that is why I would pick it for a class that wants to feel like a team.
Print each student’s photo small enough to sit in the face area of a white paper ghost, then write the name underneath.
Add the teachers too. Cut the graveyard row from black paper, tombstones and bare trees, and tape it along the bottom edge.
A bright door color like this blue lets the white ghosts stand out. Print all the photos at one size so the ghosts match.
9. Let’s Get Spooky Door
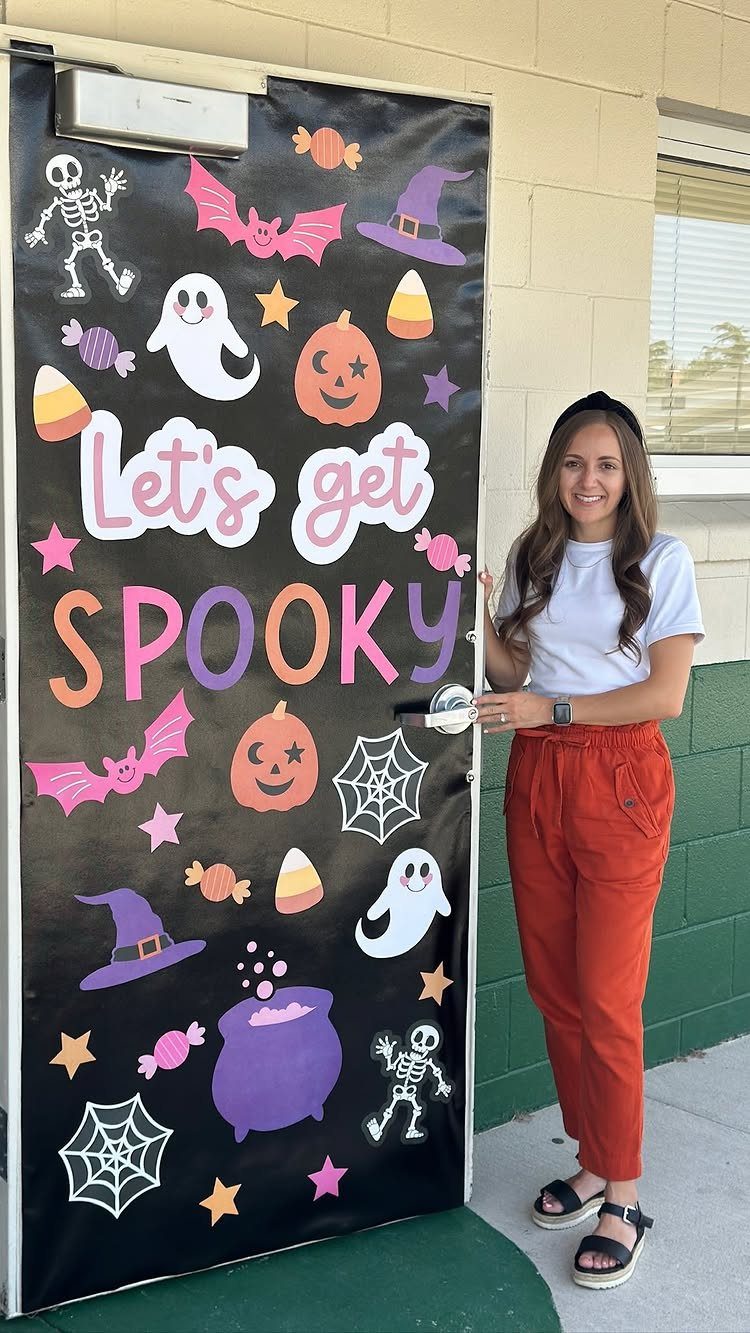
Pastel paper on a black door gives Halloween a friendlier face, and I think that suits younger grades better than the usual dark orange and black.
Cut the ghosts, pumpkins and skeletons from light colors, since black behind them makes every shade pop.
Make "SPOOKY" the biggest word and the rest smaller, so the eye lands on it first. Outline shapes in marker if a pale color looks washed out.
10. Halloween Banner and Hanging Garland Doorway
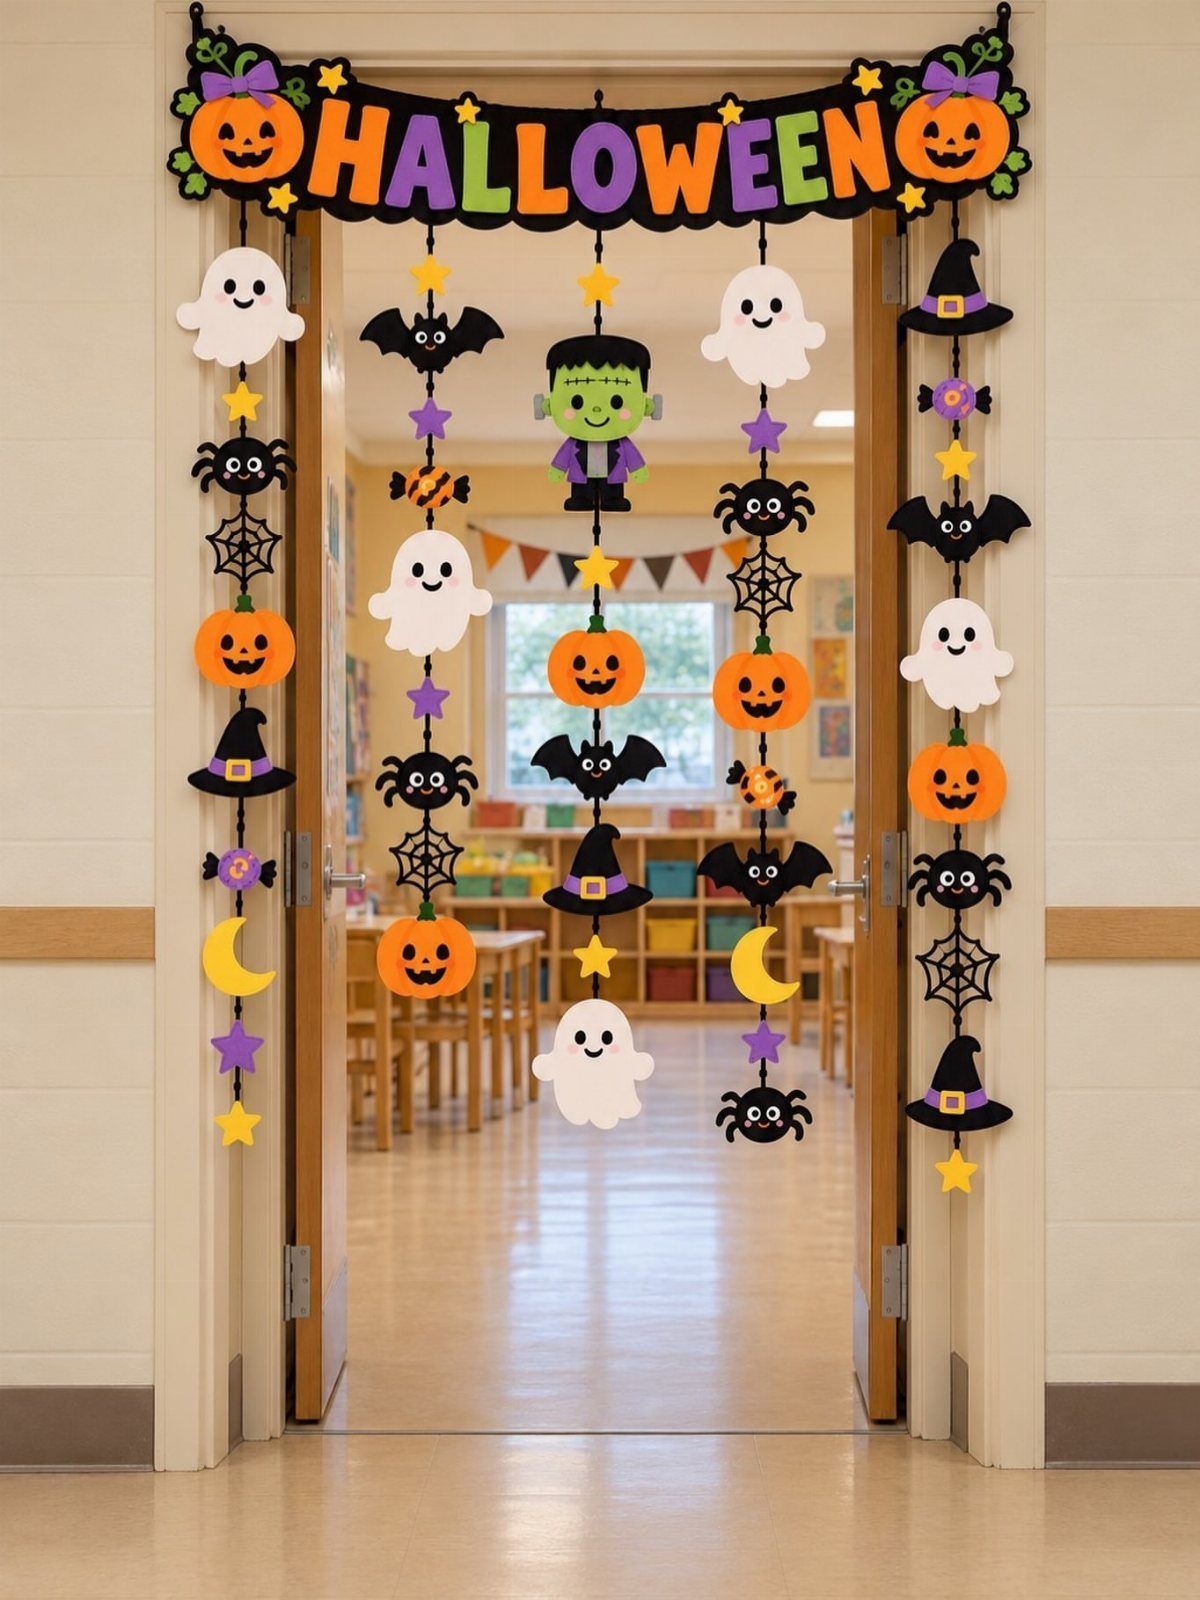
Framing the doorway instead of covering the door keeps the entrance usable and leaves the door free to open. Hang a letter banner across the top with one big letter per sheet, so "HALLOWEEN" can be read from the hallway.
Then drop garlands down each side: ghosts, pumpkins, bats and spiders strung on string or yarn.
Cut every shape in 2 layers of paper for sturdier hangings. Use removable tape on the frame so the paint stays clean.
11. Scarecrow
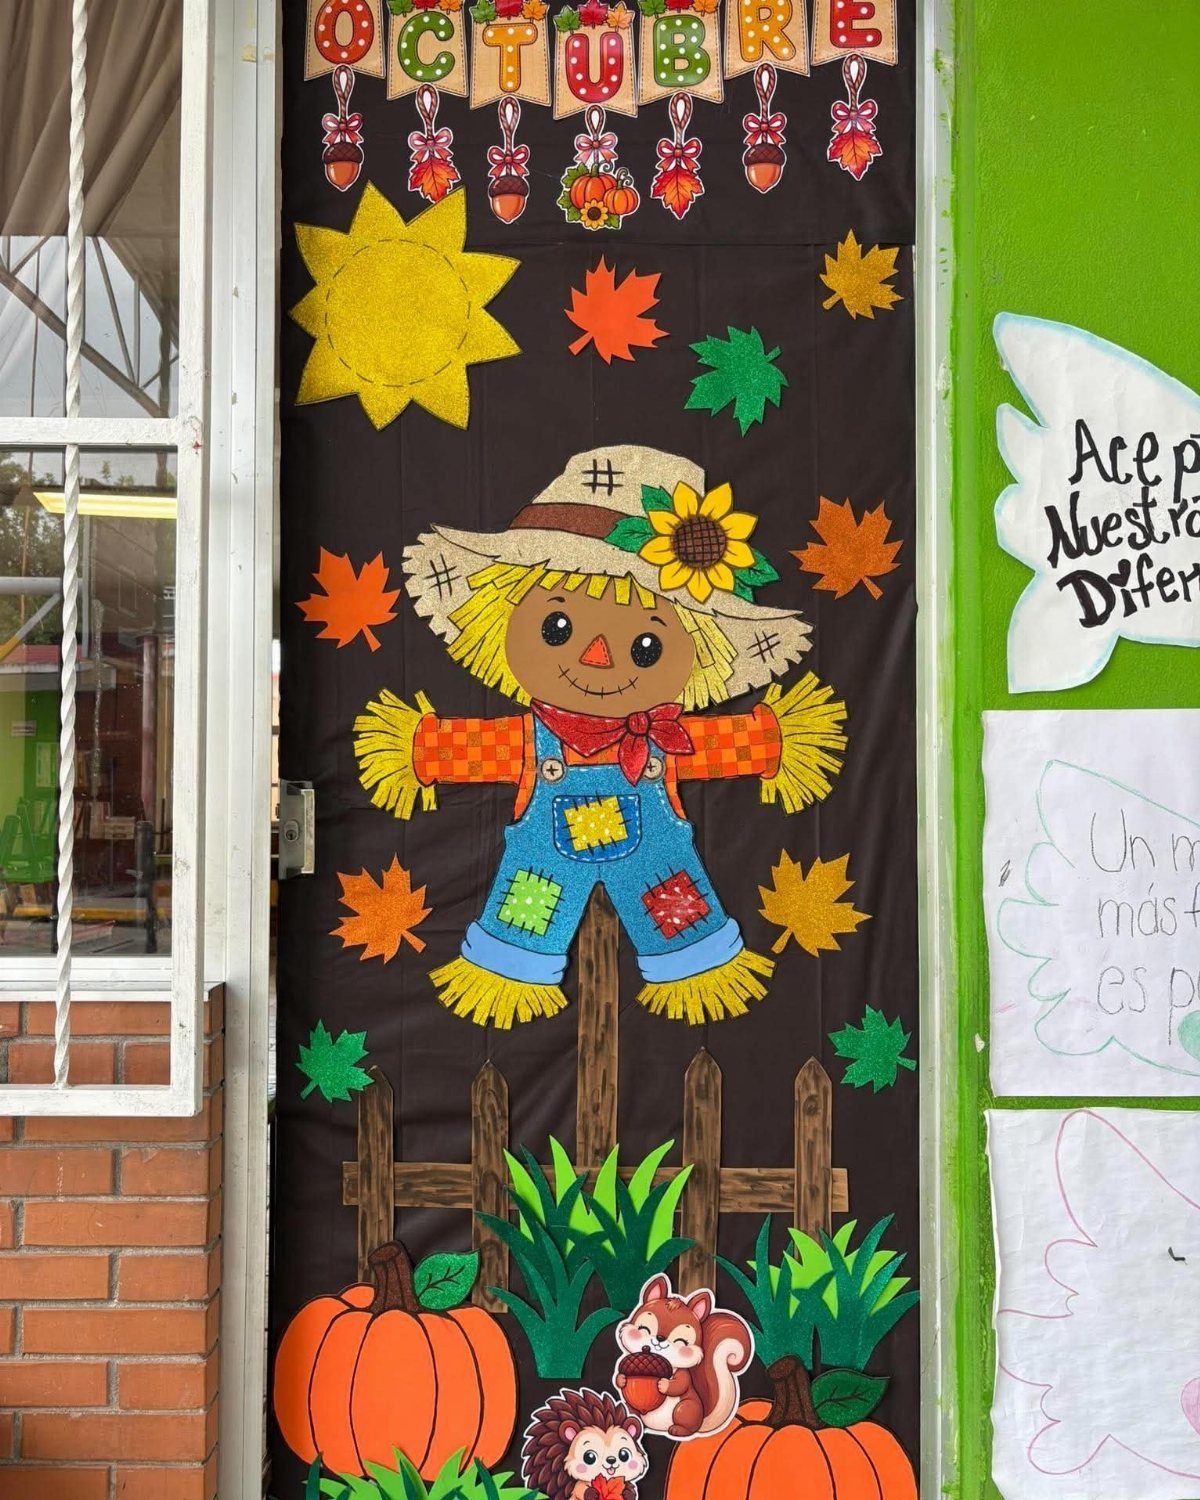
A scarecrow this size works because it fills the whole door with one figure. Build him from large paper pieces: a hat, a face, a plaid or patched shirt, and straw sticking out at the sleeves and collar.
The sign on the scarecrow’s door, the heading above the classroom’s Halloween display, can be in any language the class is studying, which makes this one easy to tie to a lesson.
Cut the big pieces first, then fill the gaps with small ones.
DIY Halloween Door Ideas
Construction paper, markers and scissors cover almost everything a classroom door needs. Cut pumpkins, ghosts or bats in bulk, then hand them to students to decorate before they go up.
Texture is cheap too. Simple streamers, paper chains or cotton ball "webs" add depth without adding to the bill.
A monster door is the easiest place to start. Red, white, orange and black paper plus some basic shapes is all it takes, and the cutting goes fast.
Incorporating Students in Designs
Students feel proud of a door when they can find themselves on it.
Student names ask the least of you: print one on each paper pumpkin, or letter them across the wings of a row of bats that crosses a big yellow moon.
Photos of just the students’ eyes, placed on ghosts, monsters or bats, are funnier than full faces and easy to match up. Let each child build a jack-o-lantern with their own spin, so no two look alike.
Changing Decorations Throughout October
A door does not have to be finished on day one.
A bare pumpkin patch of 5 or 6 paper gourds is enough for the first week of October; I add a few more each week so the door fills up by Halloween.
Add ghosts, bats or candy corn every week or so. Students notice the change, and you spread the cutting and prep across the month instead of doing it all at once.
Frequently Asked Questions
What are some popular items for Halloween door decorations?
Jack-o-lanterns, silly ghosts, candy corn, crawling spiders and big-eyed monsters are the classics, and Halloween movie references like Hocus Pocus work well too.
I’d pick one big shape or one clear slogan over many small pieces, because a busy hallway door has to read from a distance.
Can Halloween door decorations also be educational?
Yes. Put letters, sight words or math facts on paper pumpkins or candy corn shapes, so each pumpkin carries a letter or a word the class is learning.
Language classes can use the scarecrow’s sign for vocabulary, with a greeting or a harvest word written in Spanish, French or Mandarin. The decoration stays festive while it reinforces a lesson.
How can I get students involved in decorating a classroom door?
Put each child on the door. Print a name on a paper pumpkin, or letter names across the wings of bats.
Cropped photos showing only each student’s eyes, set into ghost, monster or bat cutouts, get bigger laughs than full faces and keep every child a little mysterious.
Printing every photo at the same size keeps the cutouts lined up, and each child can then give their jack-o-lantern its own face and personality.
How do I keep a classroom door fresh all October?
Build it in stages. A bare door with 5 or 6 paper pumpkins in week one gives you room to grow, and ghosts, bats or candy corn can join it weekly.
Kids spot each new addition right away, and the cutting gets split into small weekly jobs, so nobody faces one huge session.