Your skill with a needle and your child’s age pick the project faster than your budget does, because most of these cost next to nothing: a cardboard tube firecracker, a clothespin and cotton ball painting, or a popsicle stick flag.
The span runs from those 1-sitting paper and paint crafts for very young kids to a patchwork quilt, a quilted table runner and crocheted gnomes that ask for real sewing or hooking.
If you have never stitched, stay with paint, paper and glue; if you already sew, the fabric projects reward the extra time.
1. 4th of July Fireworks Craft
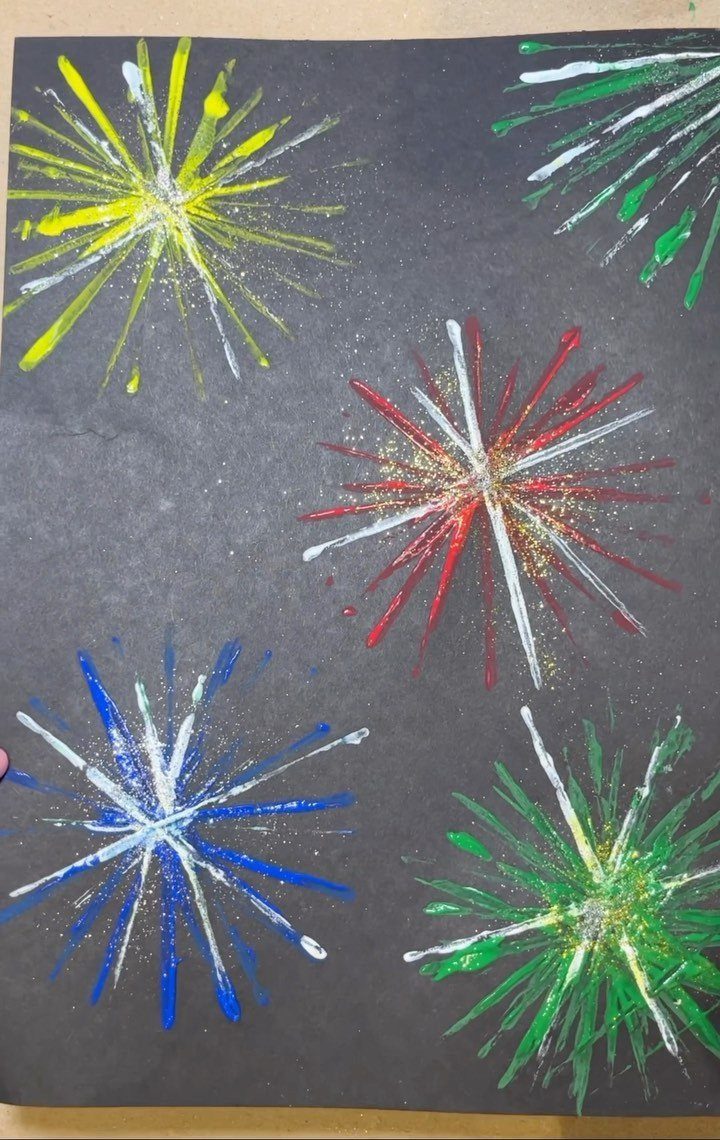
Black paper makes paint look brighter than white paper ever will, which is why this fireworks craft works so well with kids.
Yellow, red, blue and green starbursts pop against it, and a shake of glitter on wet paint gives the sparkle of a real show with no smoke or noise.
Painting the bursts is the whole project, so it suits small hands and short attention spans. Let the glitter set before anyone carries the paper off to the fridge.
Celebrate Independence Day with DIY Sparklers and Watercolor Resist Flag decorations, perfect for adding festivity to your July 4th party décor!
— Crayola
2. Dollar Store Patriotic Wreath
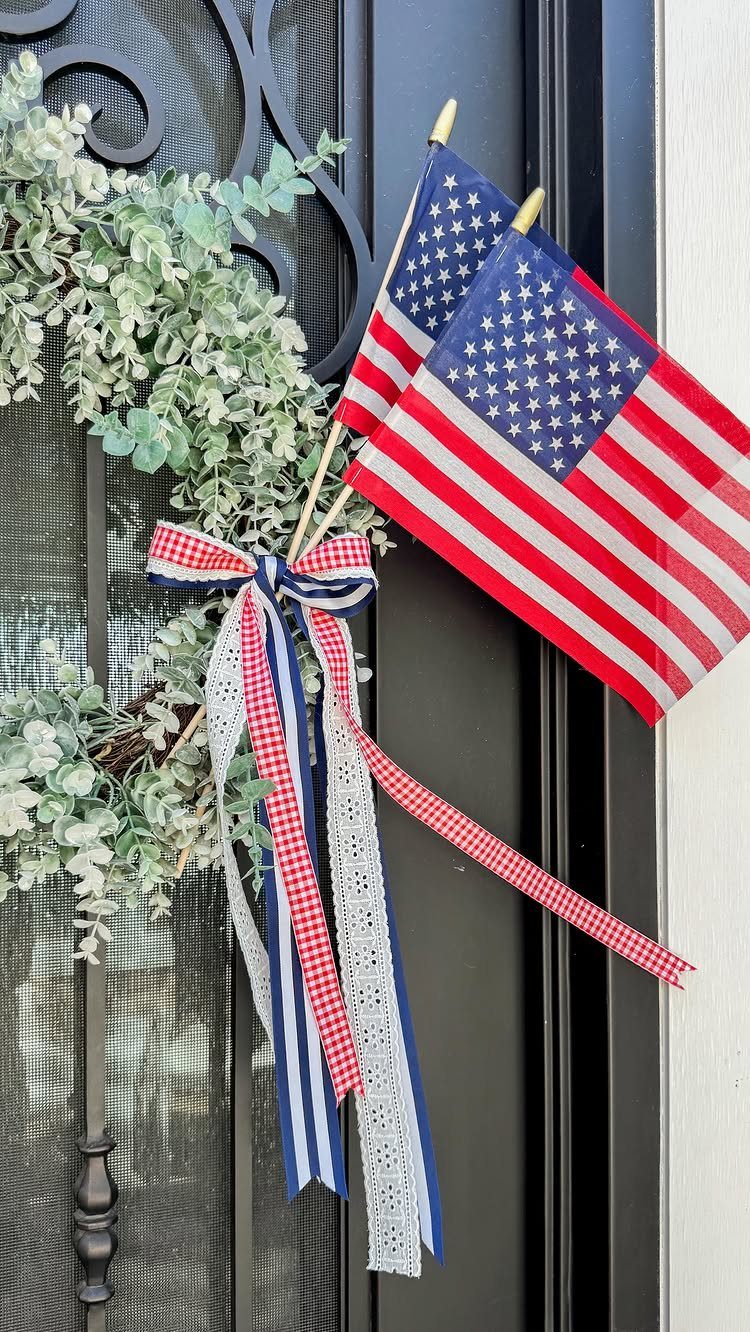
A plain green eucalyptus wreath on a dark door needs very little to read as Fourth of July.
2 small flags and a few red, white and blue ribbons do the job, and the cost stays low because the pieces are simple, inexpensive finds.
Tuck the flags in at an angle so they cross, then let the ribbon tails hang at different lengths.
A greenery wreath with red, white and blue accents stays usable past July 4th, where an all-patriotic color scheme looks out of place by mid-month.
3. American Flag Pillow
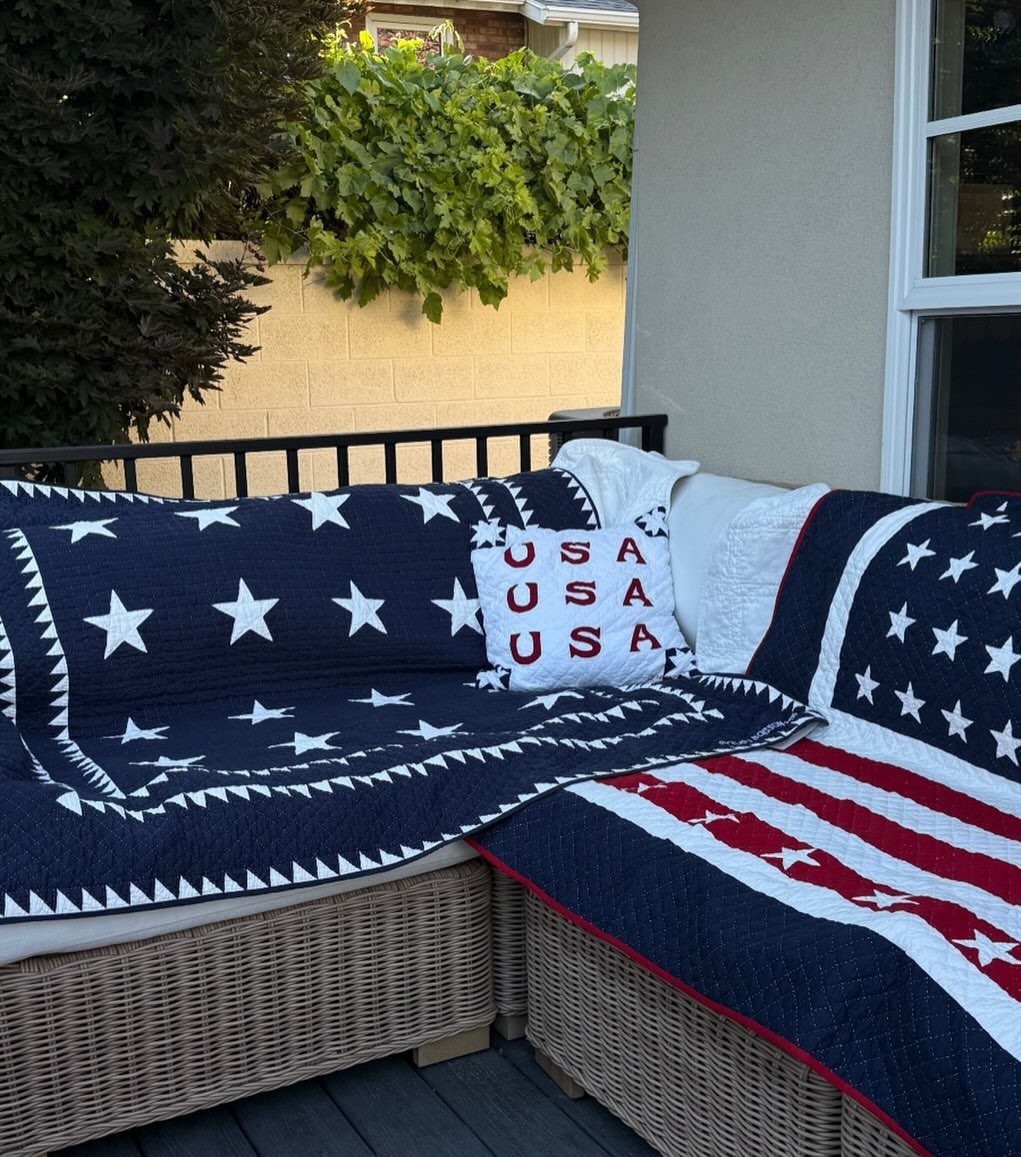
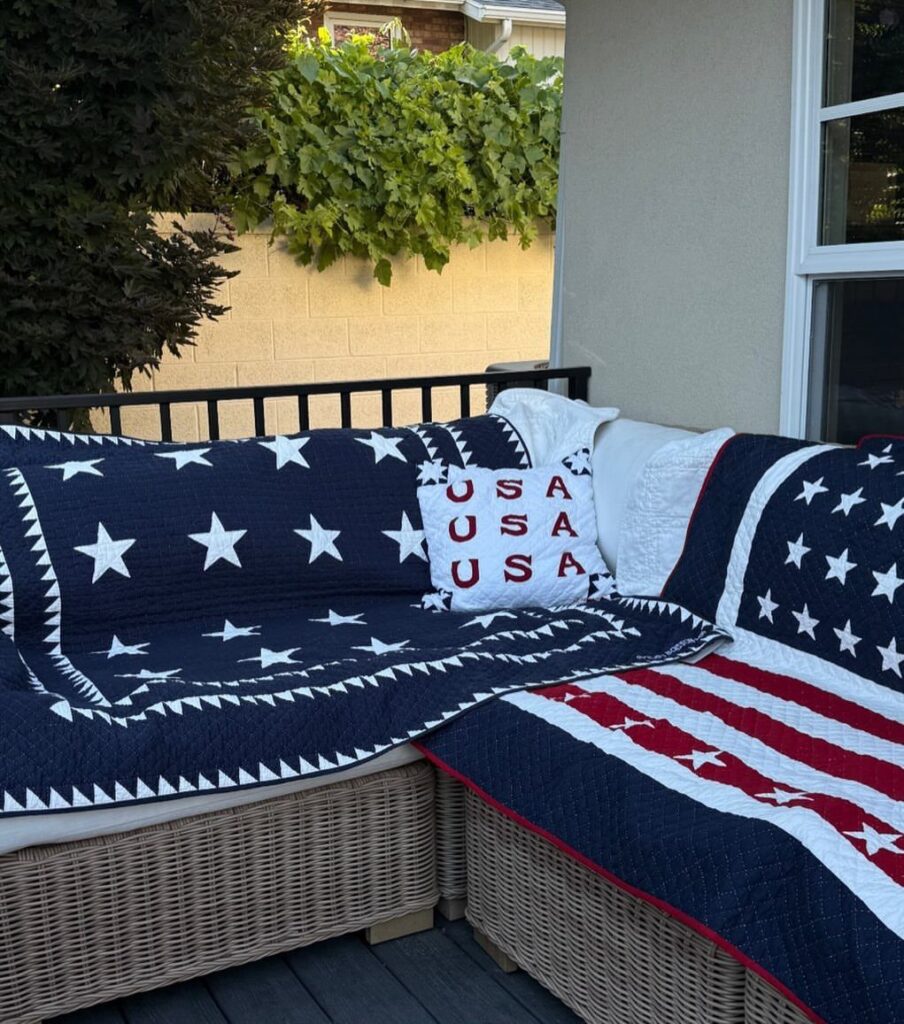
Printing "USA" 3 times across a white pillow gives you a look that feels like a Ralph Lauren or Tommy Hilfiger home collection: clean, classic and quiet.
Lettering does the patriotic work, so the rest of the setting can stay calm.
A white pillow with bold USA lettering reads clearly against solid upholstery or a backdrop that keeps blue as the dominant color. I would keep to one lettered pillow rather than a pile of them.
4. DIY Star Wreath
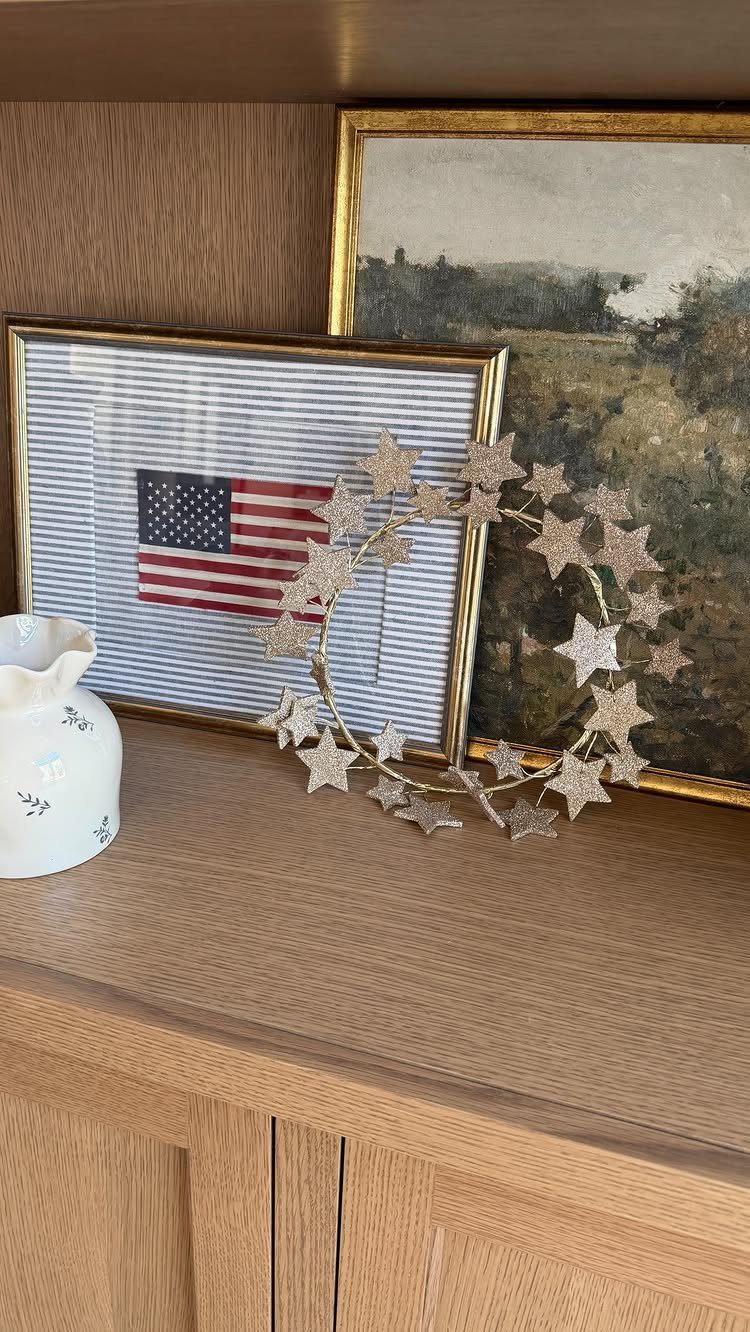
Stars are the only shape this wreath needs. Cut or collect a batch, coat them in glitter, and fix them around a ring so they overlap slightly and leave no gaps.
Gold or silver both work, and either looks good leaning on a shelf beside a framed flag, so you are not limited to hanging it on a door.
Glitter sheds, so seal it or work over a tray you can fold up and pour back into the jar.
5. DIY Patriotic Garland
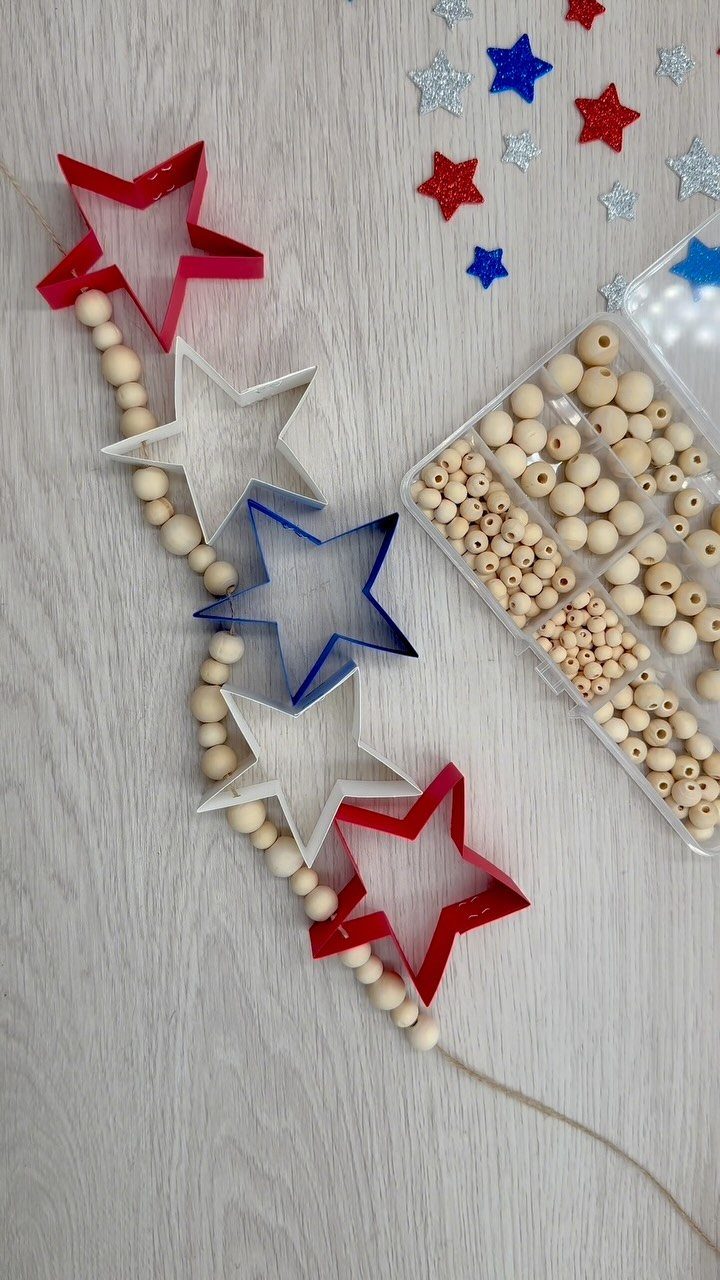
Paper stars alternating with wooden beads give this garland a handmade look that plain streamers lack. Red, white and blue stars keep it patriotic, and the natural wood tones soften it.
Thread the stars and beads on string, spacing them evenly, and sort the beads first in an organizer so the work moves fast. This patriotic garland is an easy DIY project for a quiet afternoon.
6. 4th of July Tie Dye Shirts
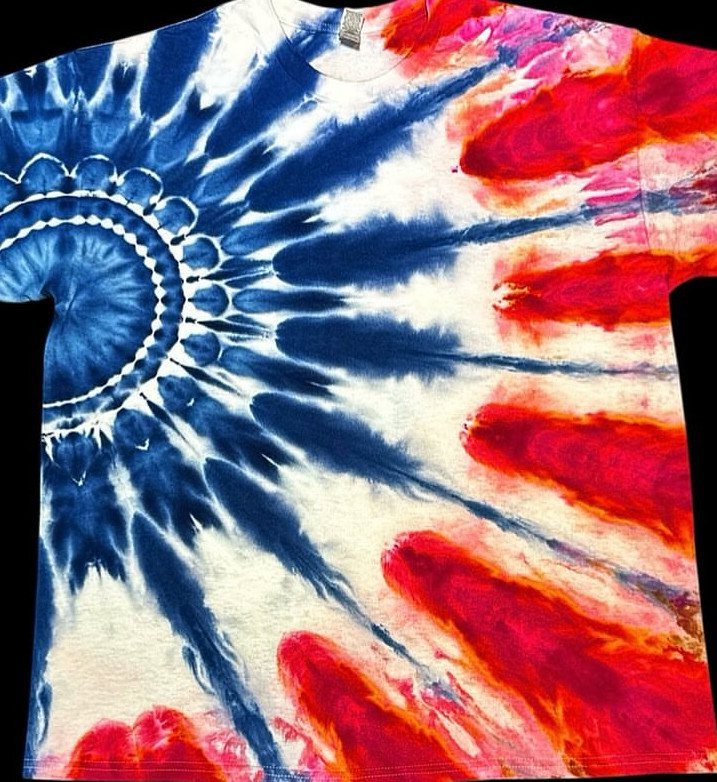
The spiral technique keeps each color separate on white cotton, so you get clean red and blue sections instead of muddy purple where dye overlaps.
Twist the fabric from the center into a flat wheel, then apply the colors in wedges so each one gets its own section.
Make every shirt the same way and the family matches, yet no 2 spirals come out identical. That small difference is what I like best about it.
7. DIY Patriotic Fabric Scrap Flags
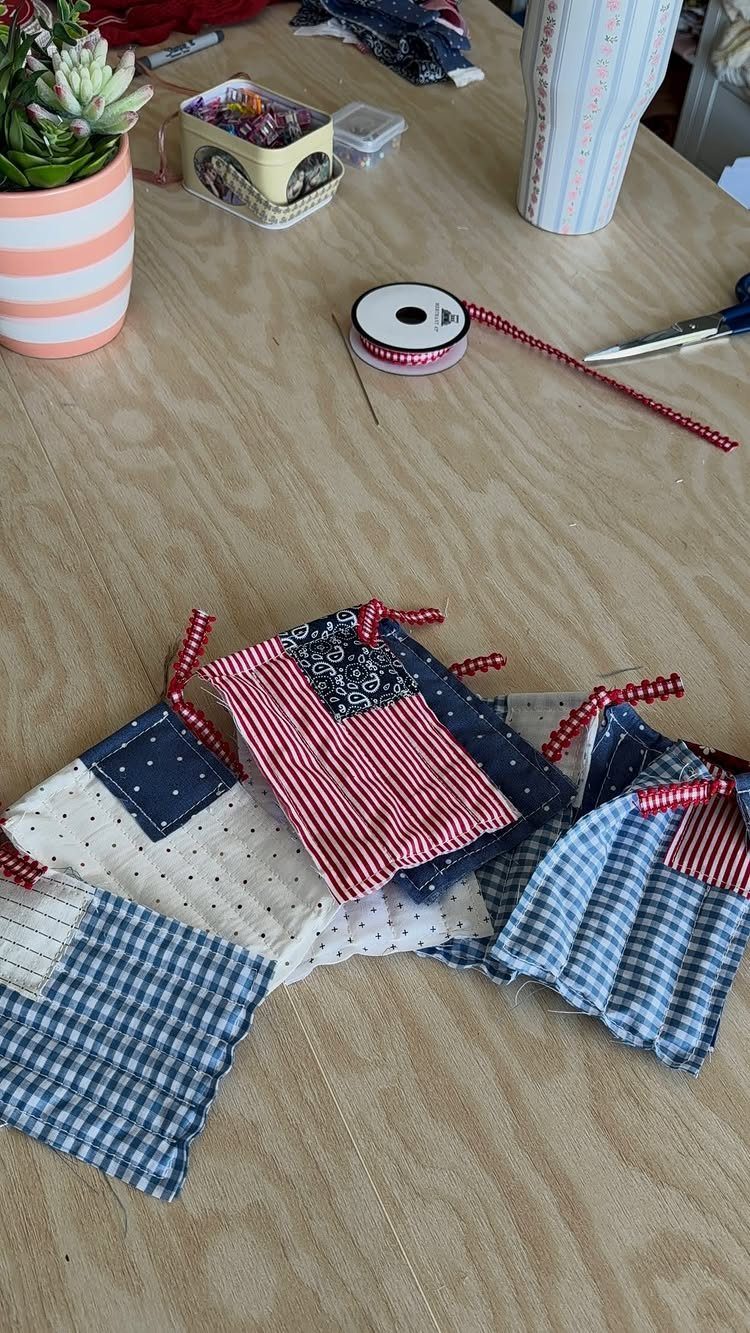
Scraps that are too small for anything else suit flags well, since each one only needs a few inches of fabric.
Cut red, white and blue pieces, then stitch or glue them into small rectangles and mount each on a stick or dowel.
Mixing prints and solids gives the set a patchwork look I prefer to matching cotton. A small bundle in a jar or tucked along a shelf reads better than a single flag on its own.
8. DIY Firecracker Craft
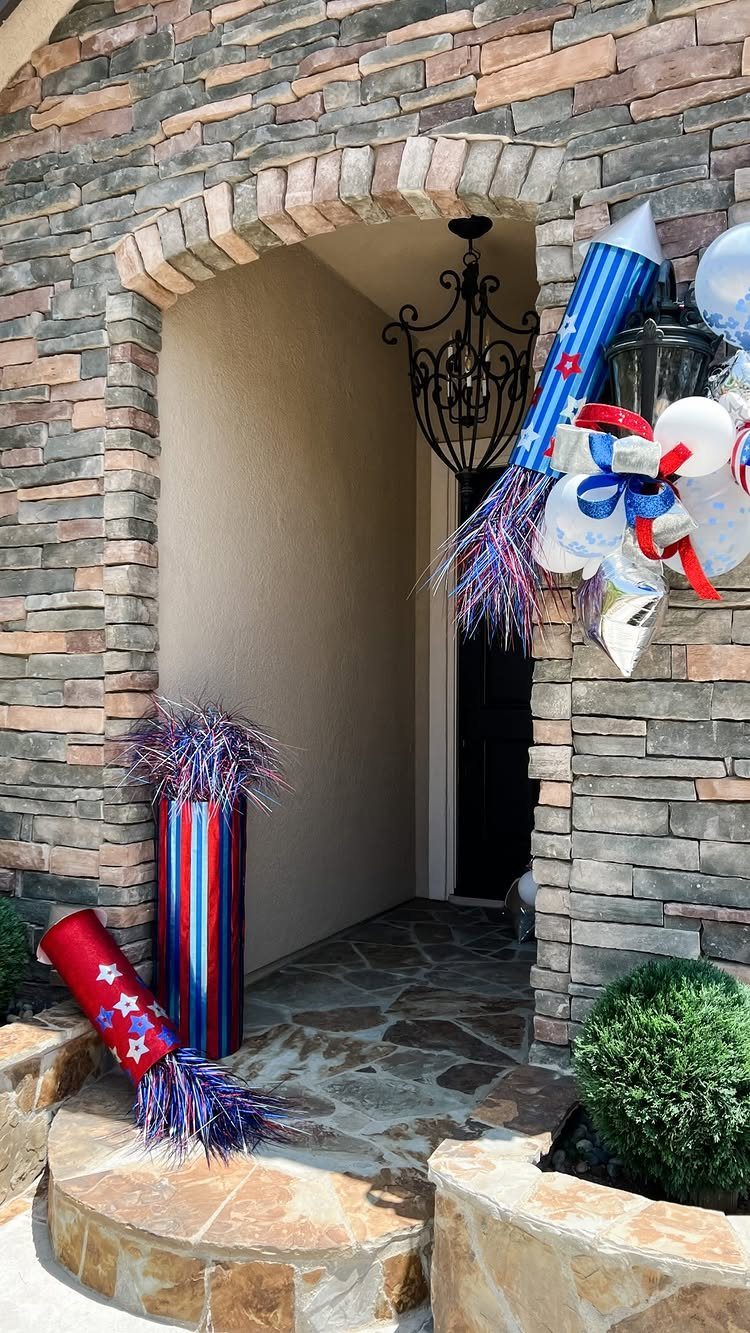
Empty cardboard tubes from paper towels or wrapping paper make big firecrackers: cover each one in red, white or blue paper, then tuck a puff of tinsel into the top as the fuse.
Big scale is what makes them read from the street.
Stand them in a cluster beside the door, varying the heights.
Tinsel can tangle in wind, so tape it down well. Grouping 3 or 4 of them costs next to nothing, and setting a lantern beside them gives the cluster a glow once the light fades.
9. Mason Jar Centerpieces
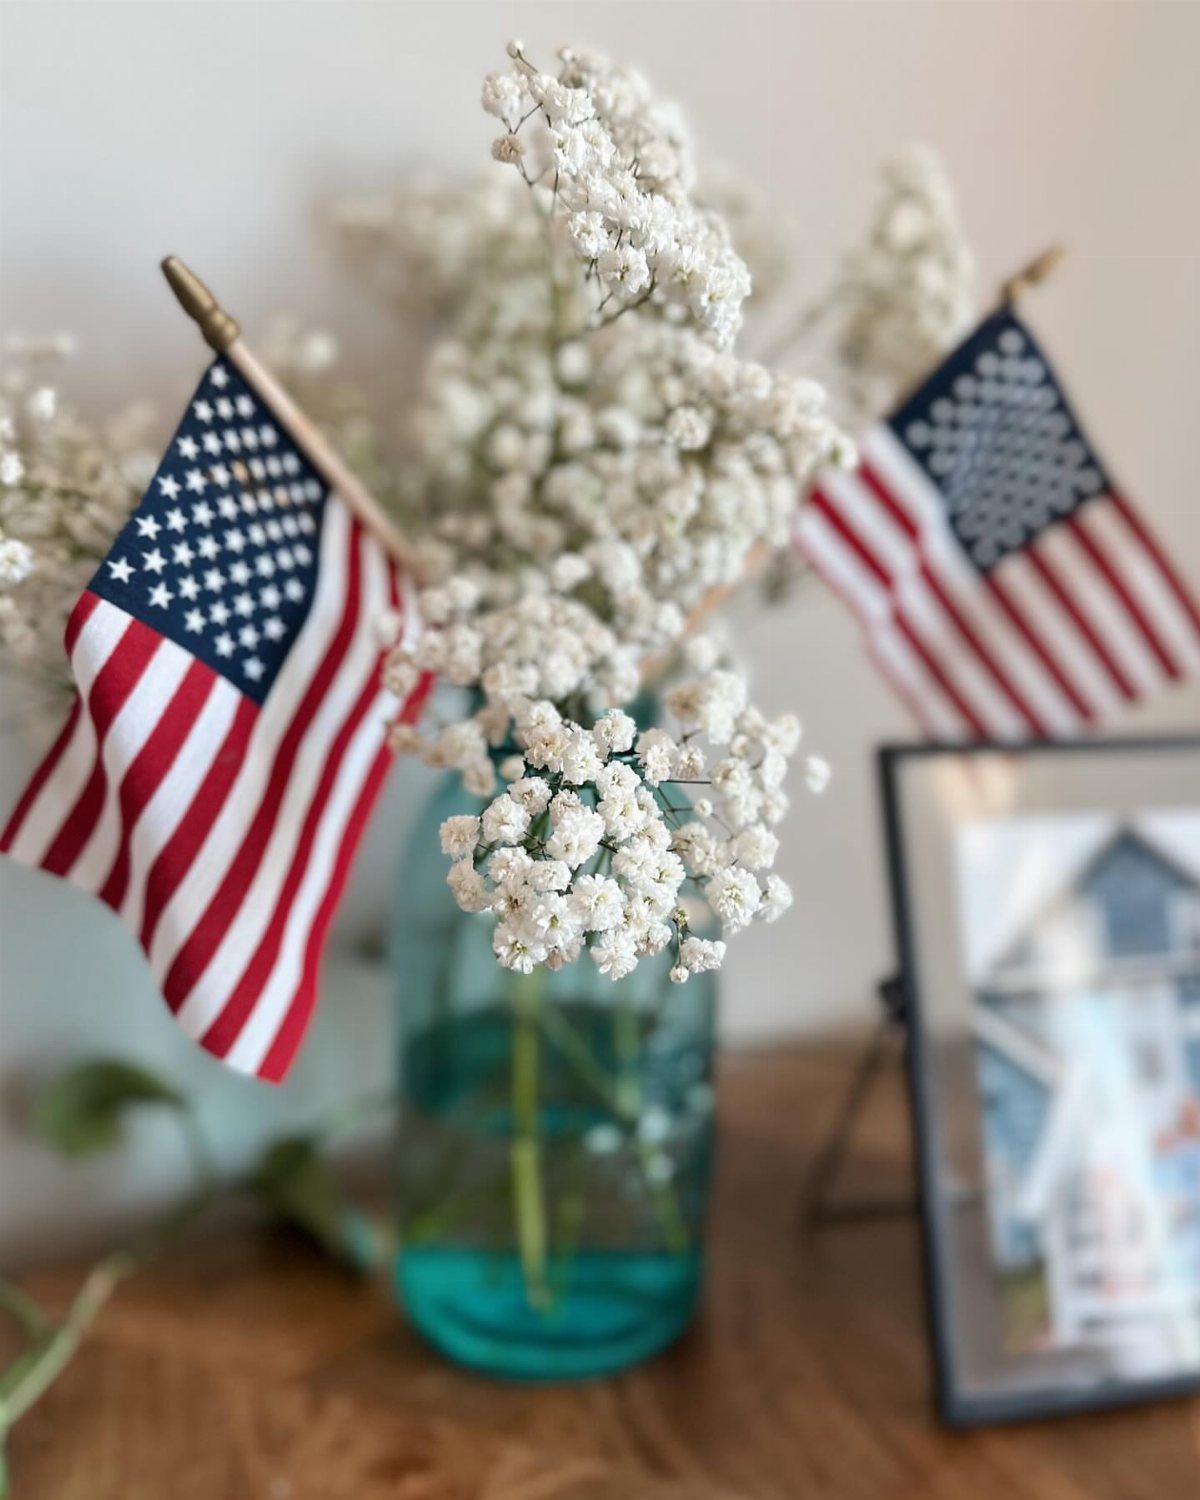
A single blue jar holding white baby’s breath and 2 small flags is about as simple as a centerpiece gets, and I would not add more. The white blooms are light and filler-priced, and the blue glass carries the color.
Stagger the flag sticks so some sit tall and others sit low, and angle them away from each other.
Make one jar per table, or line up several down the middle for a longer spread. Pick up a jar that is already in your cupboard before buying new.
10. DIY Patriotic Table Runner
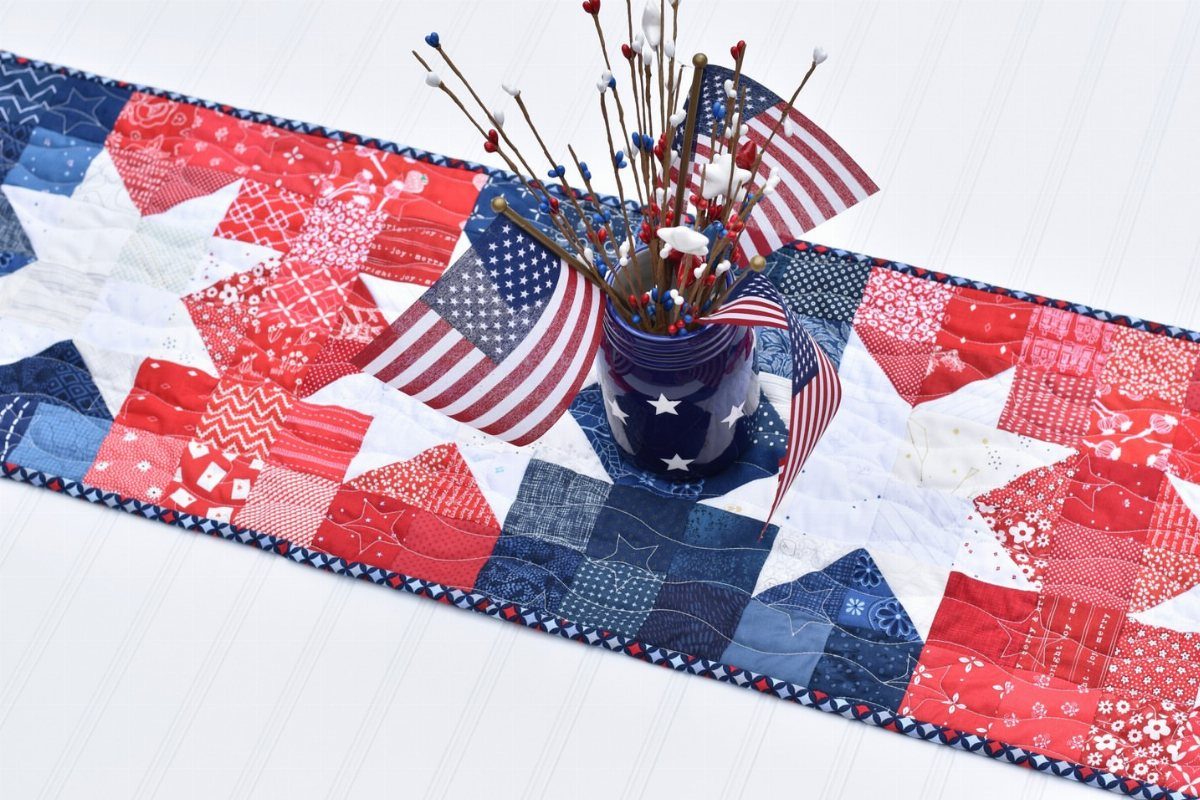
Quilted stars in red, white and blue turn a plain table into a Fourth of July one with just one long strip of fabric.
Piece the stars onto a white base, then quilt the layers together so the runner lies flat.
Sewing is the heaviest lift here, so a beginner might choose a no-sew version with fabric stars fused on.
11. Popsicle Stick American Flags
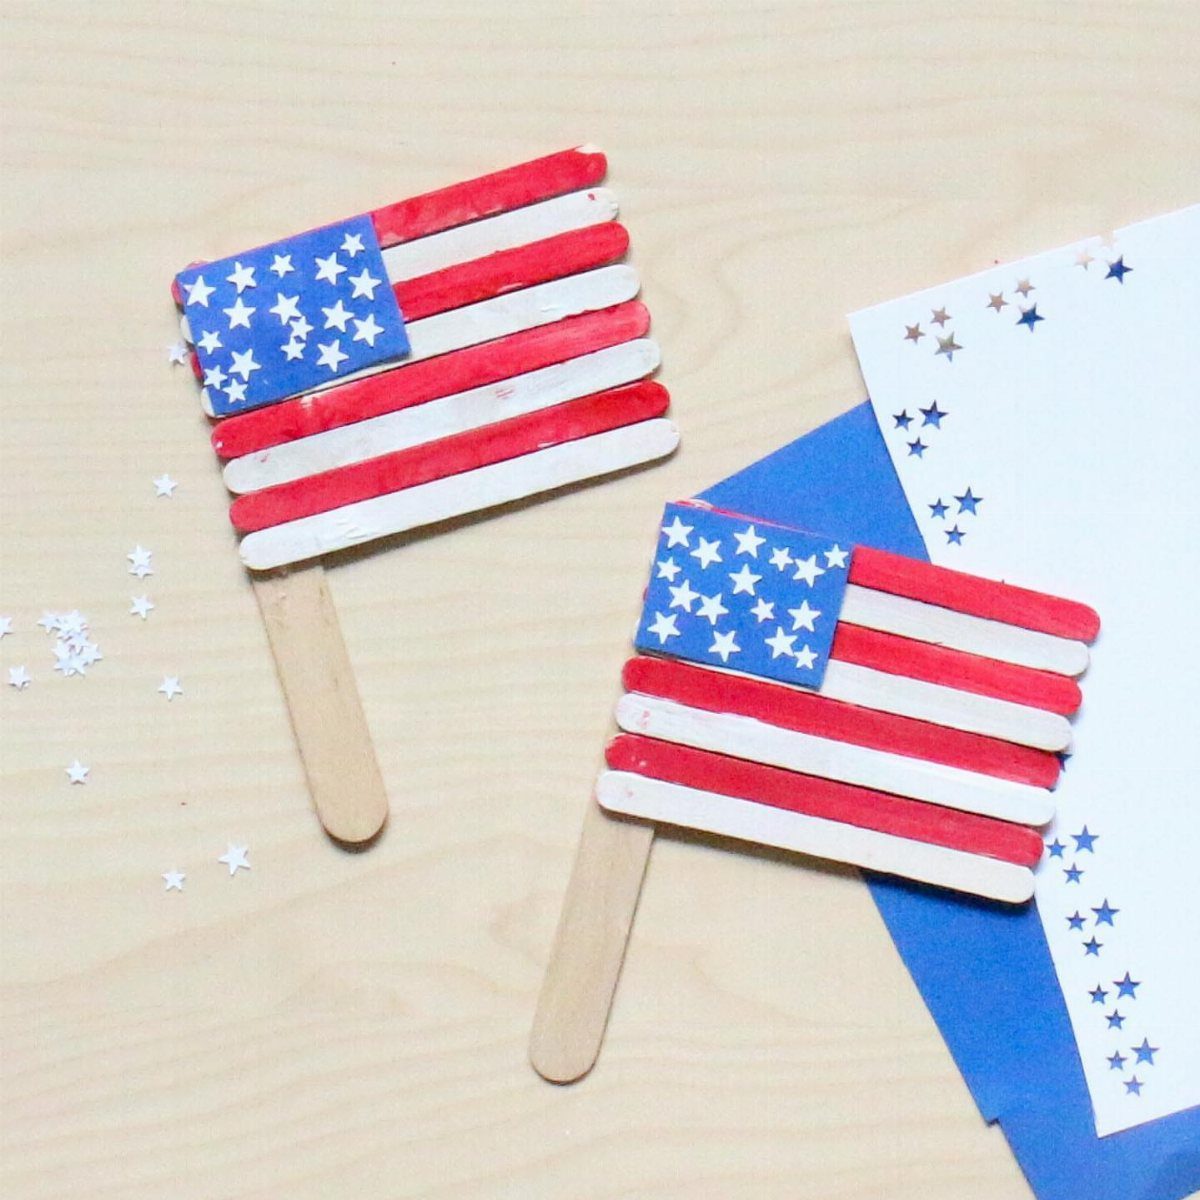
Popsicle sticks laid side by side make the stripes of a flag, with no cutting needed. Paint the sticks red and white in alternation, then add a blue rectangle in one corner and dot it with white stars.
Glue the sticks to 2 backing sticks across the back so they hold together.
Paint the stars last, once the blue is dry, or they smear. This is a cheap craft that kids and grandparents can do at the same table.
12. Clay Pot Uncle Sam
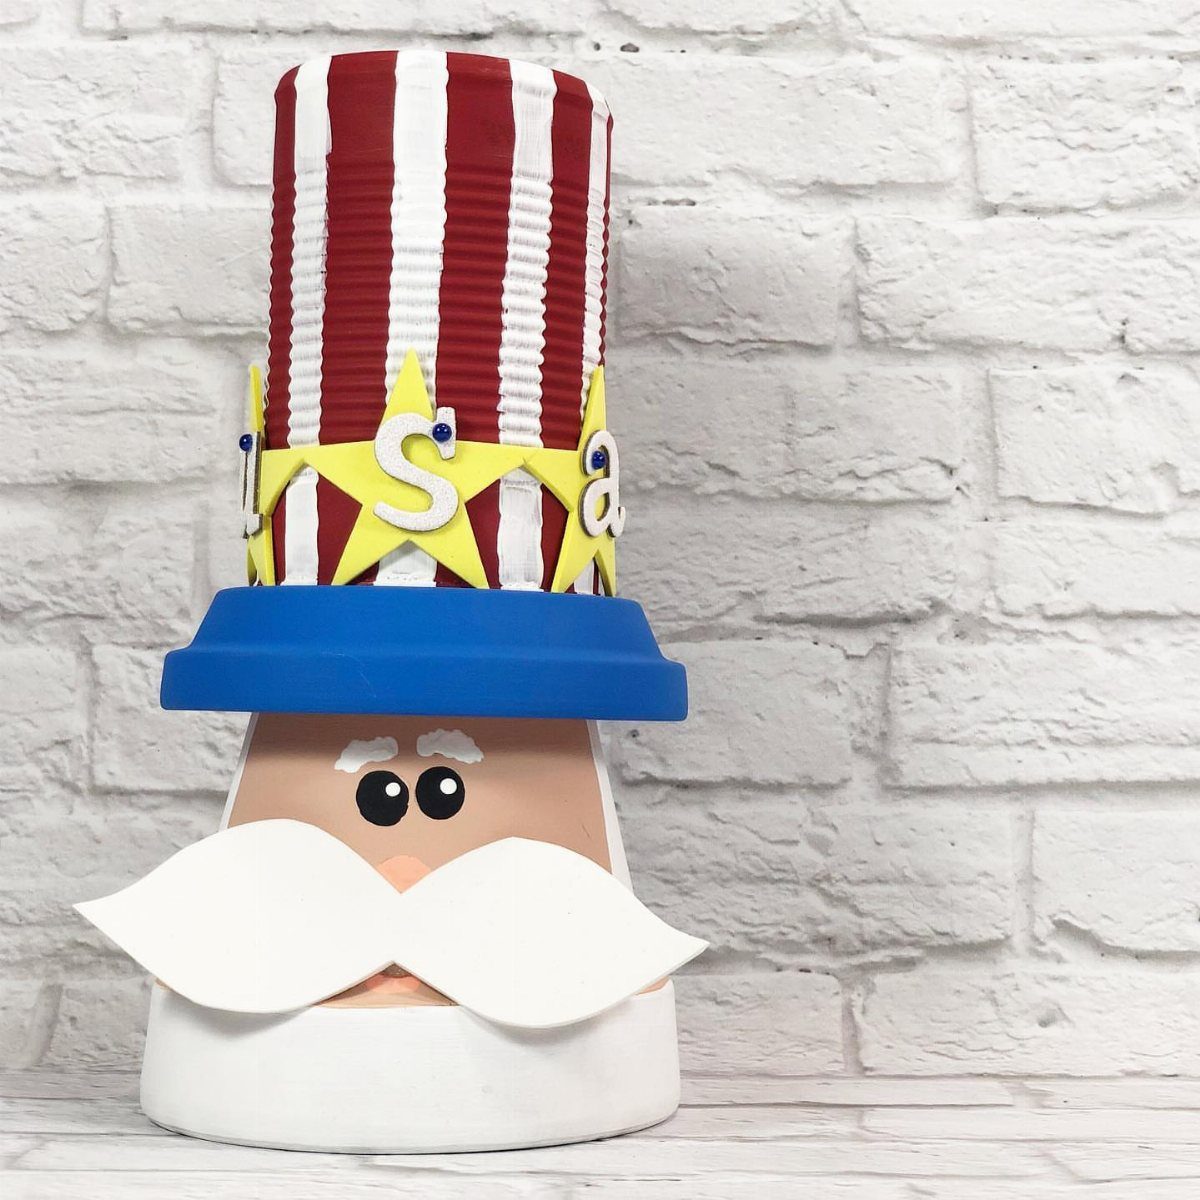
A terra-cotta pot makes the head of an Uncle Sam, and the hat does most of the character work. Cut a red and white striped paper hat, add a yellow star and "USA" lettering, and glue on googly eyes.
Paint the pot first, and give the paint plenty of time to cure before you glue any paper on.
I like it best as a table or porch figure, and it takes a child about an hour of careful painting spread across an afternoon.
13. Patriotic Painted Wooden Butterfly
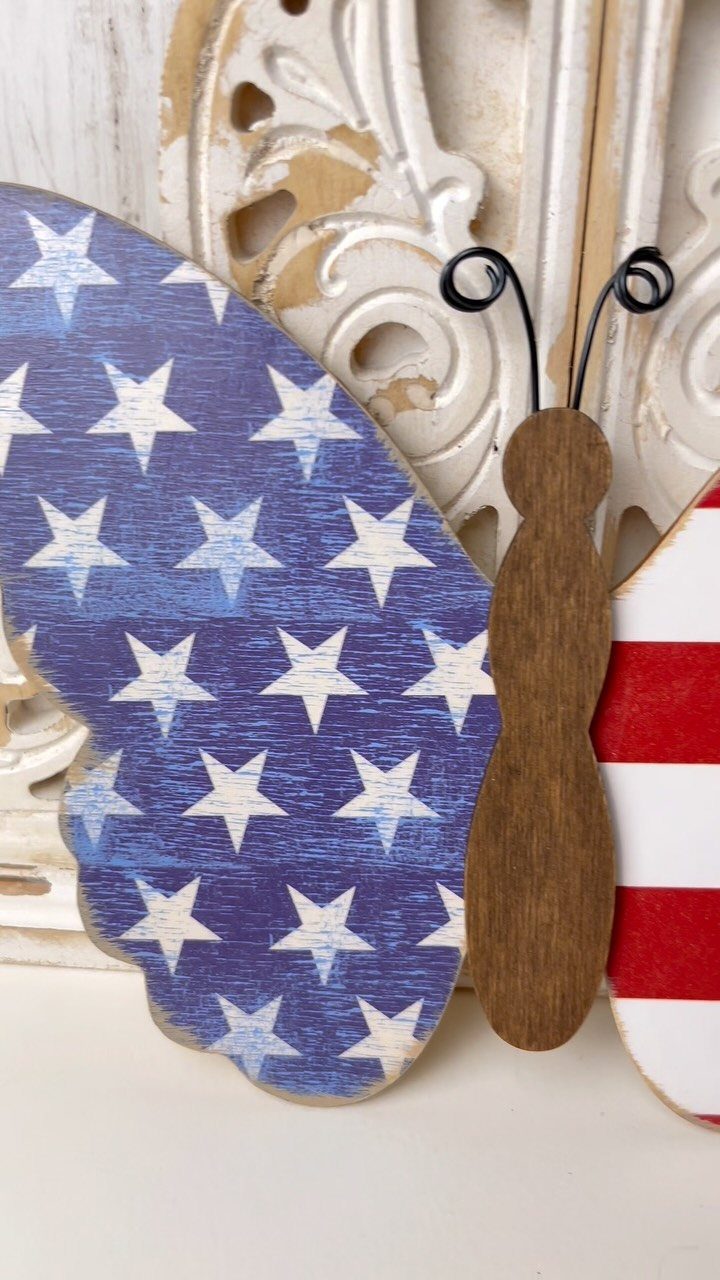
A wooden butterfly cutout is a flat, forgiving surface for flag paint, and the wings give you two natural fields: stripes on one side, a blue patch with stars on the other.
Paint the stripes first, let them dry, then add the stars with a small brush or a dot of white paint.
Lean it on a shelf or against a wall rather than hanging it. Plain wood takes acrylic well, and one coat of white underneath keeps the red from going dull.
14. Patriotic Footprint Art Cards
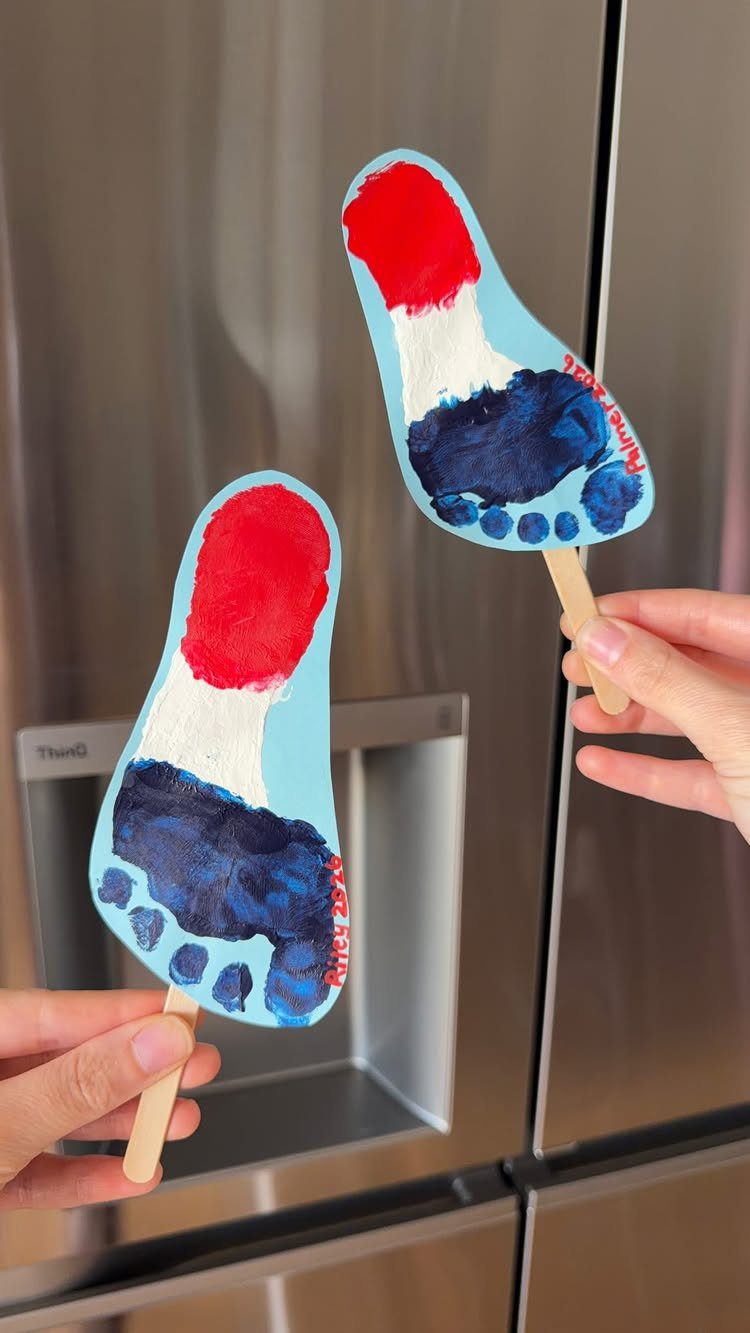
Foot-shaped cards cut from paper, painted with red, white and blue footprints and taped to popsicle sticks, turn a child’s footprint into a small flag-style keepsake.
Hold the sticks up in a cup or a vase and they work as a table decoration. Paint the foot, press it down once, and let it dry flat before you attach the stick.
15. American Flag Patchwork Quilt
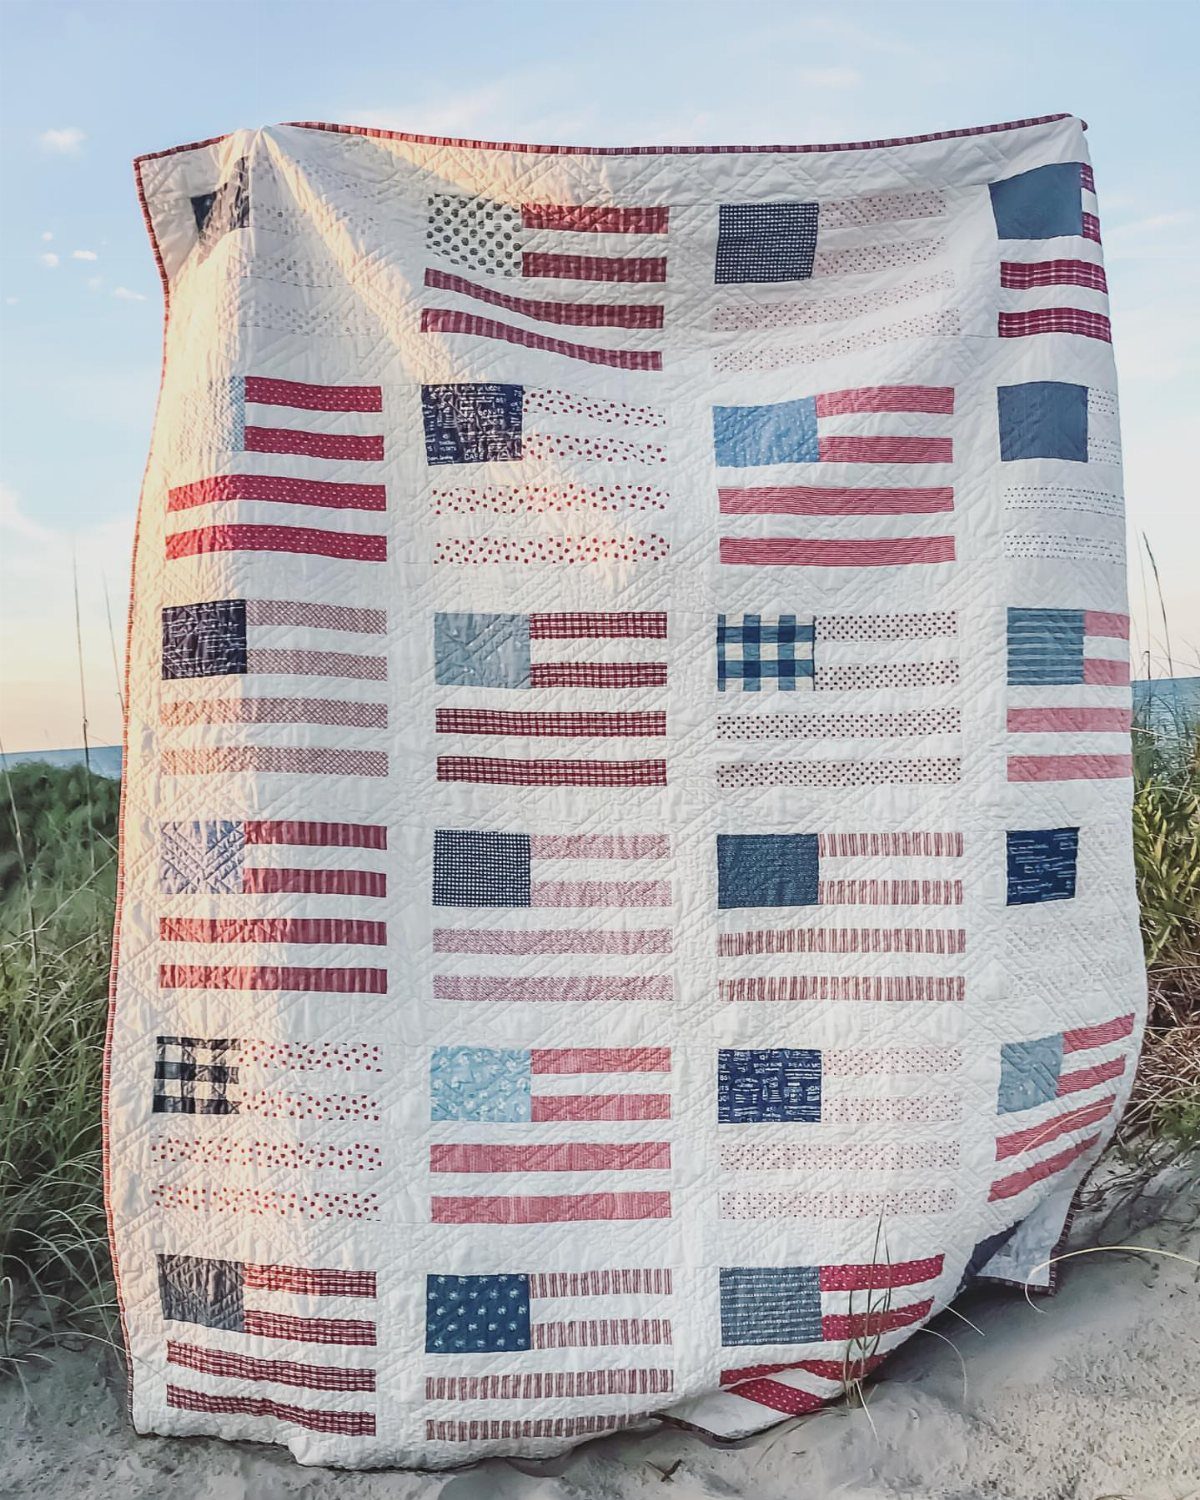
A patchwork quilt built from flag-print squares gives you a whole holiday’s worth of pattern in one piece. Mix several red, white and blue flag fabrics rather than repeating one, so the squares feel collected instead of matched.
A white base keeps it light enough for a picnic blanket or a throw over the porch chair. Sewing it is a big project, so start early and cut every square the same size.
16. Mosaic American Flag Frame
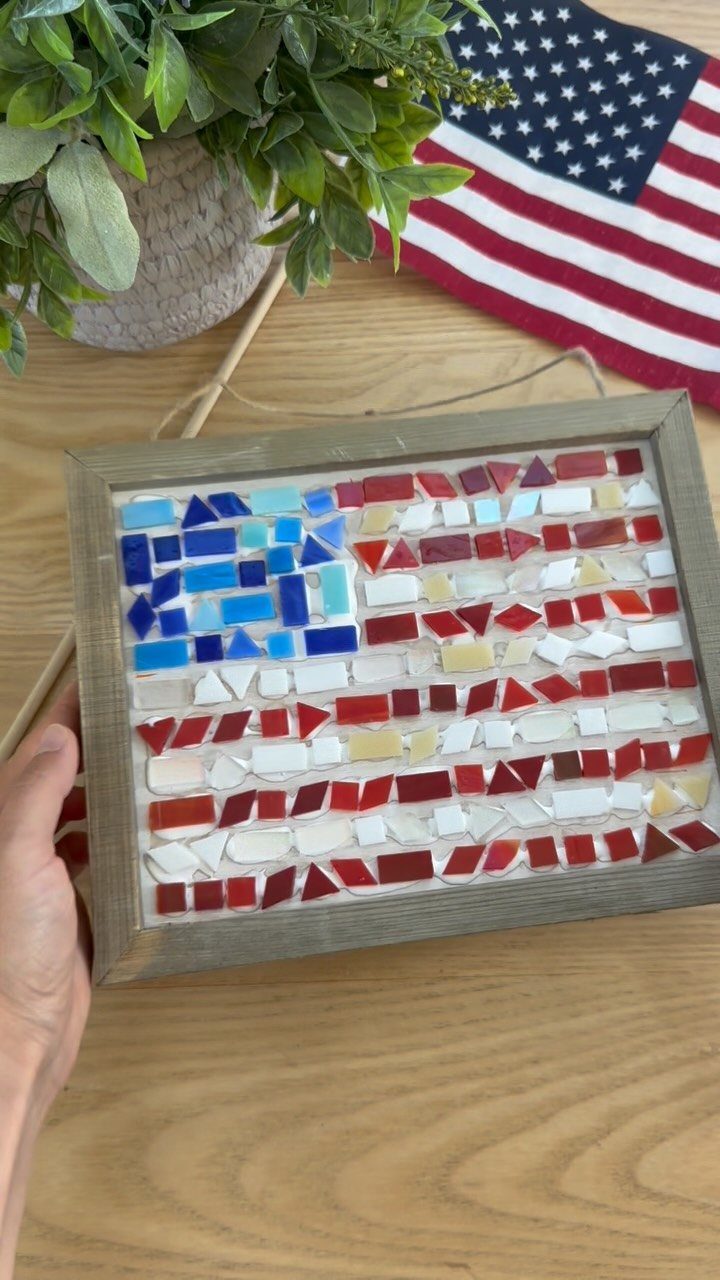
Glass tiles in red, white and blue make a flag that catches light the way paint never will. Set them in rows inside a wooden frame, with a block of blue tiles in one corner for the field.
Lay the whole design out dry before any glue touches the frame. Tiles are small and fussy, so I would keep this for older kids and adults.
17. Painted Wooden USA Sign
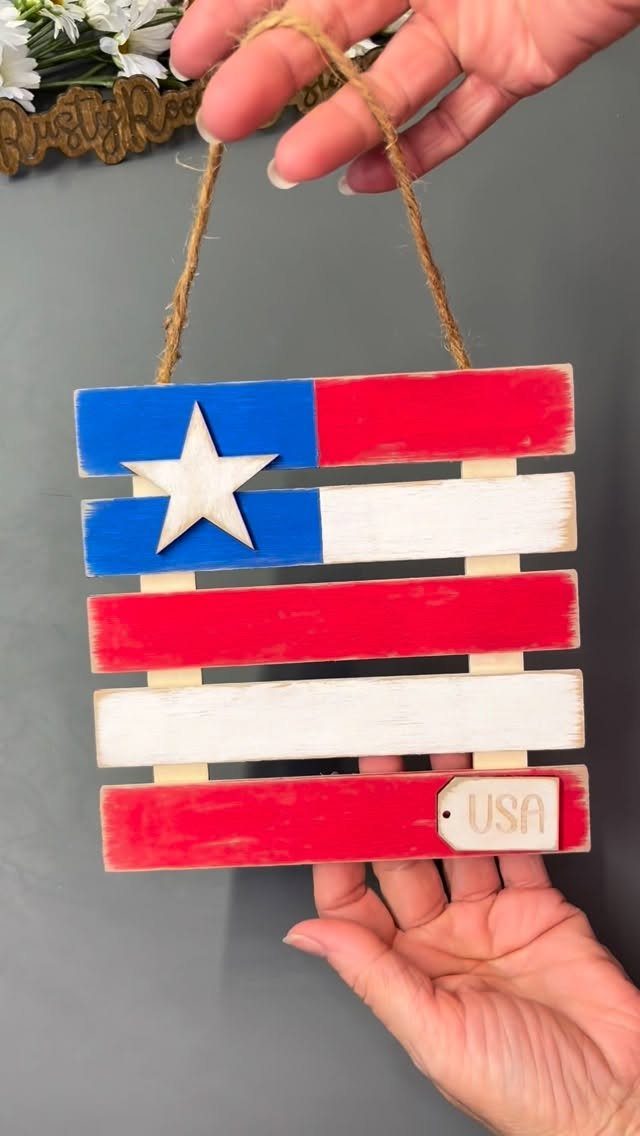
Flag stripes painted across a small wooden board, plus one white star and a tag reading "USA," make a sign that fits on a shelf or a porch step. Paint the stripes with painter’s tape between them for clean edges.
Pull the tape while the paint is still slightly tacky. Rough, rustic boards suit this better than sanded ones, since the grain adds to the worn look.
18. Clothespin Cotton Ball Painting
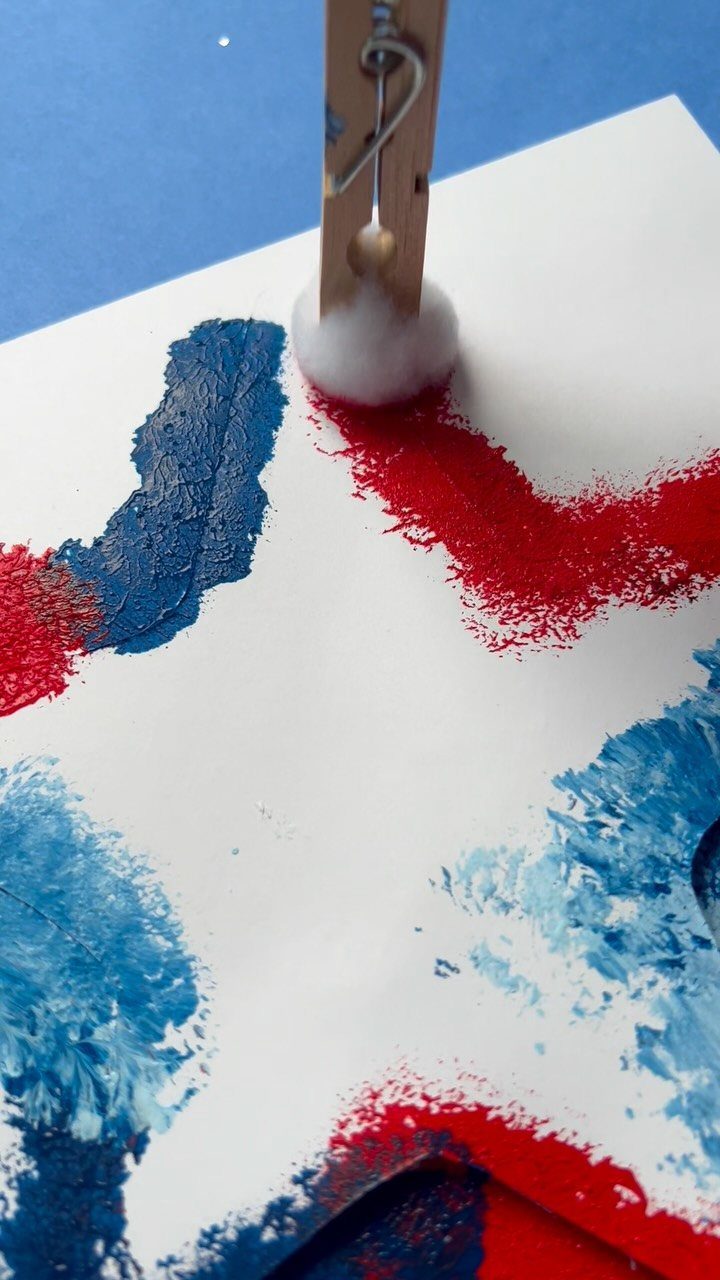
A cotton ball pinched in a clothespin keeps paint off small fingers and makes a soft, dotty stamp. Dab red and blue onto white paper in rows or clusters, and the texture reads like fireworks or a stippled flag.
Use one clothespin per color so the paint stays clean. It costs next to nothing, and it suits very young kids best.
19. Patriotic Beaded Word Bracelets
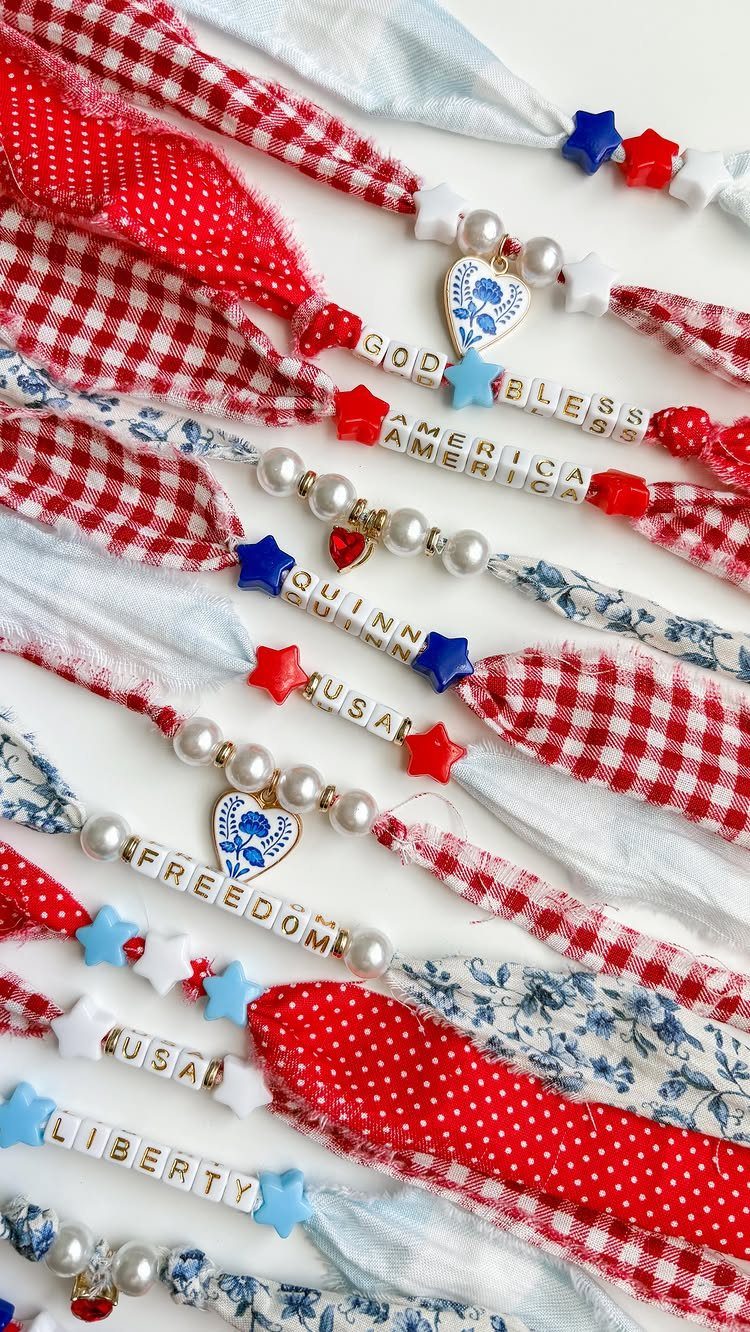
Letter beads turn a plain stretch bracelet into a message, and one strand holds more than you’d expect: "USA," "FREEDOM," "LIBERTY," or a child’s name all fit on a standard wrist with room left for a few red, white and blue spacer beads.
Short words fit best, since each letter takes its own bead.
Alternate red, white and blue around the lettering, and add a star bead at each end.
Sort the letters into a tray before you start so you can find them quickly. Making one per guest at a party table gives everyone a keepsake to wear home.
20. Crocheted Patriotic Gnomes
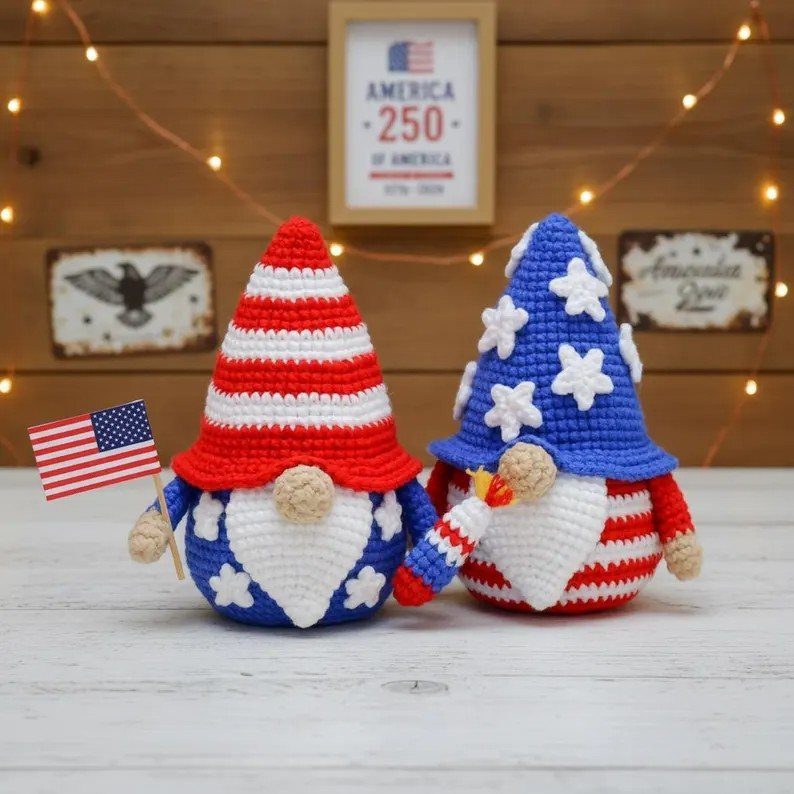
Gnomes are easy to dress for a holiday because the pointed hat and the beard do the work, and the rest is color.
Red, white and blue yarn is all these two need, with a tiny flag or firecracker held in the hands for the Independence Day detail.
Crochet is a project for someone who already hooks a stitch, so I would not pick it as a first try. A pair on a shelf or mantel with fairy lights behind them looks warm at dusk.
21. Red White and Blue Balloon Arch
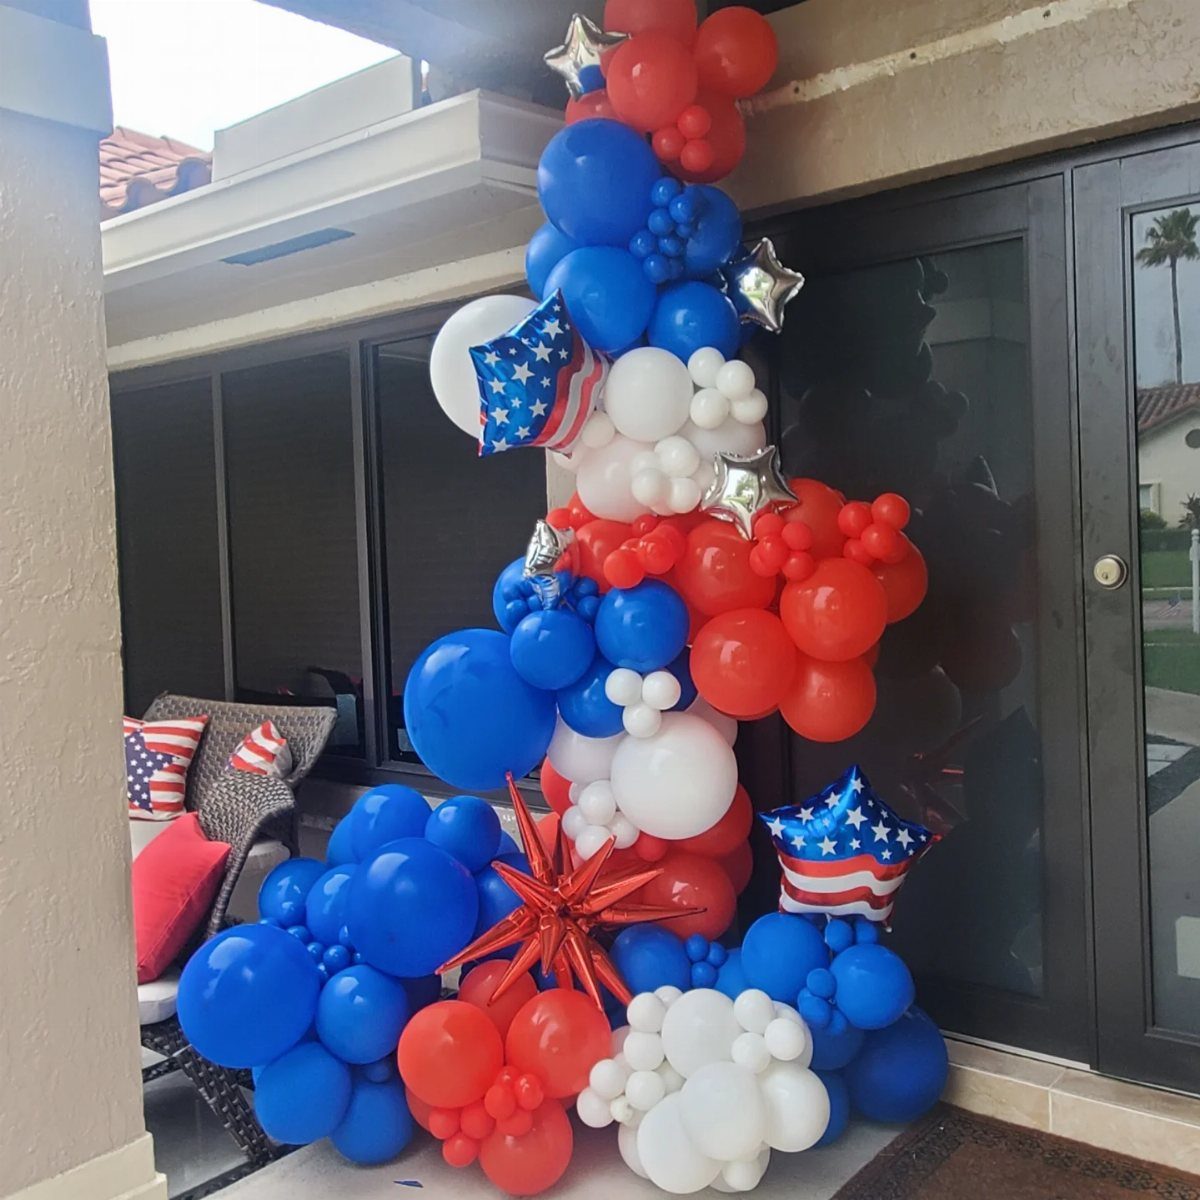
Star-shaped foil balloons break up the round shapes in a balloon arch, and I would use them sparingly, as accents rather than a full row.
Mix red, white and blue latex balloons in different sizes so the curve looks full instead of strung together.
An arch beside a patio door frames the entrance to a party, and patriotic pillows on nearby chairs repeat the colors. Inflate everything the day before if you can, and keep it out of direct afternoon heat.
22. Interlocking Paper Loop Sculpture
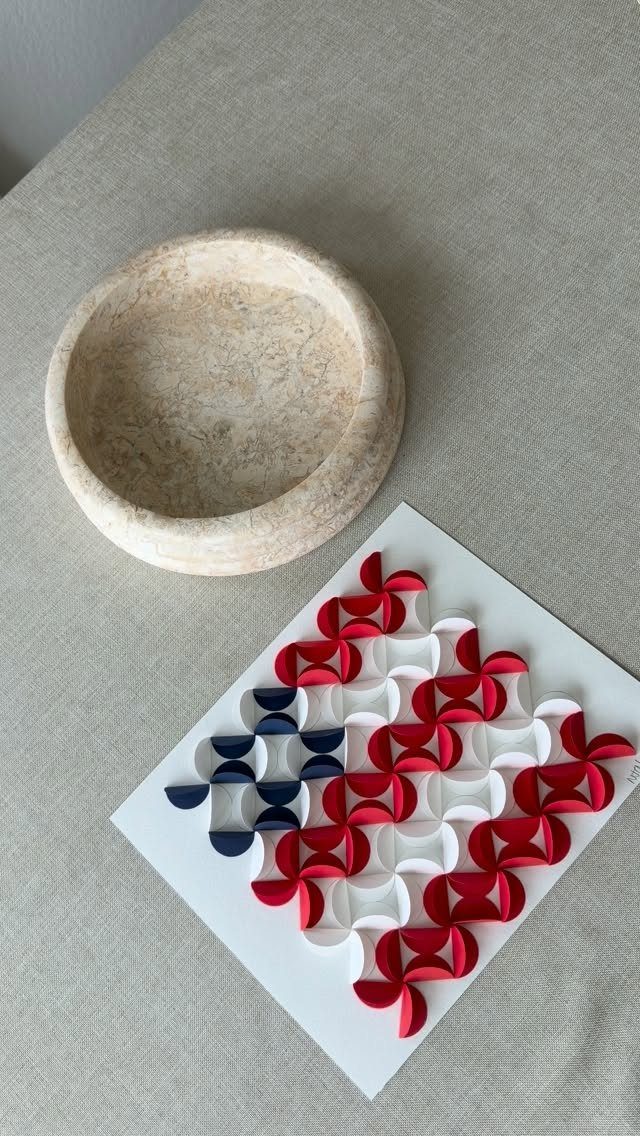
Interlocking rings of red, white and blue paper, set on a white square base, make a small modern sculpture rather than a typical holiday craft.
Cut strips of equal width, loop each one, and slide the next through before gluing it closed.
Keep the base plain white so the colors stand out, and set the piece beside a bowl or a candle on the table. Paper is cheap, so make a few and see which arrangement of loops you like best.
Crafting with Kids
Pick materials a child can handle without help: washable paint, blunt scissors, glue sticks, and paper.
Anything small enough to swallow, like tiny beads or loose glitter, belongs only at the table of older kids, and an adult should be close by.
Keep each project simple enough to finish in one sitting. A child who sees the result the same afternoon wants to make another.
Cover the table with newspaper or a wipeable cloth before anyone opens a paint jar. Cleanup then stays short, and you can relax about spills.
Budget-Friendly Ideas
Start with what the house already holds: cardboard tubes, jars, fabric scraps, and leftover ribbon. Recycled pieces cost nothing, and they often look better than new ones because they have some character.
For anything you must buy, check the dollar store first.
Before you shop, write the supplies for every project on one list. You will spot overlaps, like the same ribbon or paint serving 2 crafts, and you will buy each item once.
Crafting with Seniors
Paper crafts, painting, and simple patriotic decorations all work well, because big, forgiving movements are easier on the hands.
Keep the mood relaxed. Set out the materials in advance, let everyone work at their own pace, and sit nearby to help without taking over.
Crafting often brings back stories, so leave room to talk. A project that keeps the hands busy and the table chatty is a good one.
Display the finished pieces where people will see them, or wrap them as gifts. Seeing the work put to use makes the afternoon feel worthwhile.