Age decides which of these crafts works, so I’d start by matching the idea to the child before anything else.
The list runs from a card a child can finish in one sitting to crepe paper flowers that take more patience, and the paint resist card calls for heavier cardstock because watercolor buckles regular printer paper.
1. Handprint Bouquet
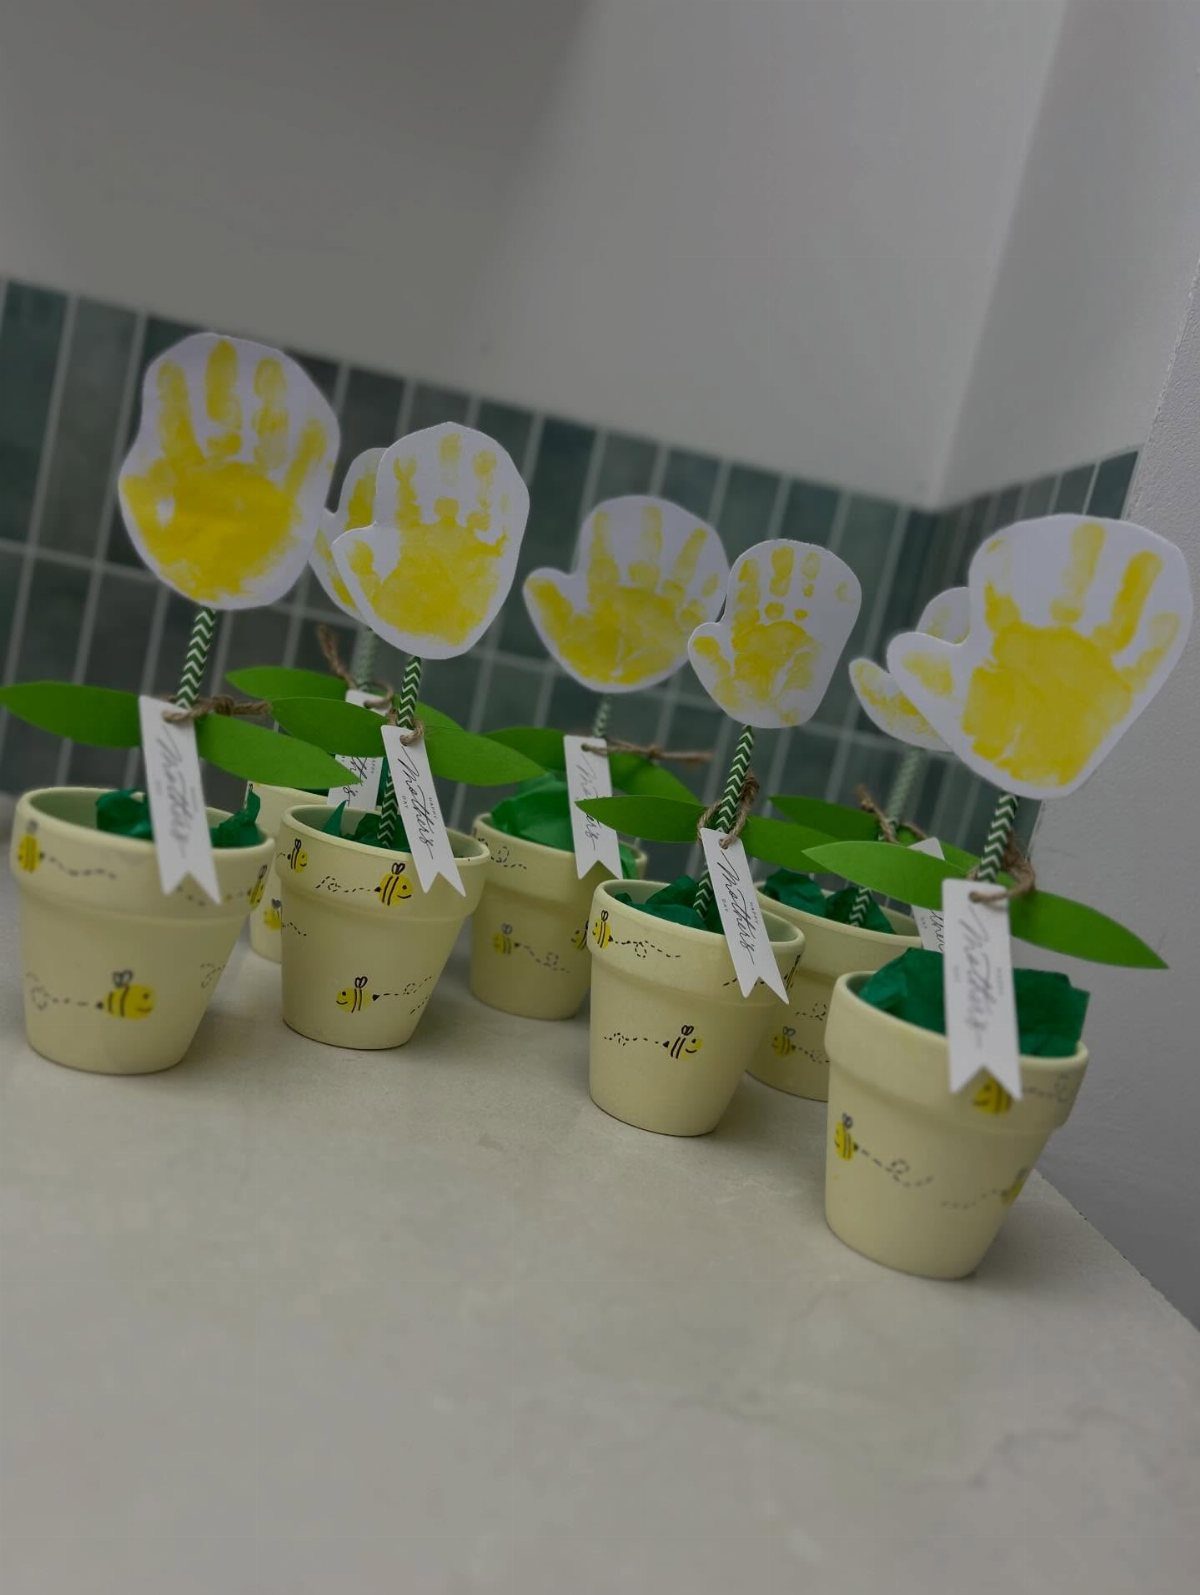
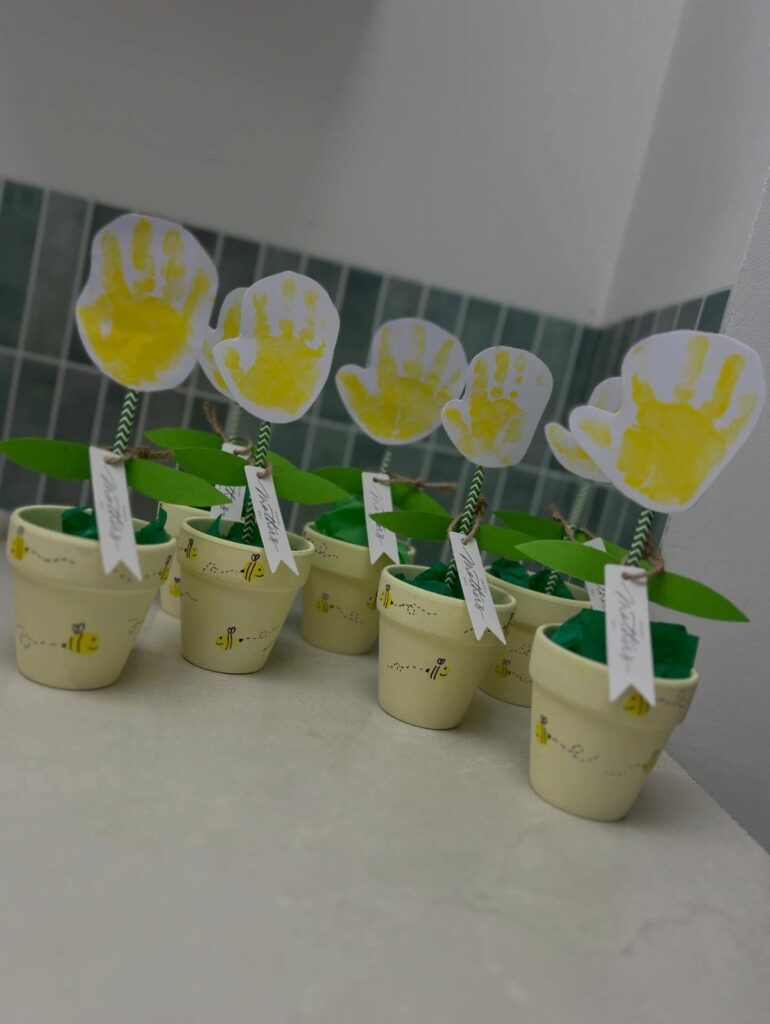
Handprints make the best petals because a small hand already looks like a flower head.
Cut the prints out, tape each one to a straw stem, and stand them in little pots so the bouquet sits on a counter like the real thing.
A tag reading "Mother’s Day" turns the pot into a finished gift. Yellow paper keeps the whole set cheerful, though any single color works if you want a more grown-up look.
2. Flower Card Bouquet
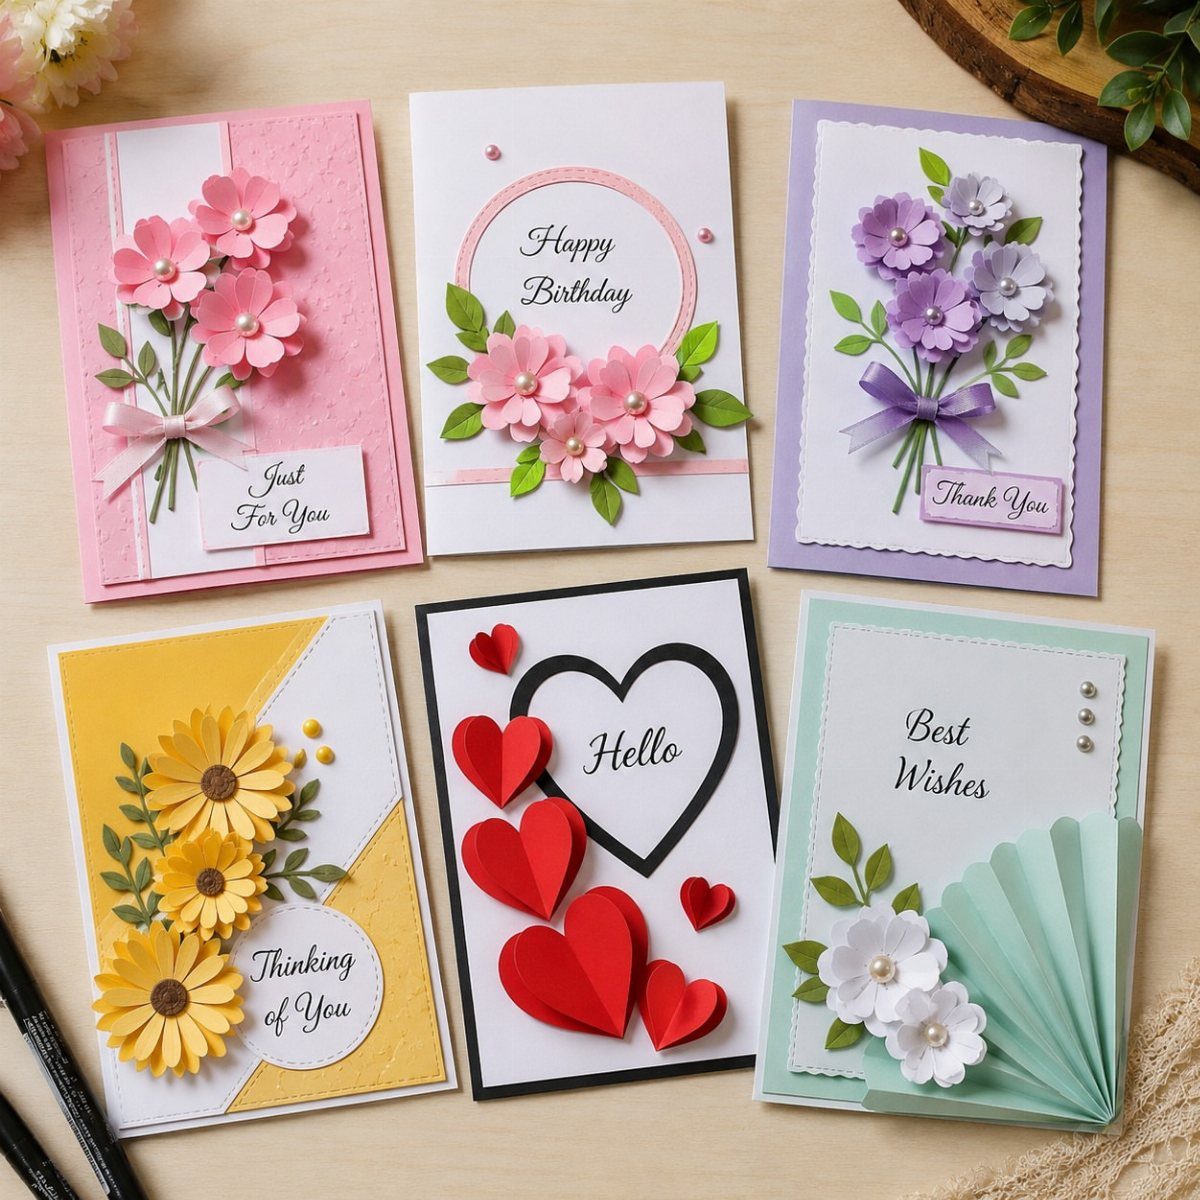
Paper flowers and hearts glued onto a folded card make a bouquet that lifts off the page.
The same design works for "Thank You" and "Thinking of You" as easily as Mother’s Day, so a child can make a small stack in one sitting.
Layer the flowers so they overlap, and tuck a heart or two between them to fill gaps. I’d keep the lettering simple, since the flowers do the talking.
3. Mother’s Day Card
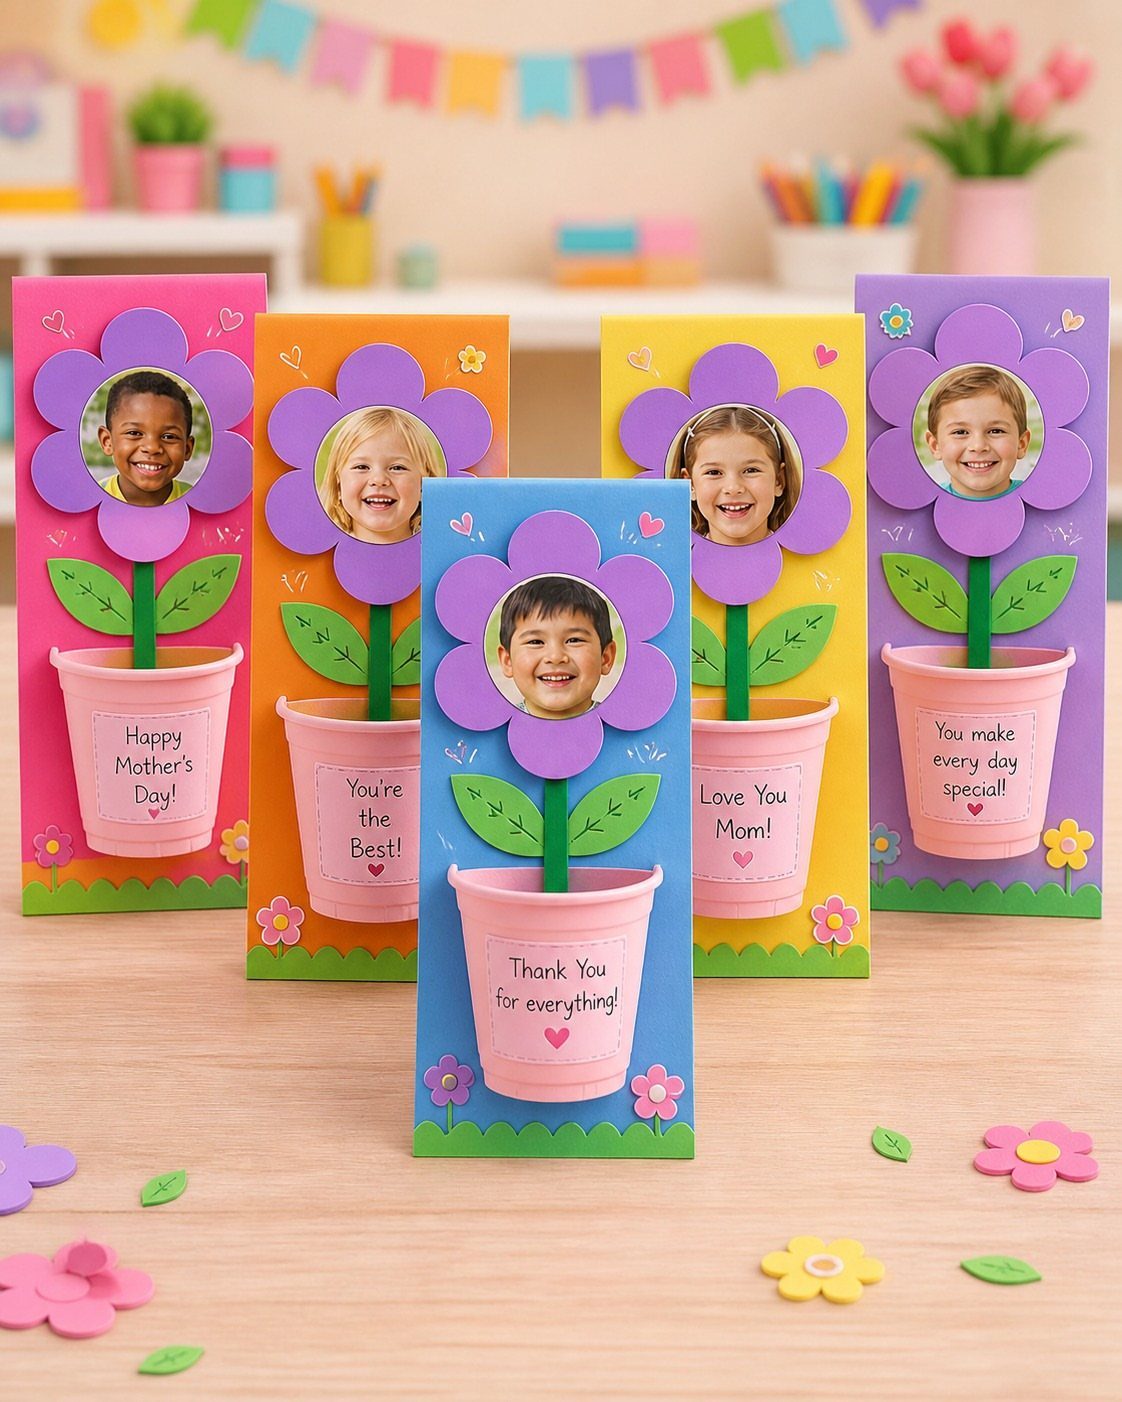
A photo of your child at the center of each paper flower beats any store-bought card for sentiment. Print the pictures small, glue one in the middle, and fan colored petals around it.
Then add a short message in marker, such as "Love You Mom!"
A child can write a short message without help. This is the easiest option here for younger kids, because the petals are just cut shapes.
If mothers were flowers, you’d pick her. Let mom know how special she is with a DIY Mother’s Day flower gift (plus, it’s an easy Mother’s Day craft for kids!).
— Crayola
4. Colorable Cards
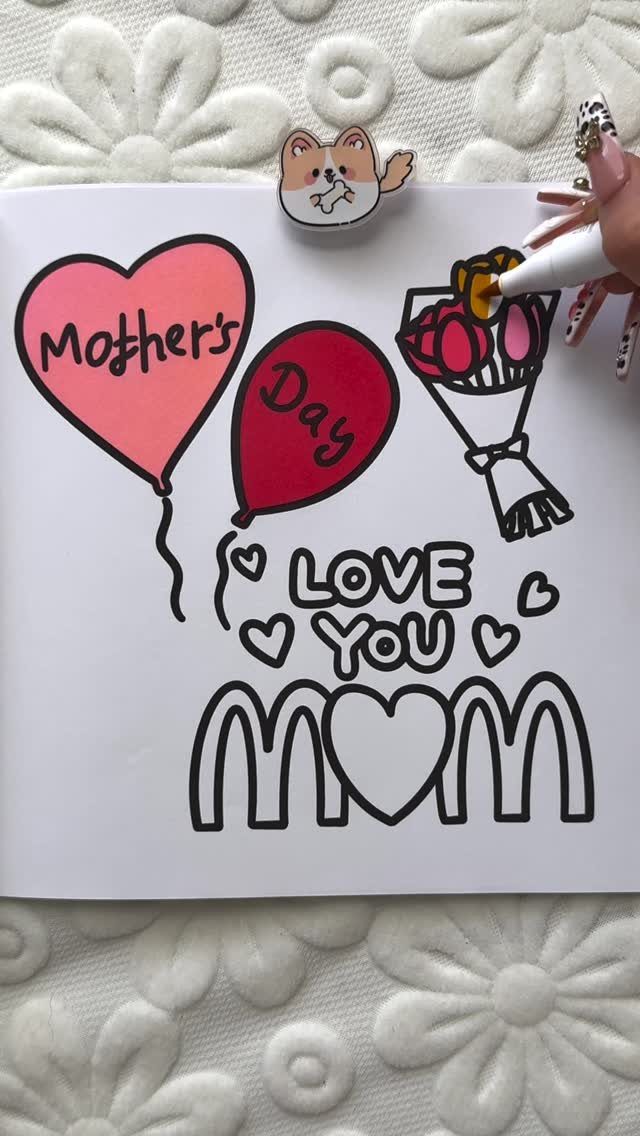
A printable pack with outlined cards lets kids do the coloring while you skip the planning. Print a few pages on regular paper, or on heavier cardstock if you plan to use markers.
The balloons and flower bouquet outlines leave room for a child to pick every color.
Fold when dry, and leave room inside for kids to write "Love You Mom" in their own hand. It’s a good fit for kids who can’t cut yet.
5. 3D Flowers
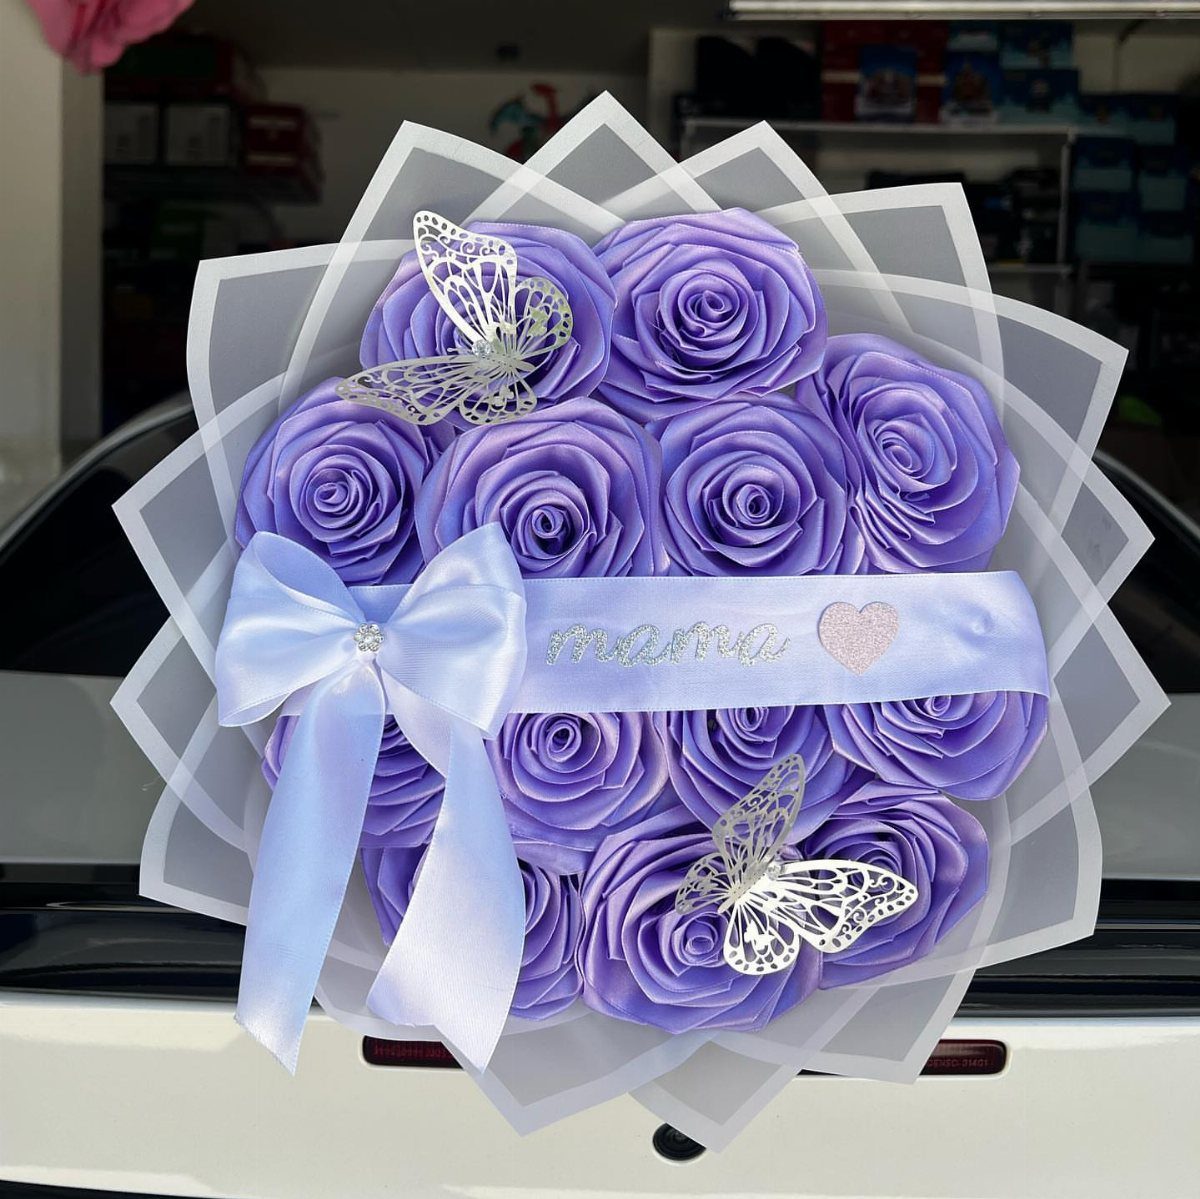
Each petal curls tight, so a small bunch looks lavish once it’s tied together.
Expect this one to take longer than a card, and an older child or an adult will need to help with the rolling. Keep it for a gift that deserves the effort.
6. Crepe Paper Flowers
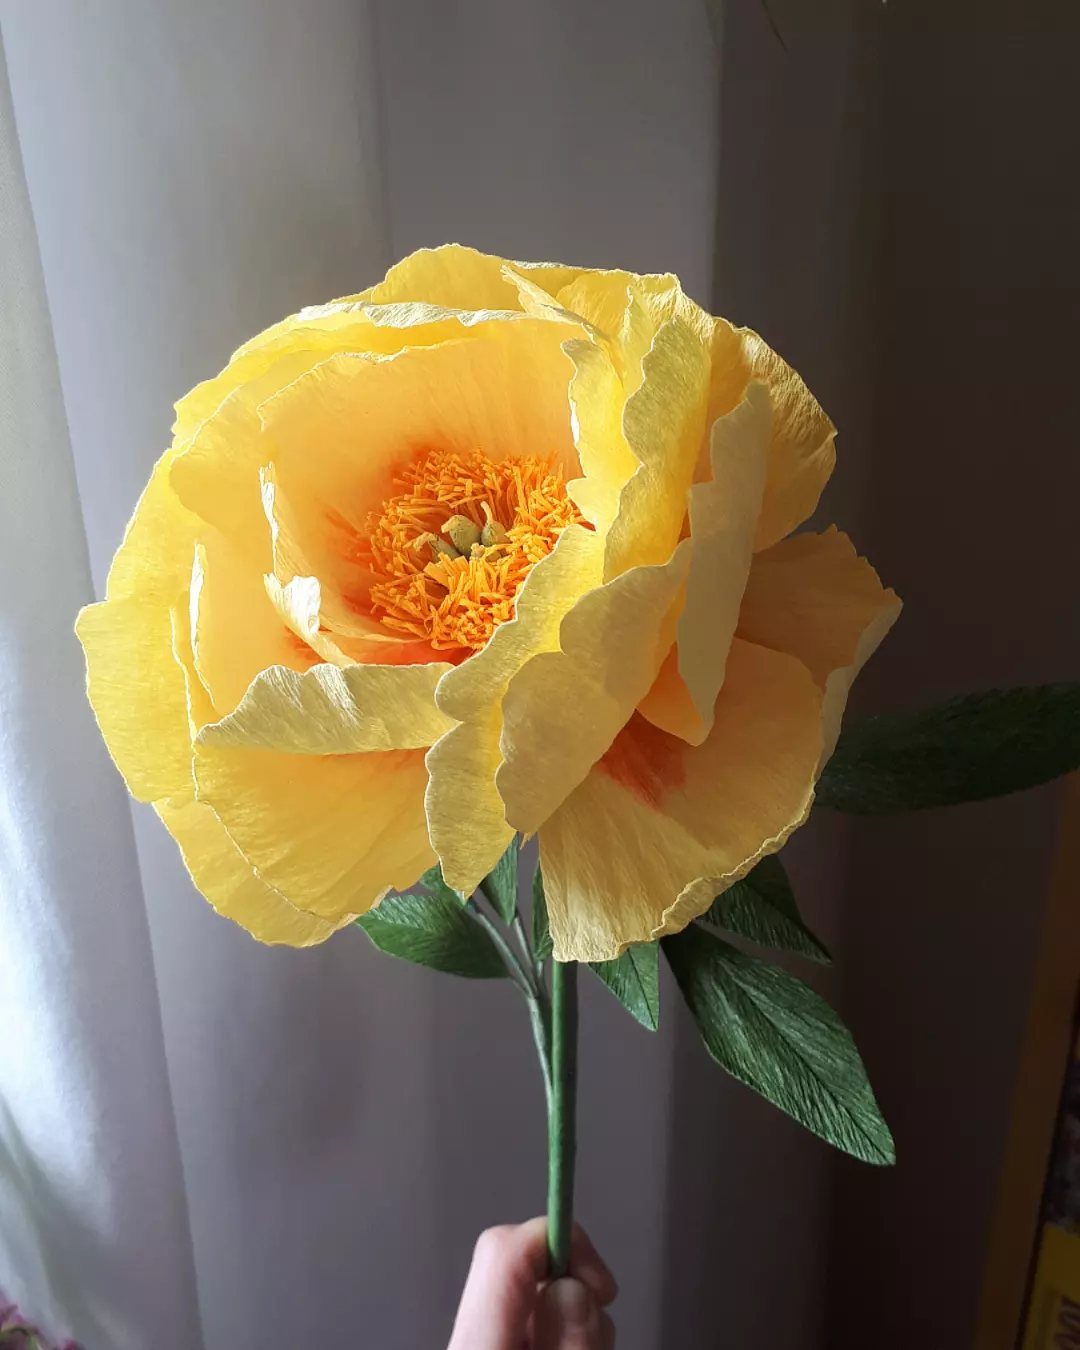
Crepe paper stretches and ruffles, which gives a flower soft, natural petals that flat paper can’t match. Make a large bloom with a contrasting center, then add a stem and leaves.
A single flower can go on a card, or you can glue a small magnet to the back so it lives on the fridge. I’d pick the magnet: it gets seen every day, and it keeps well.
7. Fingerprint Lavender Paper Art
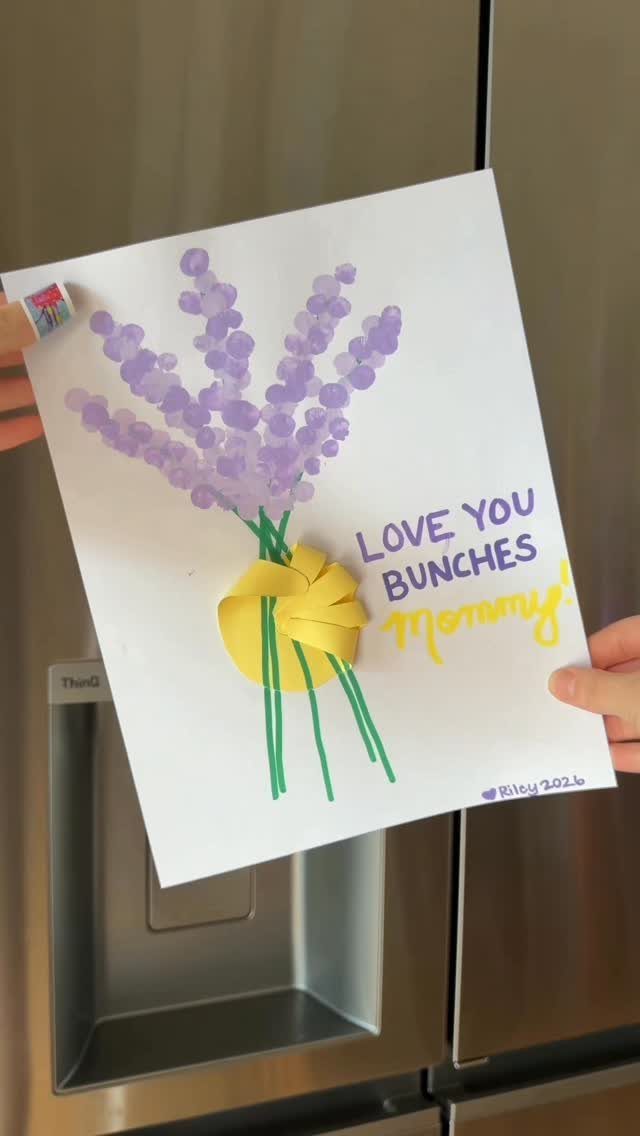
Fingertips dipped in purple paint make ideal lavender buds: press them in a column, thinner toward the top, and a stem drawn below each column finishes the sprig.
A bundle of sprigs tied with a paper bow reads as a bouquet.
White paper gives the purple the most contrast. Let the paint dry fully before gluing on the bow, and leave room at the bottom for a short message and the child’s name.
Wipes within reach make this one far less stressful, especially with younger kids.
8. Paint Resist Card
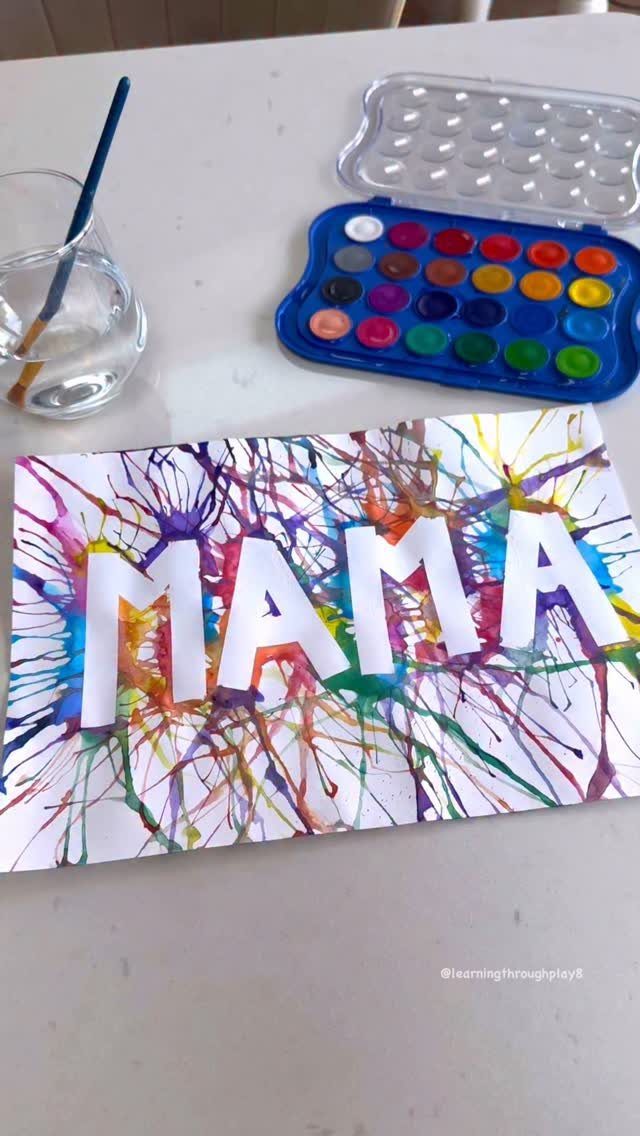
Paint resist works because wax repels watercolor: write "MAMA" in white crayon first, then brush color over the whole page and the letters appear as if by magic.
Press hard with the crayon so the wax lays down thick. A child can’t see the letters while drawing them, so a parent may want to pencil them lightly beforehand as a guide.
Watercolor on regular printer paper tends to buckle, so I’d choose heavier cardstock. Keep a water glass nearby, and give the card time to dry flat before you fold it.
Crafting with Kids
Kids put more care into a gift when they make the decisions themselves, so let them pick the colors and the layout while you handle the cutting that needs a steady adult hand.
Set out the paper, glue and scissors before you call them over, and cover the table. A messy start is easier to accept than a stalled project, so let the glue spill and the scraps fly before you tidy anything.
Expect uneven edges and crooked petals. Those flaws are what make a handmade gift feel like it came from a particular child, so resist the urge to fix them.
Toddlers can tear paper, press stickers and smear glue, while older kids can cut and fold. Give each age a job that fits, and the finished piece still counts as theirs.
Using Recycled Materials
Toilet paper rolls make a good flower base because the cardboard already has a round shape and holds paint well. Flatten, snip and fan the tube into petals, then paint it.
For a stem, push a wooden skewer through the back. Stand the flowers in a jar or glass filled with sand, which holds the skewers upright so the bunch can sit on a table.
Gather the rest of your supplies from the recycling bin before you start: paper, paint, scissors and glue. Rinse and dry anything that held food, and sand down any skewer tips so little hands stay safe.
Personalization Ideas
Choose the colors around the person receiving the gift. If your mom, aunt or grandmother has a favorite shade, make the flowers in it and let that color carry the whole piece.
A hand-tally bouquet is a personal touch that works well for the youngest kids.
For the stems, press a child’s hand onto green paper, cut around it, and glue the blossoms across the fingertips. White cardstock for the base and colored cardstock for the blooms keeps it simple.
Keep any written message short and in the child’s own words. A line about what they love about her will mean more than a polished phrase.
Frequently Asked Questions
What materials do I need for Mother’s Day paper crafts?
Paper, glue, scissors and paint cover most of them, and cardstock is the better base when you plan to use markers or watercolor.
For paper flowers, I rely on crepe paper for the petals, a cardboard tube from a spent toilet paper roll for a sturdy base or vase, and wooden skewers for stems that stand up straight.
Anything from the recycling bin works, as long as you rinse and dry food containers first.
How can kids personalize their Mother’s Day crafts?
Her favorite color should drive the palette, and a handwritten note in the child’s own phrasing beats anything printed. A small photo of the child glued into the center of a paper flower is another strong option.