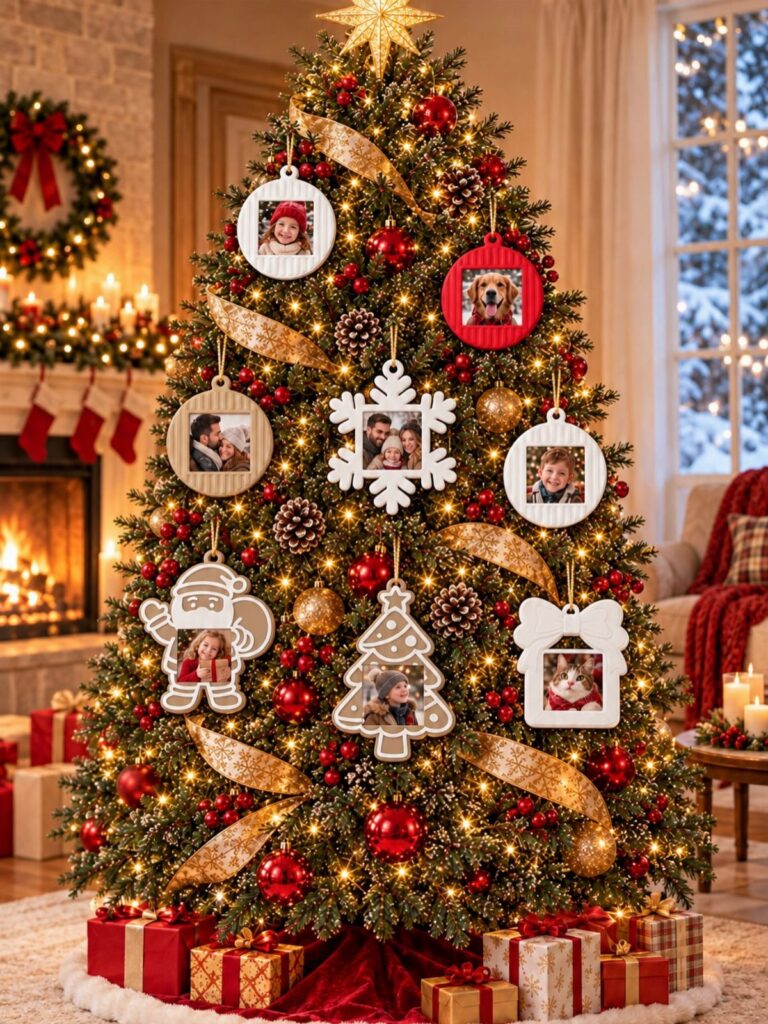
The ornaments here run from flour, salt and water at almost no cost to seed beads that take an evening for a few, and the child’s age usually decides which one fits the table.
Young kids do best with popsicle sticks, salt dough or a clay handprint, while beads, crochet and glitter suit older kids and adults.
1. Paper Ornaments
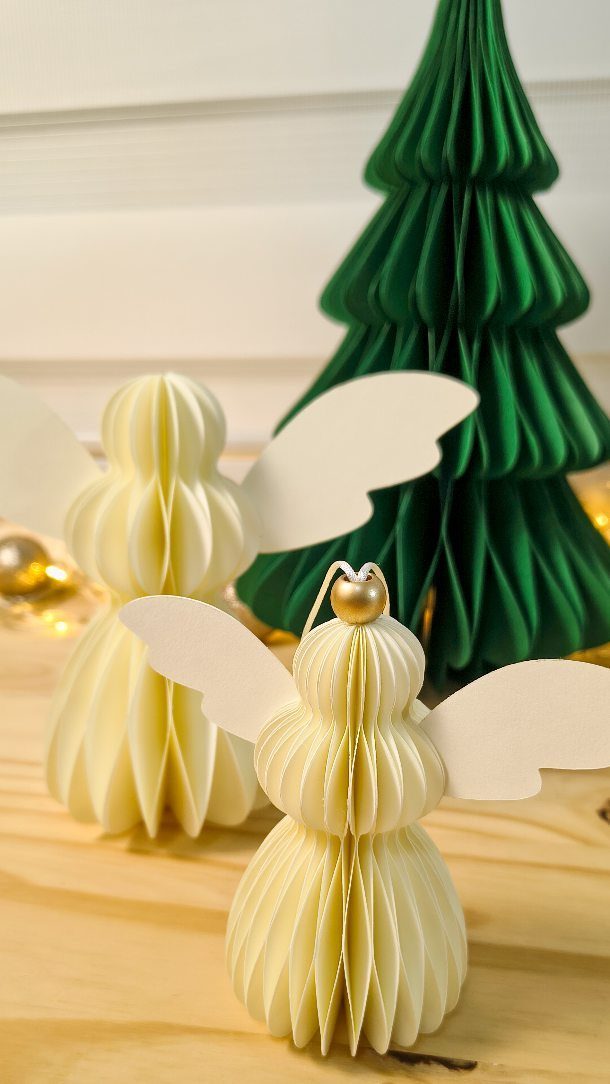
Pleated paper holds a shape that flat cutouts can’t, which is why an angel or a tree folded from one strip reads as a finished ornament rather than a school project.
Cardstock keeps the pleats crisp; thin printer paper sags on a tree branch.
White angels beside a green tree make a good pair, and a single sheet of each color is enough to start. Fold evenly, fan the folds open, and pinch the base.
A loop of thread at the top is all the hanger it needs.
2. Salt Dough Ornaments
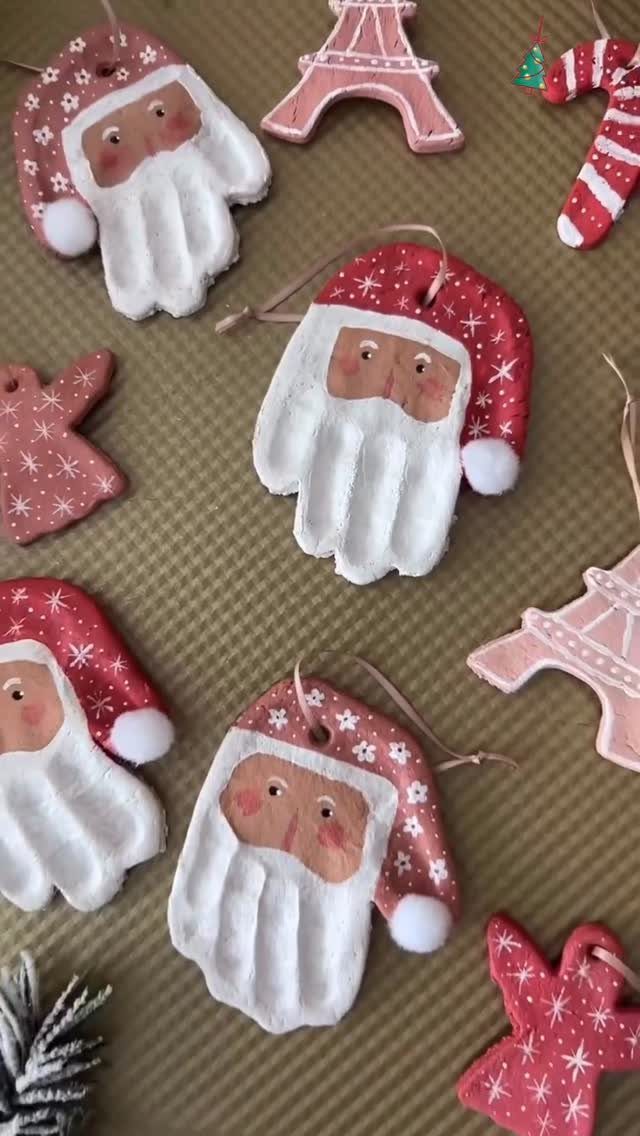
Flour, salt and water make the dough, and a rolling pin and cookie cutters do the shaping. That keeps the cost close to nothing, which suits a crowd of kids or a budget party table.
Cutters give clean candy canes and Santas, but hand-sculpted shapes, like the tiny Eiffel Tower, are where the fun is. Poke the hanging hole before baking, since a hole punched afterward cracks the dough.
Paint once the pieces are fully cool. I would pick salt dough over store-bought ornaments for gift tags too.
3. Popsicle Stick Ornaments
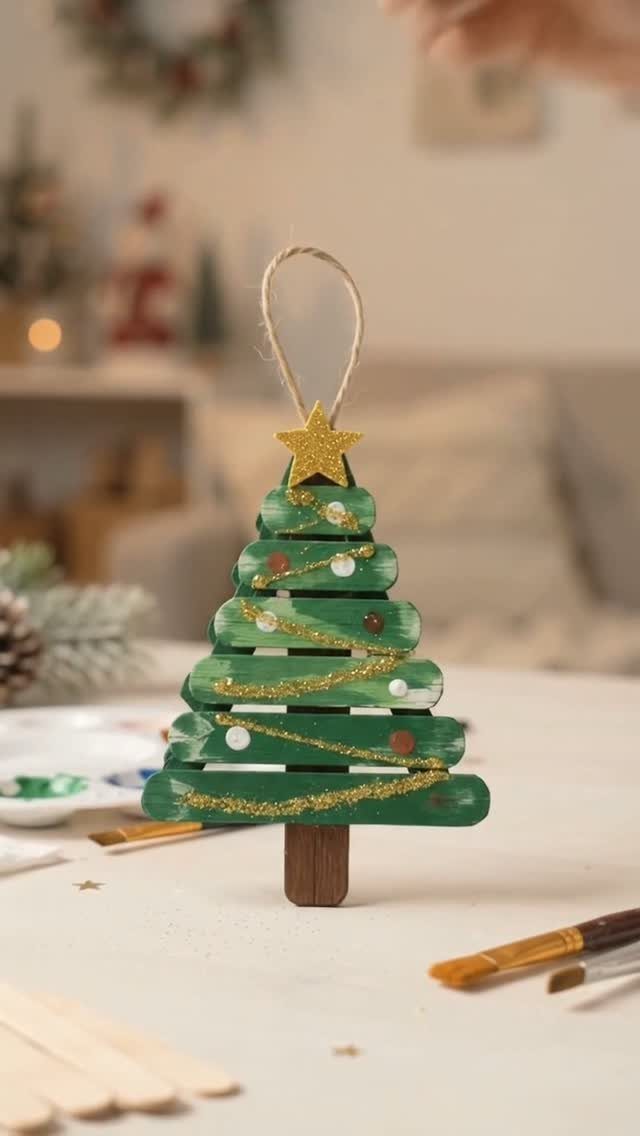
Popsicle sticks glued into a triangle make a tree, and that single shape is the best first project here. A craft store pack costs a few dollars and covers a whole table of guests.
Paint the sticks green before gluing, or the bare wood shows through at the joints. Gold glitter and a star on top give it a finished look.
The maker calls it good for kids’ crafts and handmade gifts, and I agree. Tacky glue holds better than a glue stick, though it needs a few minutes to set.
4. Beaded Ornaments
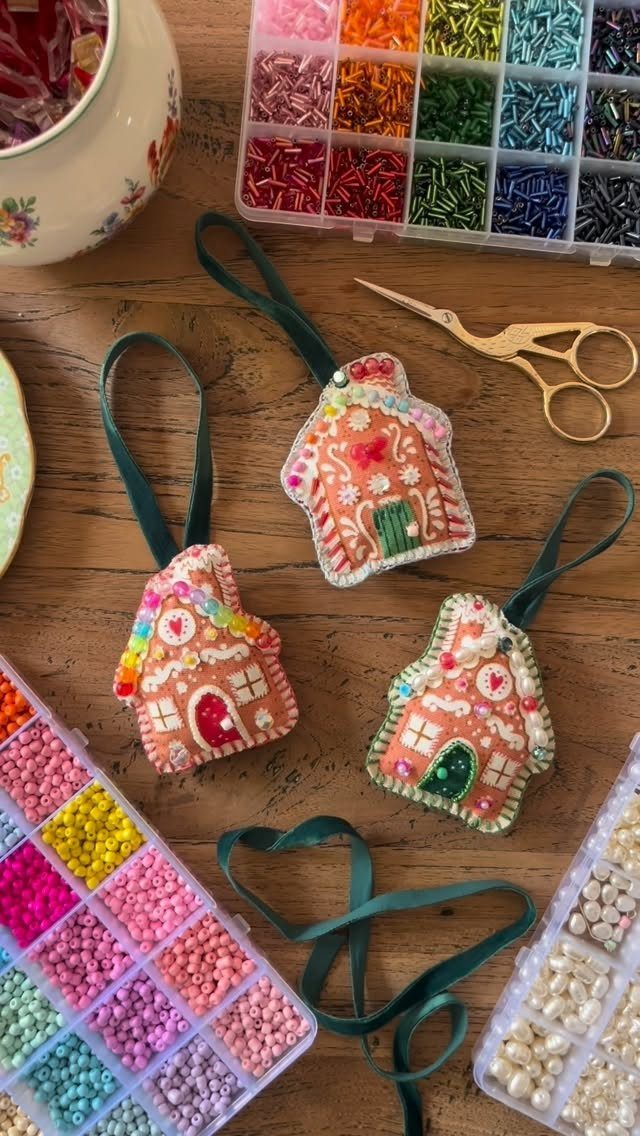
Seed beads reward patience, and a small house shape is a fair test of it. Each ornament is built bead by bead on wire or thread, so plan on an evening for a few, not an hour for a dozen.
Sort the colors into small containers first, because spilled beads are the main way this goes wrong. A ribbon loop at the top finishes each one.
I would skip this for young kids. Teens and adults will enjoy it, and these make lovely gifts.
5. Natural Material Ornaments
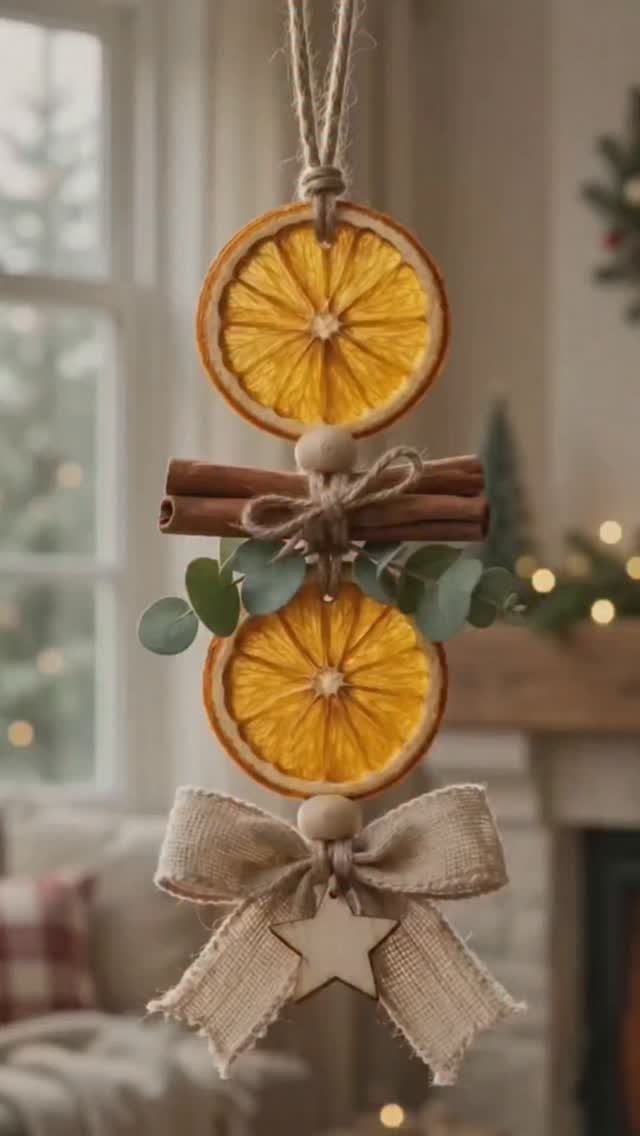
Dried orange slices and cinnamon sticks bring scent along with color, and that sets this ornament apart from everything plastic on the tree.
Slice the oranges thin and dry them fully before using, or they will mold. Pinecones work the same way, tied on with a loop.
Natural pieces look best on a tree with warm white lights. Most of the materials come from a grocery store or the yard.
6. Plush Fabric Ornaments
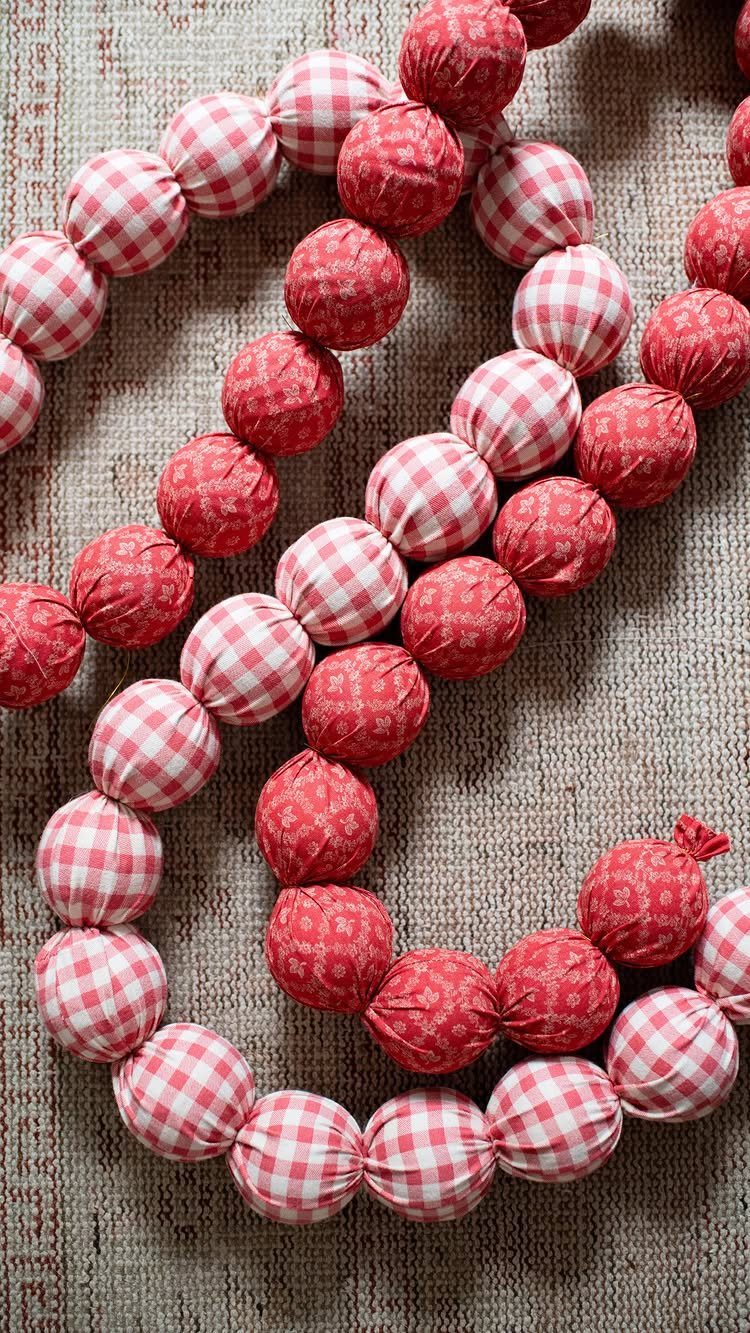
Fabric scraps are the whole budget here, which makes this the best use of that bag of leftover quilting cotton. Red gingham and a matching print look classic strung together as a garland, or hung one at a time.
Cut 2 circles per ball, sew around the edge, leave a gap, stuff with fiberfill, and stitch it shut. A running stitch by hand works fine if you don’t own a machine.
Keep the prints small. Large patterns get lost on a small sphere.
7. Photo Ornaments
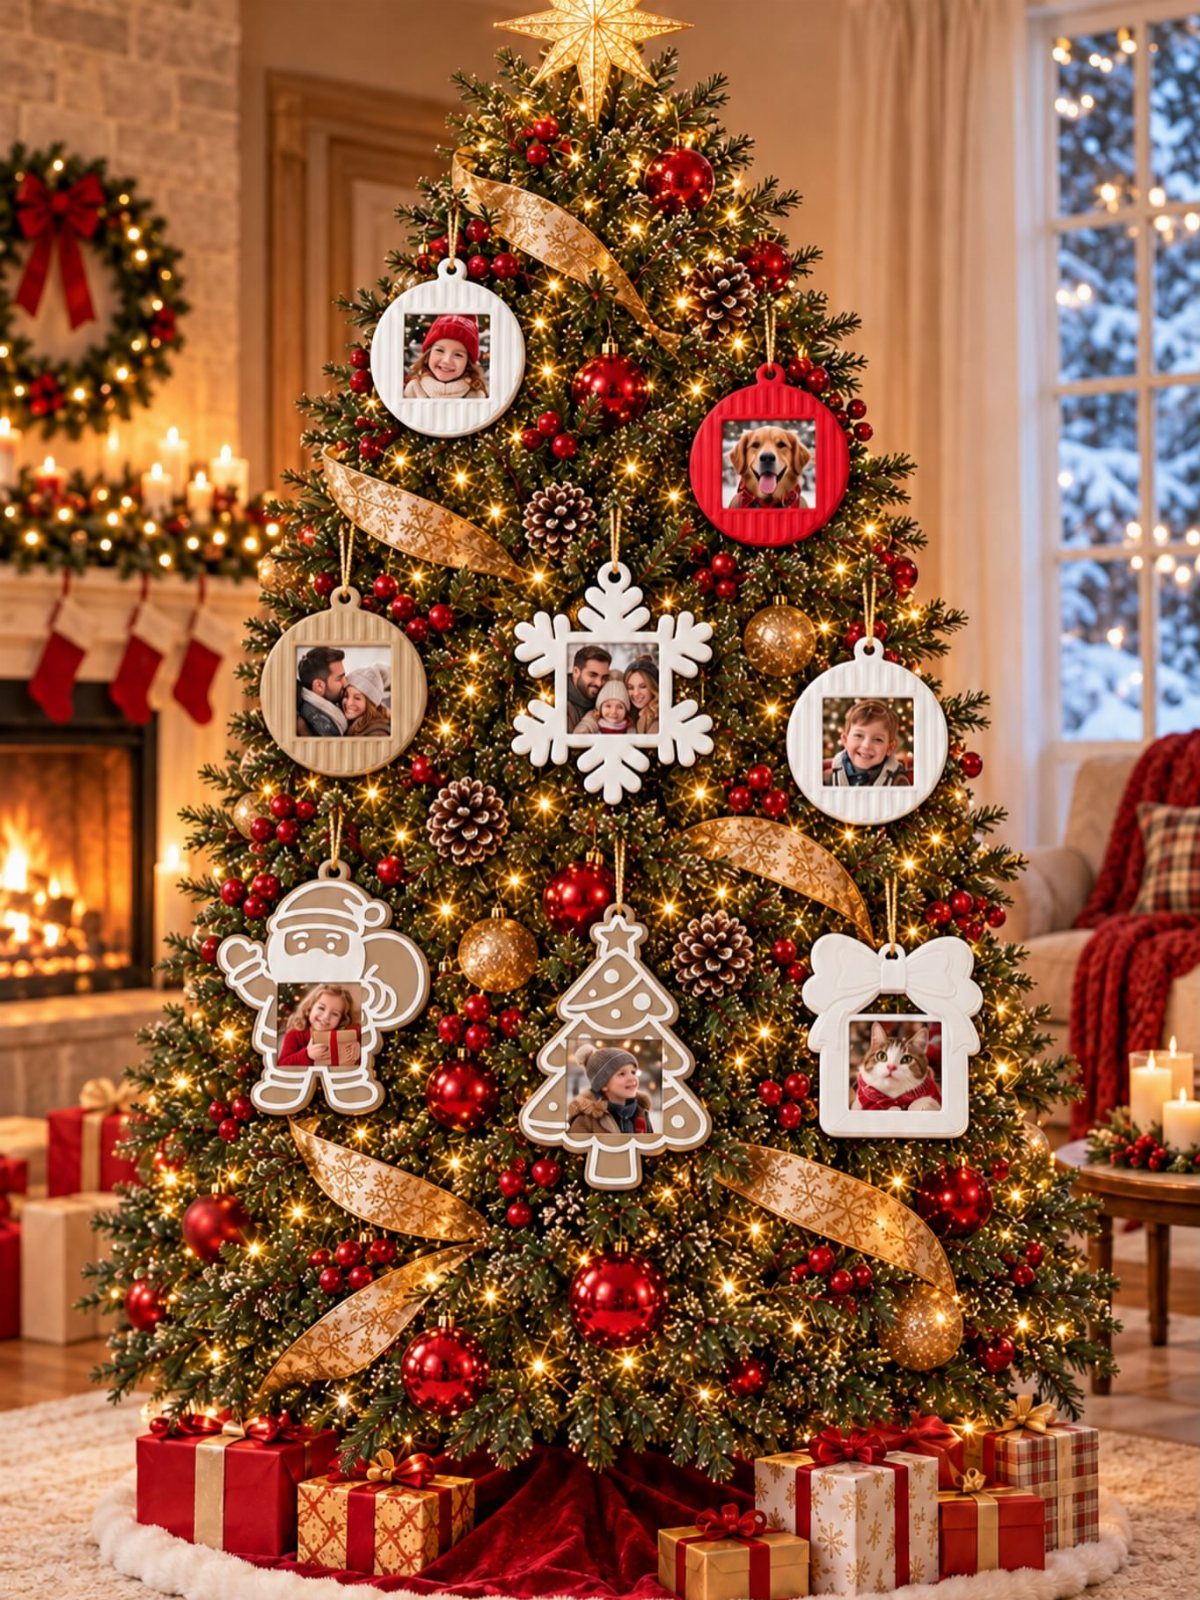
Printed faces turn a tree into a family record, and a dog gets the same spot as the grandparents. Crop tight to the face before printing so each ornament shows one person clearly.
Pick frames or flat cutouts in one material, or the mix looks cluttered.
I like these as gifts for relatives who already own plenty of ornaments.
8. Glitter Ornaments
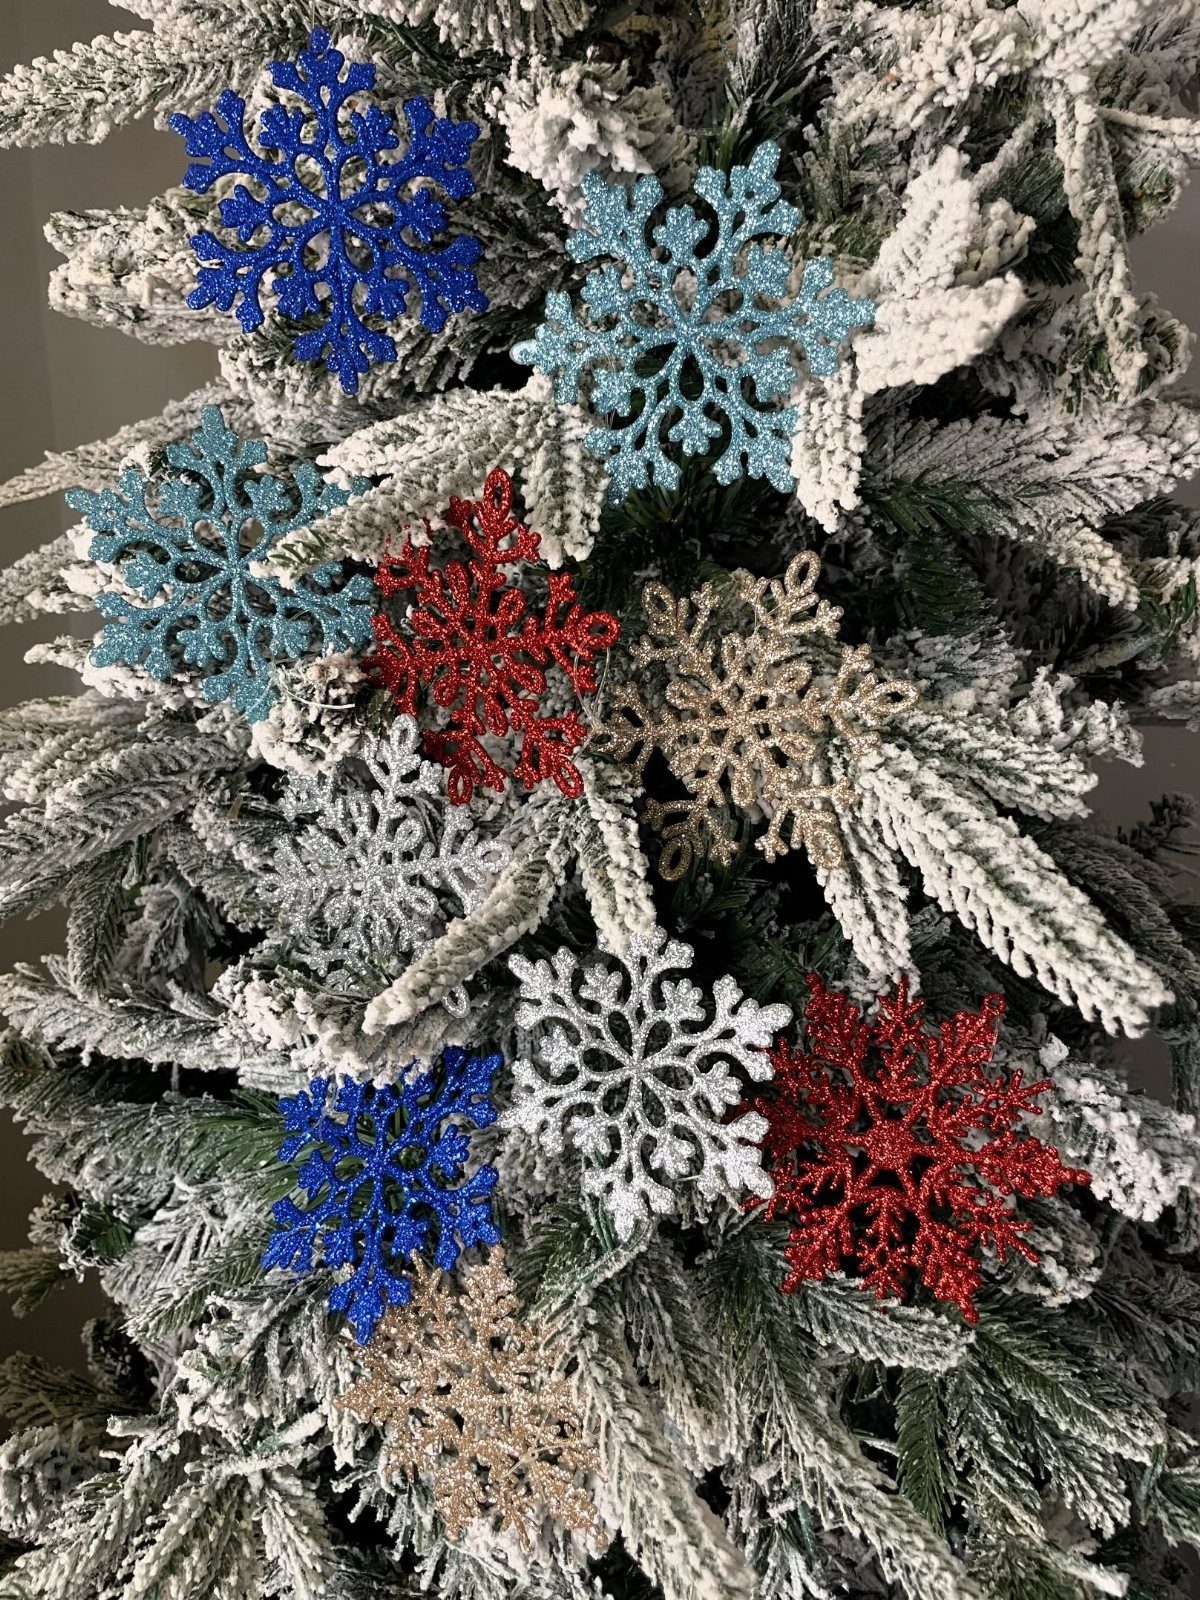
Glitter snowflakes in several colors stand out on a flocked tree because the white background holds contrast. Matching the shape across different colors keeps the set coherent.
Brush on glue, shake the glitter over a paper-lined tray, and let it dry fully before hanging. Fine glitter gives a smoother shine than chunky flakes.
Expect glitter on the table for days. Cover the surface first, and keep this one for older kids.
9. Crochet Yarn Ornaments
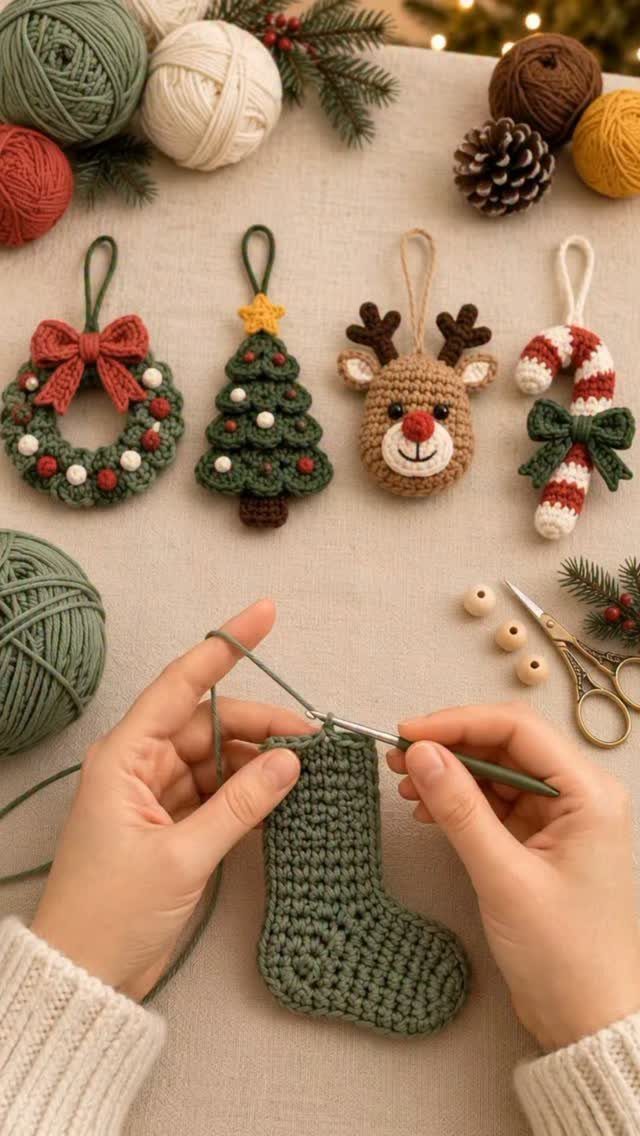
A crocheted stocking takes little yarn, and a wreath, tree, reindeer or candy cane is just as small. That makes this a good way to use leftover balls from other projects.
Choose red, green and white yarn, and stuff the flat shapes lightly for volume. Leave a tail to tie a hanging loop.
I would suggest this only if you already know basic stitches. Beginners should try a flat wreath or tree before the reindeer, which has more parts to join.
10. Clay Handprint and Footprint Ornaments
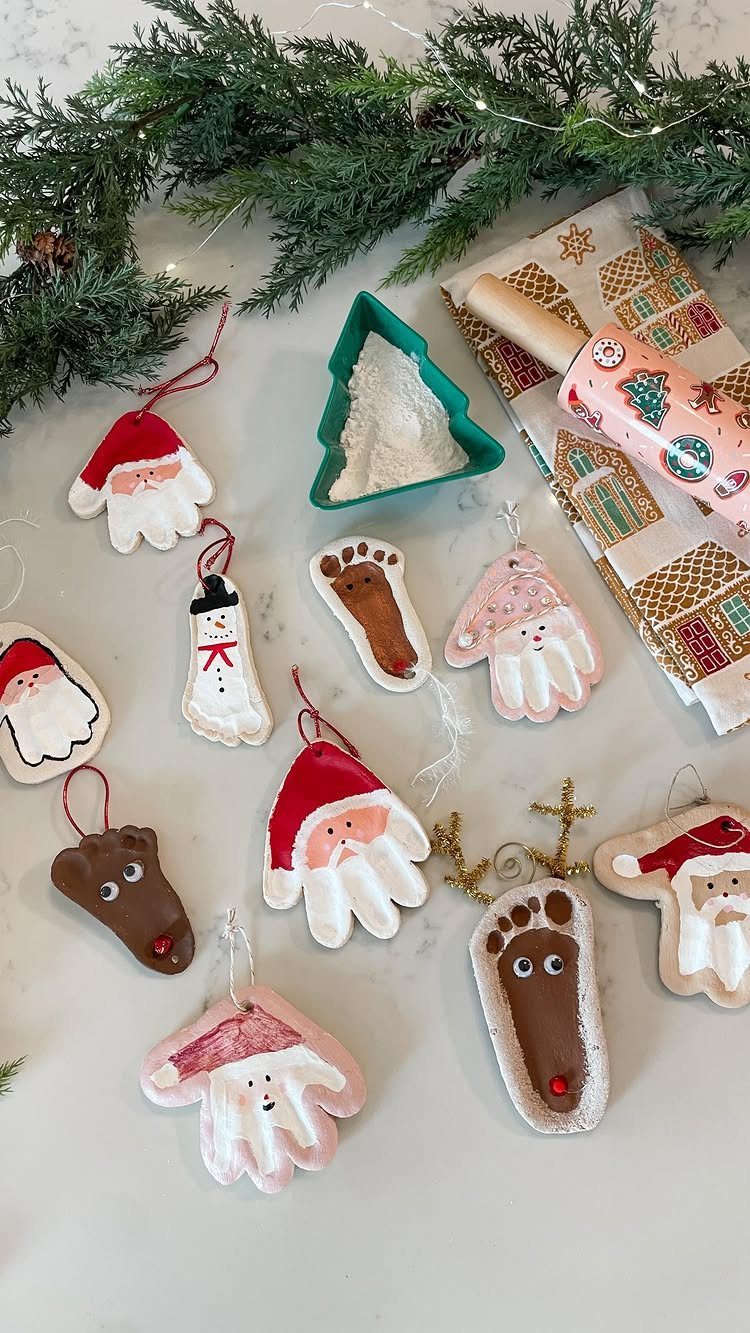
Press a small hand or foot into rolled white clay, and the print becomes the body of a Santa, reindeer or snowman. A rolling pin gives an even slab, so the impressions come out at the same depth.
Cut around each print, poke the hanging hole, and let the clay dry before painting. Paint the faces and hats last, with a thin brush.
Kids’ prints change every year, which is why these are worth dating on the back. Grandparents tend to keep these.
Materials for Crafts
A yarn tree shows how little a craft needs: green yarn, a stick for the trunk, felt or buttons for baubles, and glue.
Sticks from the yard work as well as craft sticks or coffee stirrers, so check the recycling bin before buying.
PVA glue suits the baubles. A hot glue gun is the faster alternative, but it runs hot, so keep it with the adults and let kids place the pieces.
Cutting the sticks to length is an adult job. Do it before the table is set up, so nobody waits on a saw while the yarn gets tangled.
Buttons give a harder, shinier bauble than felt. Felt is softer and easier for small hands to glue down.
Gather everything into one box per person while you’re setting up. A craft goes faster when nobody is hunting for scissors.
Crafting with Kids
Pick projects that look good without much skill. Kids stay interested when the result looks like something they would proudly hang up, and cheap supplies keep the pressure off if a piece goes wrong.
For kids who say they don’t like crafts, try an ornament with a science twist. It gives them something to watch and talk about, not just something to glue.
Make the ornaments alongside them instead of supervising from across the room. Doing your own at the same table is the easiest way to turn an afternoon into a family habit.
Set out a small tray of materials for each child so choices stay manageable. Fewer options mean fewer arguments and quicker finishing.
Personalization Ideas
A name and a date turn any ornament into a keepsake. A baby’s first Christmas and a newlywed couple’s first tree are the 2 occasions where this matters most.
Painted initials are the simplest route, since one letter fits on almost any shape. Photo bulb ornaments are another option, and so is a handprint in clay.
A cork coaster with a striped bow makes a quick photo ornament. Glue the photo to the coaster, tie the bow, and add a loop at the top.
Write the year somewhere small and out of sight. The same ornament doubles as a gift tag, so one batch can cover both jobs.
Frequently Asked Questions
How do I create my own Christmas ornament?
Start with a simple material like cardstock, felt, clay or salt dough. Salt dough is just flour, salt and water, rolled out and cut with cookie cutters, and it costs close to nothing.
Make the hanging hole before baking; punching it afterward splits the cooled dough, and paint only when the pieces have cooled completely.
What are some cheap and easy DIY Christmas decorations I can make?
Popsicle stick trees are the best first project: glue sticks into a triangle, and a craft store pack costs a few dollars and covers a whole table of guests.
Salt dough, fabric scraps and natural pieces like dried orange slices, cinnamon sticks and pinecones are also very cheap. Paint the sticks green before assembly so bare wood stays hidden where pieces meet.
What are the best Christmas ornament crafts for kids?
Popsicle stick trees and clay handprints suit kids best, since both look good without much skill.
Inexpensive materials mean no one worries when a piece needs a second attempt. Give each child a small tray of materials so choices stay manageable, and save glitter for older kids because it spreads across the table for days.